|
| |
TM 9-2320-360-20-1
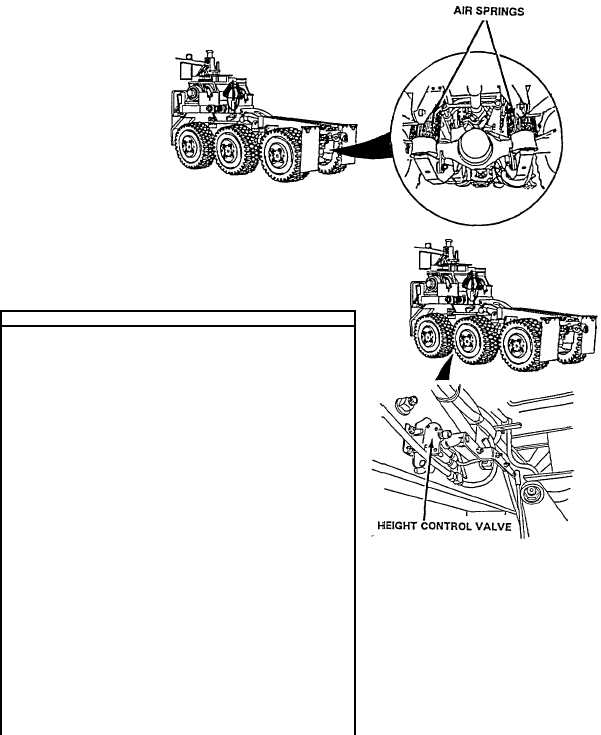
Check air springs for leaks, and for missing
mounting hardware. Inspect no. 2041, 2042,
2043, 2044, 2045, 2046, 2047, 2048, 2049, and
2050 air lines going to and from air spring
assemblies for loose connections and damage.
Refer to para 15-4 to adjust ride height
RIDE HEIGHT CONTROL VALVE TEST
(1)
Start engine (TM 9-2320-360-10) and allow air
pressure to build up in air reservoirs. Shut off engine
(TM 9-2320-360-10) when air pressure has built up
to at least 65 psi (450 kPa)
(2)
Remove screw, washer, and locknut from valve, lever
arm Discard locknut
NOTE
Moving height control valve more
than 1 inch in either direction will
shut off air supply
(3)
Pull up on height control valve Air should flow into air
springs.
(4)
Push down on height control valve Air should exhaust
from air springs.
(5)
Return height control valve to neutral position. Air
should not flow into or out of air springs.
(6)
Replace height control valve (para 15-5) if it does not
operate properly. Install valve lever arm to height control
valve with screw, washer, and new locknut if height
control valve operates properly.
2-937
|