 |
|||
|
|
|||
|
Page Title:
Test Step 6. Check the Wire Harness for the Coolant Level Low |
|
||
| ||||||||||
|
|
 192
TM 9-2320-312-24-2
Troubleshooting Section
E. Measure the voltage at the breakout T from
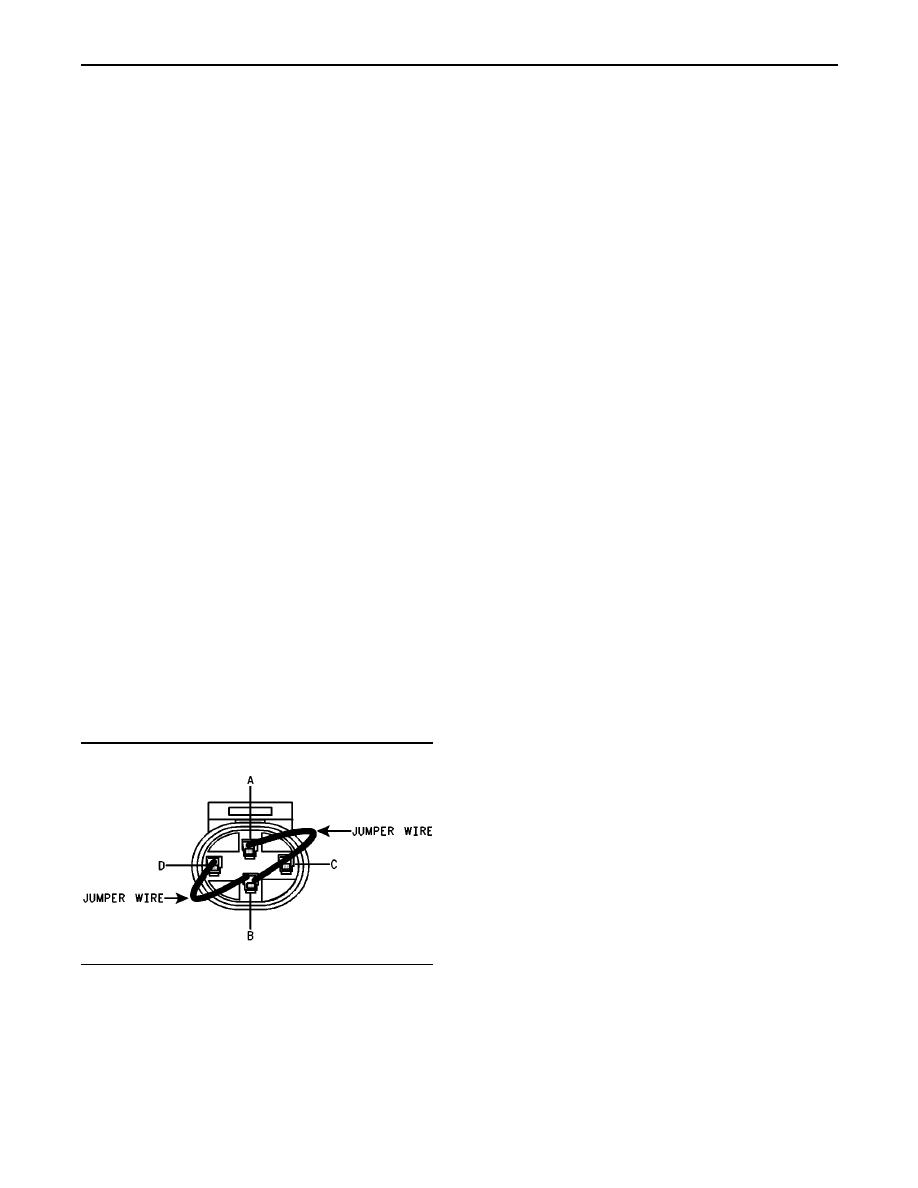
B. Use a jumper wire in order to connect terminal A
terminal 2 to terminal 5.
(coolant level low) and terminal D (coolant level
normal) to terminal B (sensor common) at the
Refer to Illustration 59.
harness connector.
Refer to Illustration 55.
Expected Result:
The measured voltage is between 4.5 VDC and 5.5
C. Turn the ignition key switch to the ON position.
VDC.
D. While the jumper wires are in place, access the
active diagnostic code screen on Cat ET.
Results:
Yes The problem is located in the harness
E. Verify that 111-02 Coolant Level Sensor Fault
(12) is active.
wiring.
Note: Wait for 30 seconds for the activation of the
Repair: Repair the wiring or replace the wiring,
diagnostic code.
as required.
Verify that the repair eliminates the problem.
Expected Result:
111-02 Coolant Level Sensor Fault (12) is active
STOP.
while the jumper wires are in place.
No The problem is on the ECM side.
Results:
Repair: Temporarily connect a test ECM. Ensure
Yes The harness and the ECM are working
that the "Engine Monitoring" and the "Coolant
Level Sensor" are programmed to match the
correctly.
old ECM. Check the test ECM by measuring
the voltage at the breakout T from terminal 2 to
Repair: Remove the jumpers. Replace the sensor
terminal 5 again. If the problem is resolved with
and ensure that 111-02 Coolant Level Sensor
the test ECM, reconnect the suspect ECM. If the
Fault (12) disappears with the new sensor.
problem returns with the suspect ECM, replace
the ECM.
Verify that the repair eliminates the problem. Clear
all diagnostic codes.
STOP.
STOP.
Test Step 6. Check the Wire Harness for
the Coolant Level Low
No Proceed to Test Step 7.
g00651008
Illustration 55
Jumper wire
A. Turn the ignition key switch to the OFF position.
|
|
Privacy Statement - Press Release - Copyright Information. - Contact Us |