 |
|||
|
|
|||
|
Page Title:
Test Step 2. Inspect Electrical Connectors and Wiring |
|
||
| ||||||||||
|
|
 183
TM 9-2320-312-24-2
Troubleshooting Section
Test Step 2. Inspect Electrical Connectors
"Low Cruise Control Speed Set Limit"
and Wiring.
"High Cruise Control Speed Set Limit"
Idle Parameters
"Fast Idle RPM #1"
"Fast Idle RPM #2"
"Idle Vehicle Speed Limit"
"Idle RPM Limit"
"Top Engine Limit" (TEL)
PTO Parameters
"PTO Configuration"
"PTO Kickout Vehicle Speed Limit"
D. Ensure that the vehicle is not experiencing
a problem due to one of these parameters.
Refer to Troubleshooting, "Customer Specified
Parameters" for a description of the parameters,
if necessary.
E. Check the status screen that indicates the last
cause of a kickout for one of the following modes:
Cruise Kickout
Idle Kickout
Fast Idle Kickout
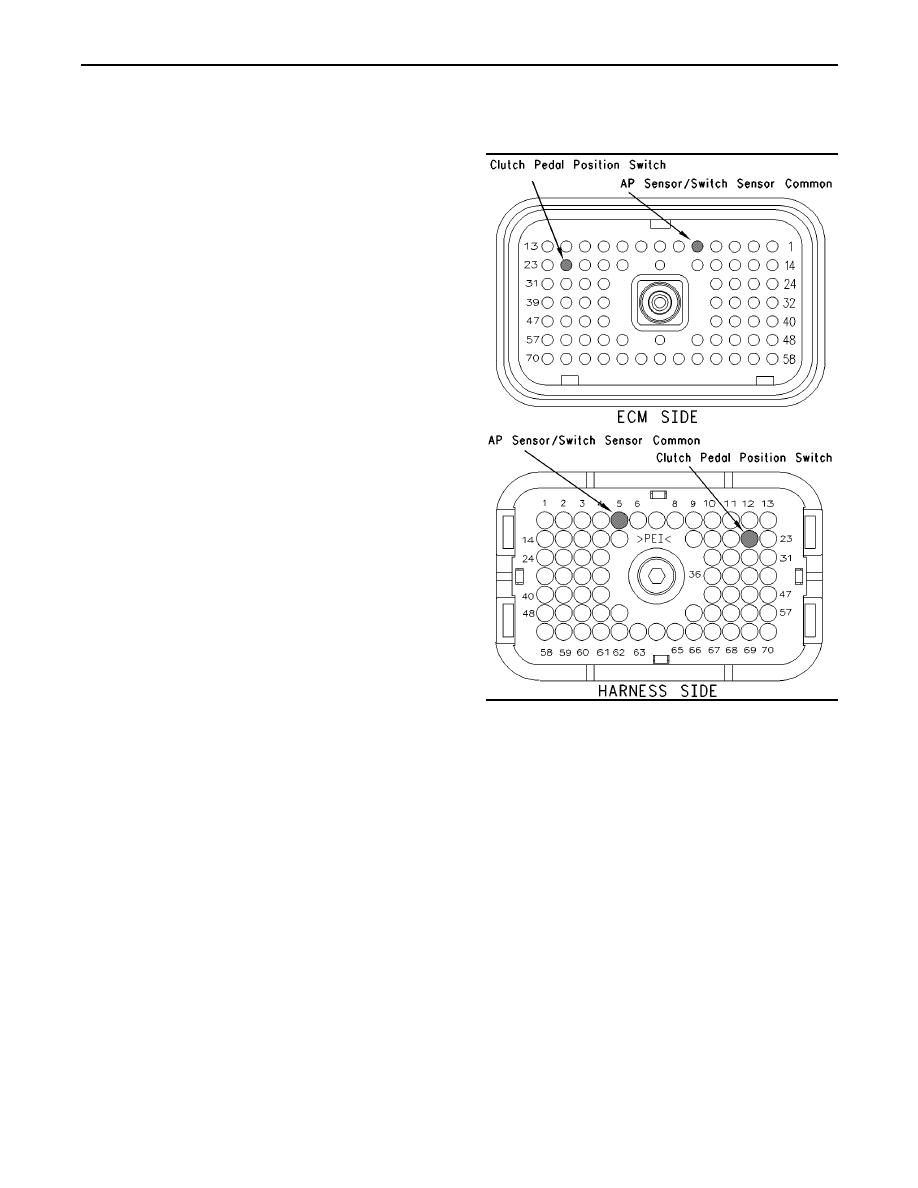
g00773080
Illustration 50
PTO Kickout
A. Thoroughly inspect ECM vehicle harness
Refer to Tables 145, 146, 147, and 148 for the
connector J1/P1, the firewall bulkhead connector
meaning of the status screen.
and the terminals for the following switches in
the connectors:
Expected Result:
clutch pedal position switch (terminal 22)
The problem is due to a parameter setting or the
problem is due to a normal kickout.
AP sensor/switch sensor common (terminal 5)
Results:
Refer to Troubleshooting, " Electrical Connectors
- Inspect" for details.
Yes Explain the proper operation of system to
the driver. STOP.
B. Perform a 45 N (10 lb) pull test on each of the
wires in the ECM connector that are associated
No
with the switches.
Repair: Refer to Tables 145, 146, 147, and 148 for
Refer to Illustration 50.
recommended troubleshooting.
C. Check the ECM connector (allen head screw) for
If a problem is still suspected with the clutch
the proper torque of 6.0 Nm (55 lb in).
switch circuit perform the following procedure:
D. Check the harness and wiring for abrasion and
Proceed to Test Step 2.
pinch points from the sensor to the ECM.
|
|
Privacy Statement - Press Release - Copyright Information. - Contact Us |
