 |
|||
|
|
|||
|
|
|||
| ||||||||||
|
|
 TM 9-2320-312-24-1
FLOODLIGHT AND CAB BACKUP LIGHT MAINTENANCE - CONTINUED
0108 00
LAMP REPLACEMENT - CONTINUED
7.
Place battery disconnect switch in ON position.
FLOODLIGHT REMOVAL
1.
Remove lamp (Refer to Lamp Replacement).
NOTE
Remove and discard tiedown strap.
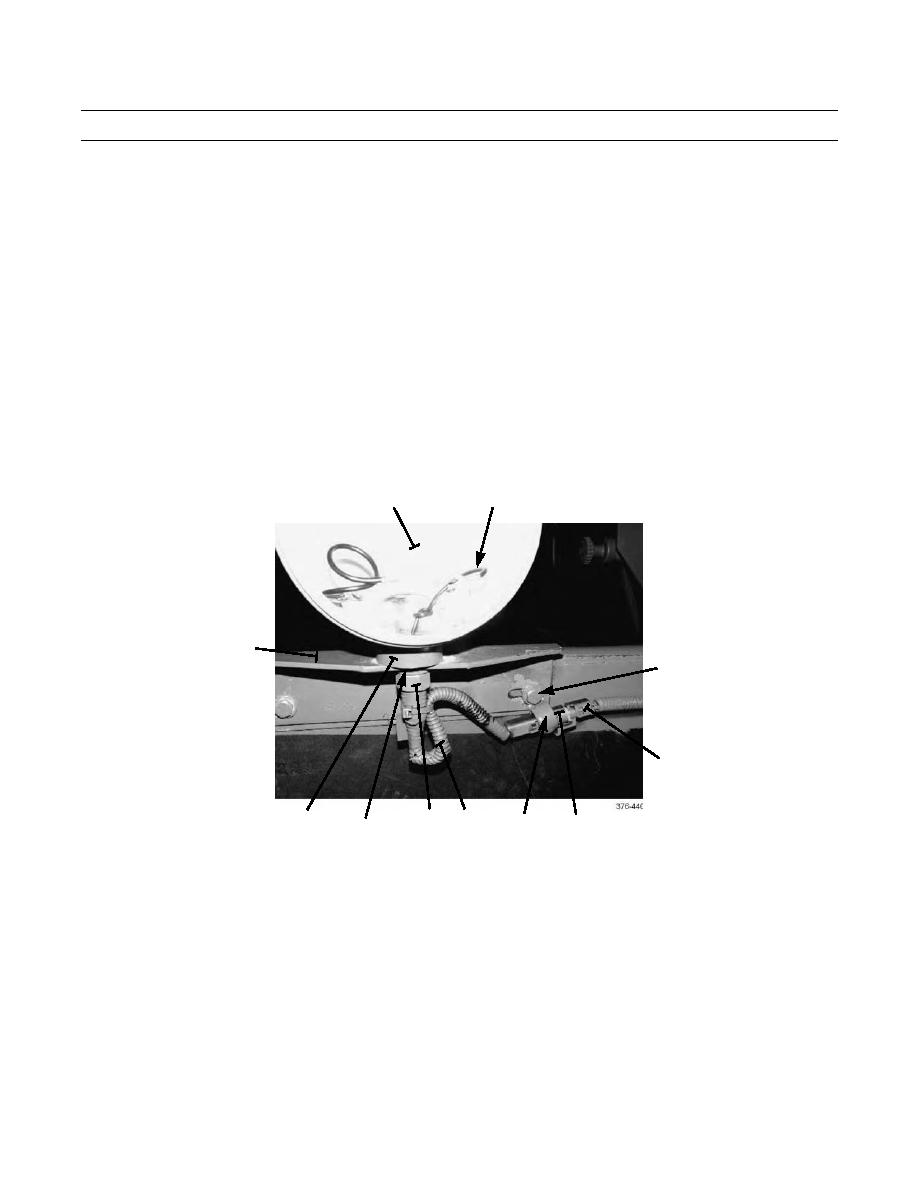
2.
Remove nut (9), washer (10, and screw (11) to release wire (8) and clamp (14) from bracket (19) and mudflap sup-
port bracket.
3.
Remove tape and loom (15) from wire (8) of floodlight housing (1).
4.
Disconnect connector (13) of wire (8) from chassis wiring harness (12).
5.
Untie knot in wire (8) and pull wire out from floodlight housing (1).
6.
Remove nut (16), washer (17), floodlight housing (1), and support ring (18) from bracket (19).
1
8
19
9,10,11
12
16
18
15
14
13
17
FLOODLIGHT INSTALLATION
1.
Install support ring (18) and floodlight housing (1) to bracket (19) with washer (17) and nut (16).
2.
Push wire (8) into floodlight housing (1) and tie knot in wire.
3.
Connect connector (13) of wire (8) to chassis wiring harness (12).
4.
Install loom (15) to wire (8) with electrical tape.
5.
Secure wire (8) with loom (15) to bracket (19) and muffler support bracket with clamp (14), screw (11), washer
(10), and nut (9).
6.
Install lamp (Refer to Lamp Replacement).
END OF WORK PACKAGE
0108 00-3/4 Blank
|
|
Privacy Statement - Press Release - Copyright Information. - Contact Us |
