 |
|||
|
|
|||
|
Page Title:
ENGINE AIR CLEANER REMOVAL - CONTINUED |
|
||
| ||||||||||
|
|
 TM 9-2320-312-24-1
ENGINE AIR CLEANER AND AIR INTAKE TUBES AND HOSES REPLACEMENT - CONTINUED
0015 00
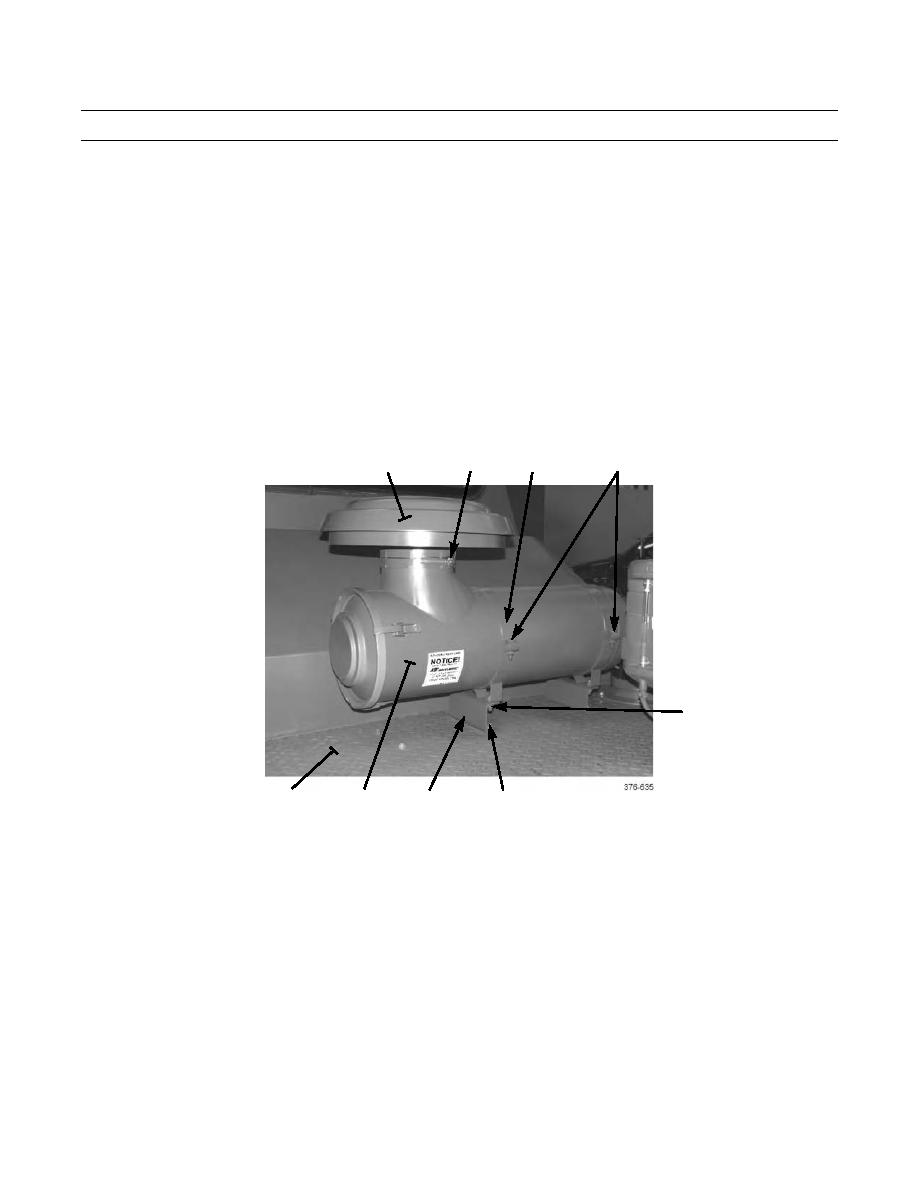
ENGINE AIR CLEANER REMOVAL - CONTINUED
2.
Remove two nuts (10), screws (11), and air cleaner from two clamps (9).
NOTE
Perform steps 3 through 5 only as required to replace damaged components.
3.
Loosen clamp (8) and remove hood (7) from air cleaner housing (3).
4.
Remove two nuts (12), screws (13), and each clamp (9) from bracket (16).
NOTE
Cab must be tilted (TM 9-2320-312-10) to perform step 5.
5.
Remove two nuts (14), screws (15), and each bracket (16) from cab deck (17).
10,11
9
8
7
12,13
17
3
16
14,15
ENGINE AIR CLEANER INSTALLATION
1.
If removed, install each bracket (16) to cab deck (17) with two screws (15) and nuts (14). Lower cab (TM 9-2320-312-
10).
2.
If removed, install each clamp (9) to bracket (16) with two screws (13) and nuts (12).
3.
If removed, install hood (7) to air cleaner housing (3) and tighten clamp (8).
4.
Position air cleaner inside two clamps (9). Secure each clamp with screw (11) and nut (10).
5.
Install elbow (6) to air cleaner housing (3) and tighten clamp (5).
0015 00-4
|
|
Privacy Statement - Press Release - Copyright Information. - Contact Us |
