 |
|||
|
|
|||
|
|
|||
| ||||||||||
|
|
 TM 9-2320-303-24-2
AIR CONDITIONER RECEIVER-DRYER REPLACEMENT - CONTINUED
0303 00
REMOVAL - CONTINUED
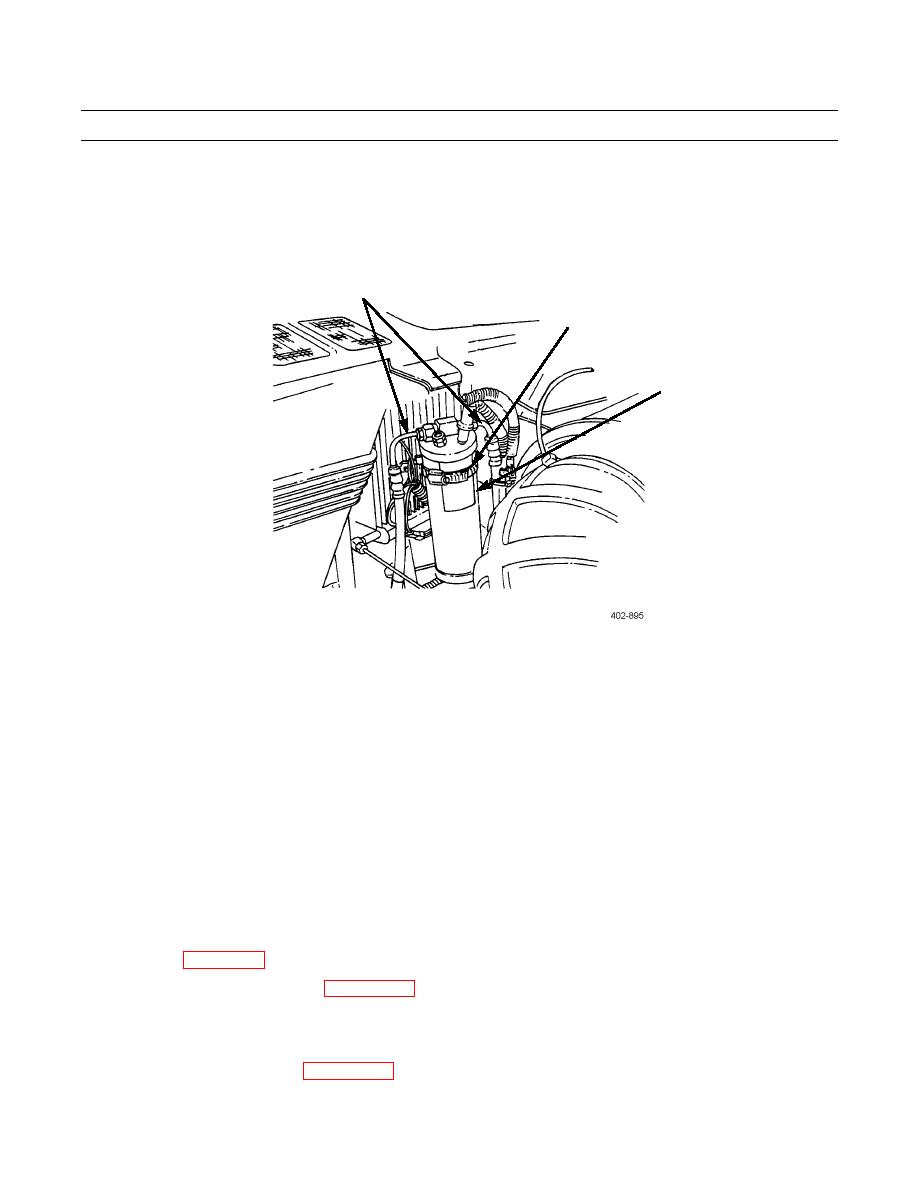
1.
Tag and disconnect refrigerant lines (1) from receiver-dryer (3). Install plugs in refrigerant lines. Remove and discard
preformed packings.
2.
Loosen hose clamp (2) attaching receiver-dryer (3) to mounting bracket and remove receiver-dryer.
1
2
3
INSTALLATION
NOTE
Ensure that hose connection ports of new receiver-dryer are securely sealed. If not, receiver-dryer is
contaminated with moisture. Do not use.
Remove tape covering moisture indicator window. The color of the moisture indicator paper inside
should be blue, but may be light blue or white if a very small quantity of moisture entered receiver-dryer
during manufacture. Proceed with installation. Moisture indicator paper will return to blue color after
approximately 30 minutes of system operation.
1.
Position receiver-dryer (3) in mounting bracket. Tighten hose clamp (2).
2.
Remove plugs from refrigerant lines (1) and line ports on new receiver-dryer (3).
3.
Install new preformed packings and apply refrigerant oil to preformed packings.
4.
Apply loctite to male fitting threads and connect refrigerant lines (1) to receiver-dryer (3). Apply proper torque in accor-
dance with WP 0311 00.
5.
Service air conditioner compressor (WP 0301 00).
6.
Install fan cycling switch (WP 0216 00).
7.
Install binary switch (WP 0215 00).
8.
Charge air conditioning system (WP 0297 00).
0303 00-2
|
|
Privacy Statement - Press Release - Copyright Information. - Contact Us |
