 |
|||
|
|
|||
|
|
|||
| ||||||||||
|
|
 TM 9-2320-303-24-2
AIR CONDITIONER EXPANSION VALVE REPLACEMENT - CONTINUED
0299 00
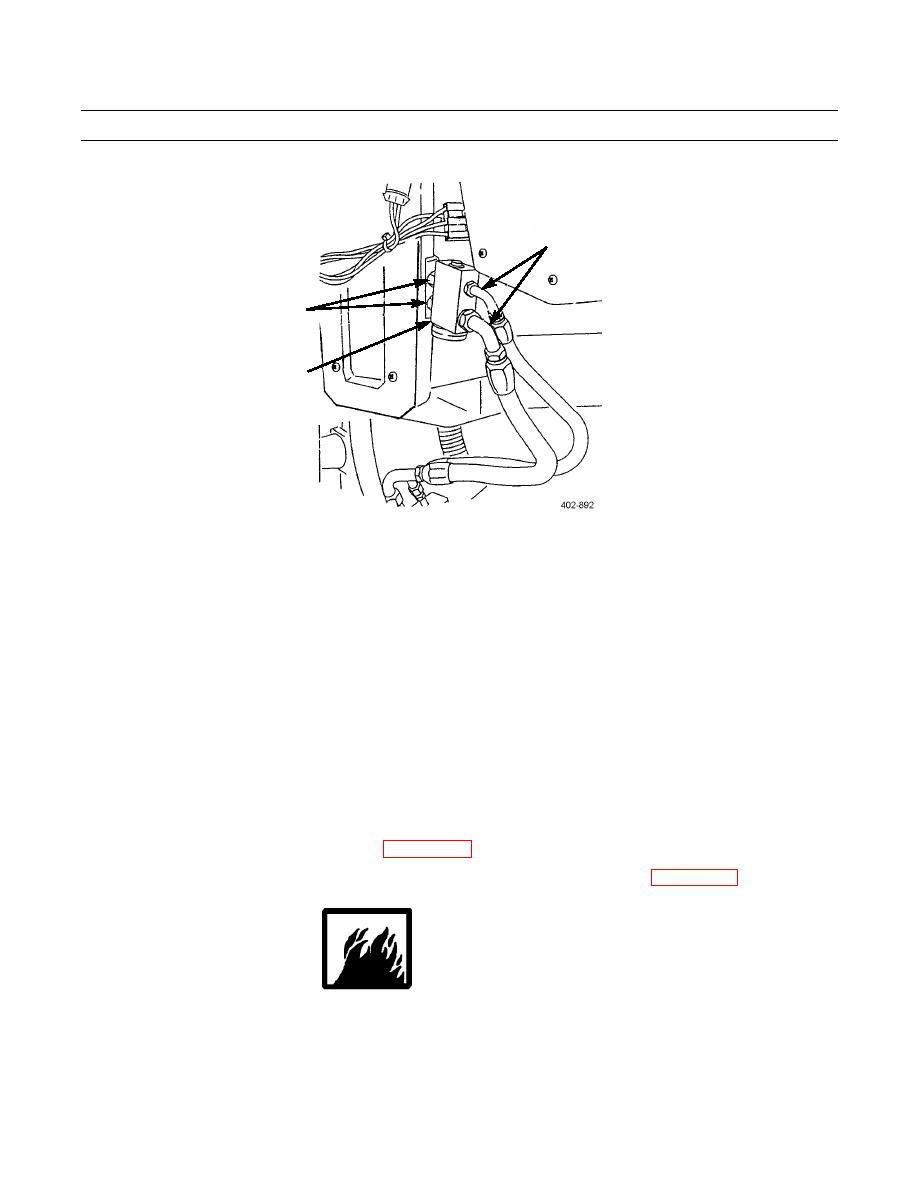
REMOVAL - CONTINUED
3
5
4
4.
Remove expansion valve (4).
INSTALLATION
1.
Remove plugs from refrigerant lines (3), evaporator coil inlet and outlet lines (5), and expansion valve (4).
2.
Install new preformed packings and lubricate with refrigerant oil.
3.
Apply loctite to male fitting threads and connect refrigerant lines (3) and evaporator coil inlet and outlet lines (5) to
expansion valve (4).
NOTE
DO NOT connect refrigerant fittings using only one wrench. Hold one fitting in place using a wrench and
turn other fitting with a second wrench.
4.
Using wrenches, tighten evaporator coil lines (5) to 216 lb-in (25 Nm).
5.
Tighten refrigerant lines (3): tighten large hose to compressor to 24 lb-ft (33 Nm); tighten small hose from receiver-
dryer to 144 lb-in (16 Nm).
6.
Evacuate and charge system with refrigerant (WP 0297 00).
7.
Add refrigerant oil to compressor to replace that which was lost during system discharge (WP 0301 00).
WARNING
Use care to prevent refrigerant from touching your skin or eyes. Liquid refrigerant, when exposed to air,
quickly evaporates and will freeze skin or eye tissue. Serious injury or blindness may result if you come in
contact with liquid refrigerant.
8.
Leak test air conditioner system (WP 0218 00).
0299 00-3
|
|
Privacy Statement - Press Release - Copyright Information. - Contact Us |
