 |
|||
|
|
|||
|
|
|||
| ||||||||||
|
|
 TM 9-2320-303-24-2
AIR DRYER REPAIR - CONTINUED
0262 00
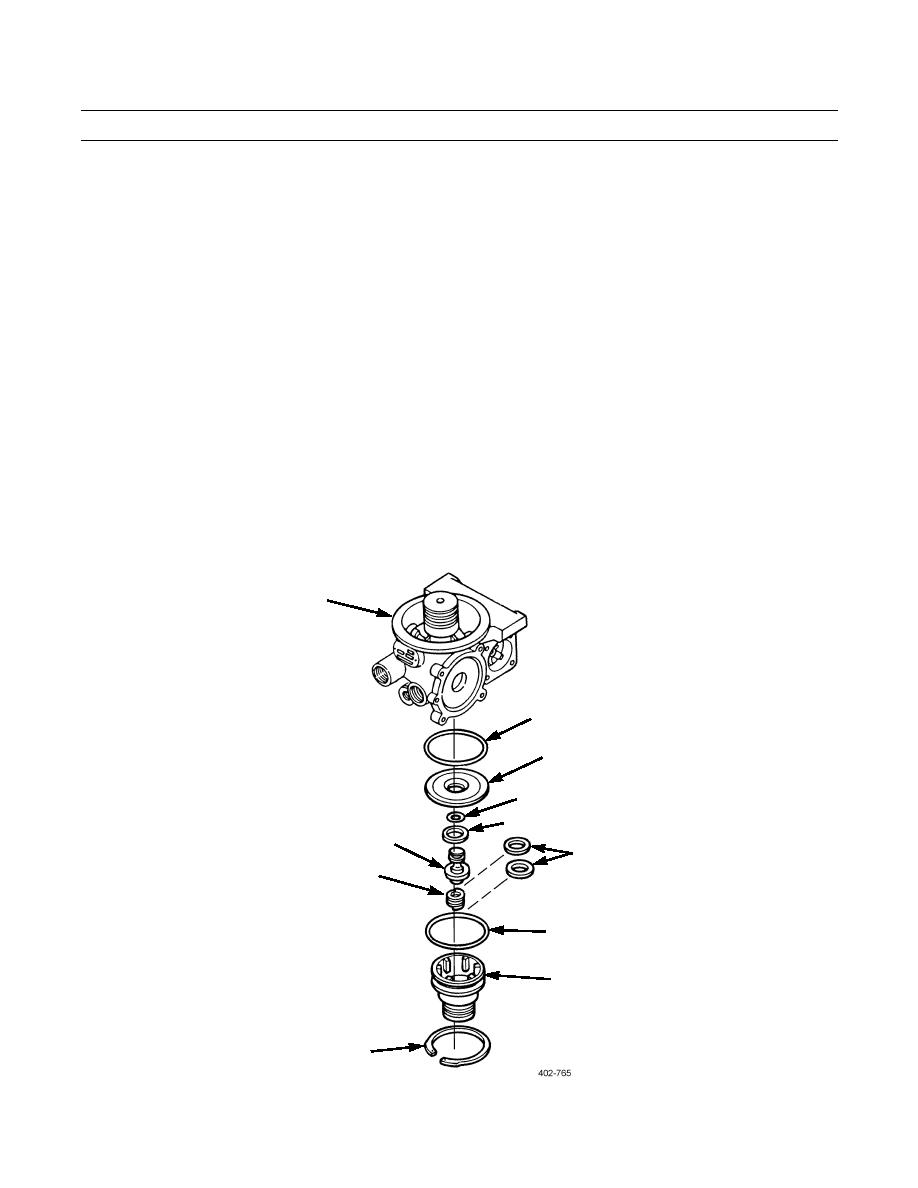
ASSEMBLY - CONTINUED
NOTE
Perform steps 11 through 17 to install PURGE VALVE ASSEMBLY.
11.
Apply a thin coat of grease to bore of air dryer (3) and three O-rings (18, 20, and 23).
12.
Install O-ring (18) to air dryer (3).
NOTE
Lip of washer must face piston seat.
13.
Install piston seat (21), O-ring (20), and washer (19) to piston (27).
14.
Install piston (27) assembly into air dryer (3).
15.
Install O-ring (23) to valve head (24).
NOTE
If equipped, also install two shims. One shim at each end of spring.
16.
Install spring (26) and two shims (22) to valve head (24).
17.
Install valve head (24) to air dryer (3) with retaining ring (25).
3
18
19
20
21
27
22
26
23
24
25
0262 00-8
|
|
Privacy Statement - Press Release - Copyright Information. - Contact Us |
