 |
|||
|
|
|||
|
|
|||
| ||||||||||
|
|
 TM 9-2320-303-24-2
STARTER SOLENOID REPLACEMENT - CONTINUED
0234 00
REMOVAL - CONTINUED
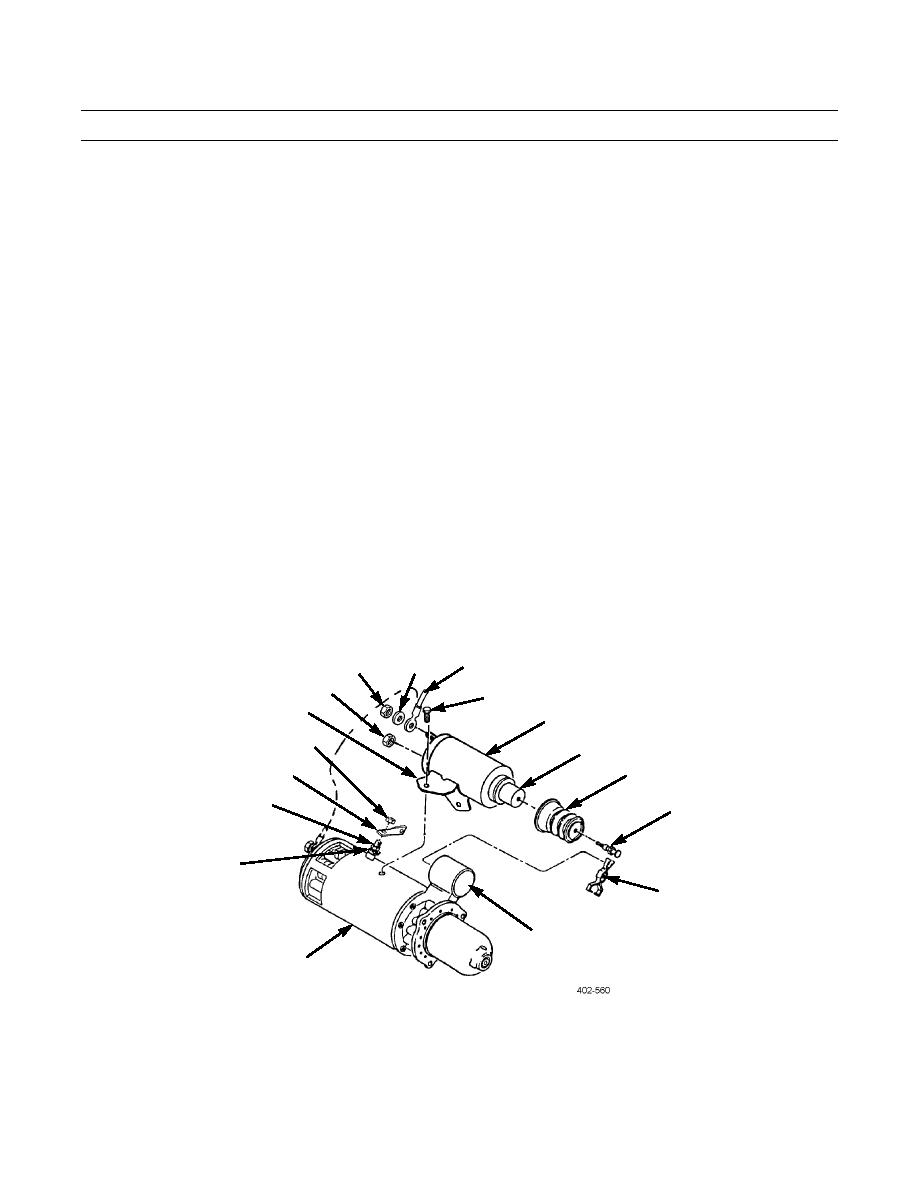
6.
Remove spool (16) from shift fork (17).
NOTE
It may be necessary to use a soft-jawed vise to hold solenoid plunger for removal of spool.
7.
Remove spool (16) and boot (15) from solenoid plunger (14).
INSTALLATION
1.
Install boot (15) and spool (16) on solenoid plunger (14).
2.
Rotate starter solenoid (5) so that mounting bracket (12) faces away from starter motor (7).
3.
Install spool (16) in shift fork (17).
4.
Rotate starter solenoid (5) to mounting position and press flush with housing (6).
5.
Apply silicone adhesive to threads and install two screws (4).
6.
Install jumper (10) on stud (9).
7.
Apply silicone adhesive to last in (6.4 mm) of threads on stud (9). Hold nut (8) and install nut (11). Tighten nut to 21-
29 lb-ft (28-39 Nm).
8.
Install nut (13) on starter solenoid (5). Tighten nut to 18-22 lb-ft (24-30 Nm).
9.
Install wire (3), lockwasher (2), and nut (1) on starter solenoid (5).
3
1
2
13
4
12
5
11
14
10
15
9
16
8
17
6
7
10.
Install starter (WP 0060 00).
END OF WORK PACKAGE
0234 00-2
|
|
Privacy Statement - Press Release - Copyright Information. - Contact Us |
