 |
|||
|
|
|||
|
|
|||
| ||||||||||
|
|
 TM 9-2320-303-24-1
HOOD ASSEMBLY REPAIR - CONTINUED
0179 00
DISASSEMBLY - CONTINUED
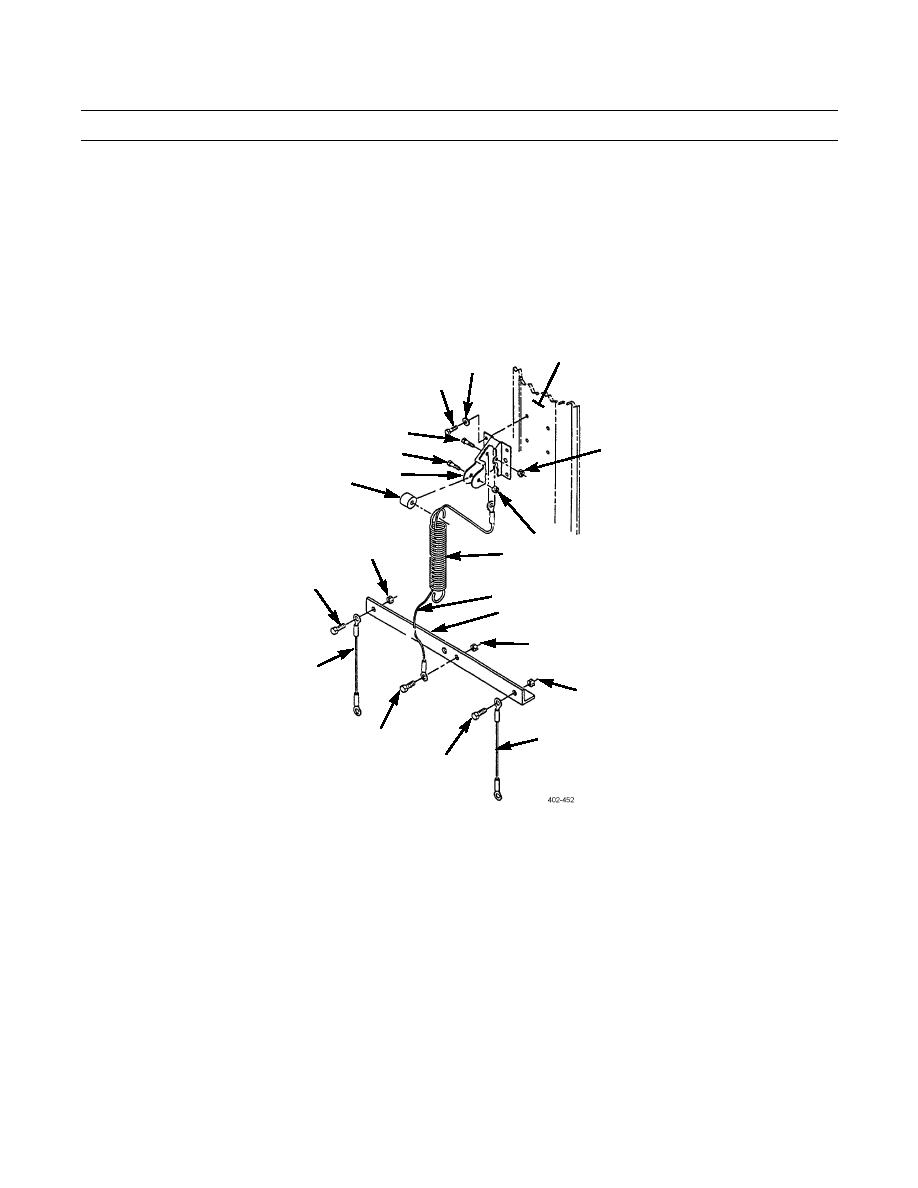
8.
Remove four screws (29), washers (30), and bracket (42) from hood (10).
9.
Remove spring (33), locknut (36), screw (40), cable (34), two locknuts (37), screws (39), and two cables (38) from yoke
(35). Discard locknuts.
10.
Remove locknut (31), screw (44), and cable (34) from bracket (42). Discard locknut.
11.
Remove locknut (32), screw (43), spring (33), and spacer (41) from bracket (42). Discard locknut.
10
30
29
44
31
43
42
41
32
37
33
39
34
35
36
38
37
38
40
39
ASSEMBLY
1.
Install spacer (41) and spring (33) on bracket (42) with screw (43) and new locknut (32).
2.
Feed cable (34) through spring (33) and install on bracket (42) with screw (44) and new locknut (31).
3.
Install cable (34) and two cables (38) on yoke (35) with screw (40) and new locknut (36), two screws (39), and new
locknuts (37). Install spring (33) to yoke.
4.
Install bracket (42) on hood (10) with four washers (30) and screws (29).
5.
Install mount (23) on hood guide (22) on each side of hood (10) with two washers (21) and four screws (20).
6.
Install crosstie plate (28) and bracket (17) on each side of hood (10) with four washers (18) and screws (19).
7.
Install crosstie (24) on hood (10) with four washers (26), screws (25), and new locknuts (27).
0179 00-3
|
|
Privacy Statement - Press Release - Copyright Information. - Contact Us |
