 |
|||
|
|
|||
|
|
|||
| ||||||||||
|
|
 TM 9-2320-303-24-1
SLACK ADJUSTER AND S-CAM REPLACEMENT - CONTINUED
0127 00
REMOVAL - CONTINUED
NOTE
Note position of washers during steps 3 and 4 to aid in installation.
3.
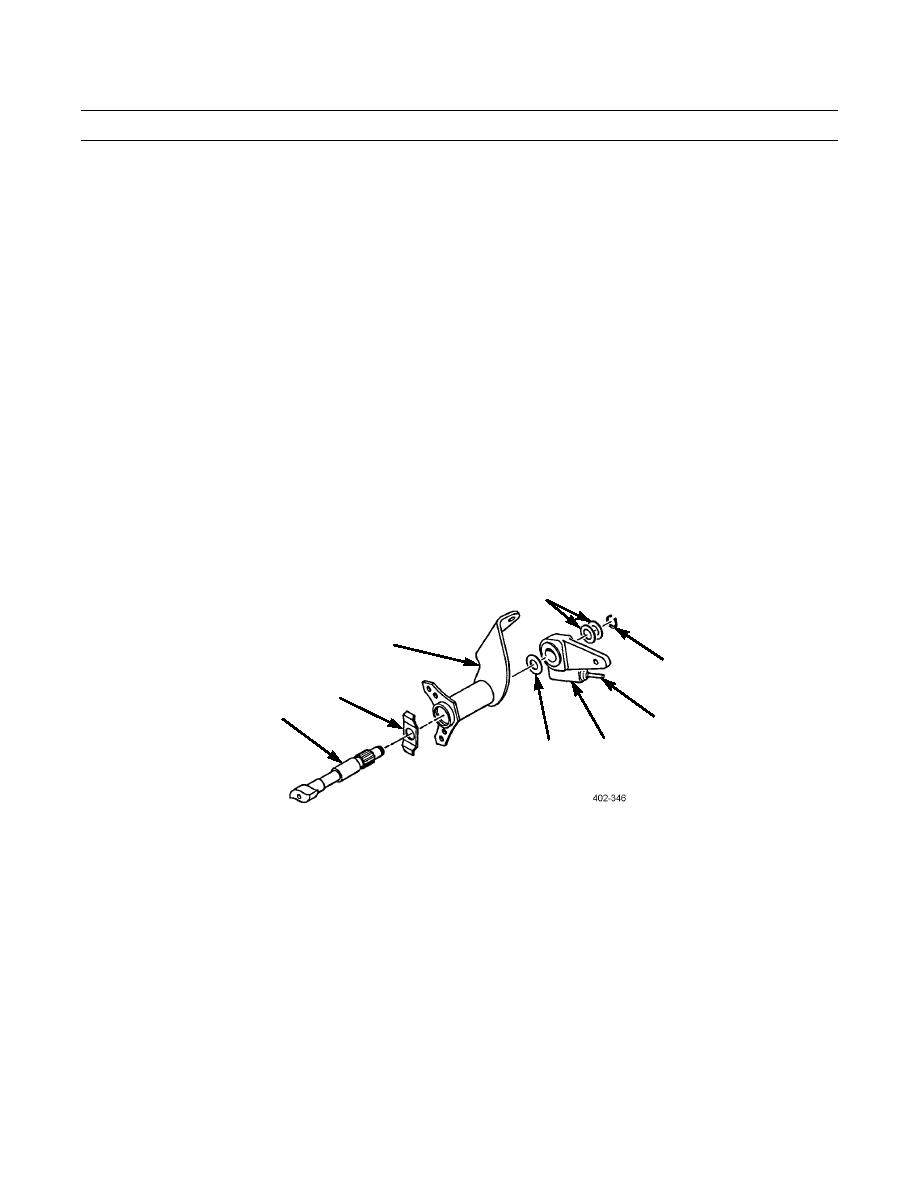
Remove retaining ring (9) and washers (8).
4.
Remove slack adjuster (10) and washer (11) from splined shaft of S-cam (5).
NOTE
Prior to performing step 5, mark position of S-cam.
5.
Remove S-cam (5) and washer (6) from mounting bracket (7).
INSTALLATION
1.
Apply thin film of antiseize compound on splines of S-cam (5).
2.
Install washer (6) on S-cam (5).
3.
Install S-cam (5) through tube of mounting bracket (7).
4.
Install washer (11), as tagged during removal, on shaft of S-cam (5).
5.
Install slack adjuster (10) over splines of S-cam (5) with capscrew (14) toward vehicle.
6.
Install washers (8), as tagged during removal, and retaining ring (9) to secure slack adjuster (10) to S-cam (5).
8
7
9
6
5
12
10
11
0127 00-2
|
|
Privacy Statement - Press Release - Copyright Information. - Contact Us |