 |
|||
|
|
|||
|
|
|||
| ||||||||||
|
|
 TM 9-2320-303-24-1
MASTER BATTERY SWITCH REPLACEMENT - CONTINUED
0106 00
REMOVAL - CONTINUED
NOTE
Tag cables to ensure correct installation.
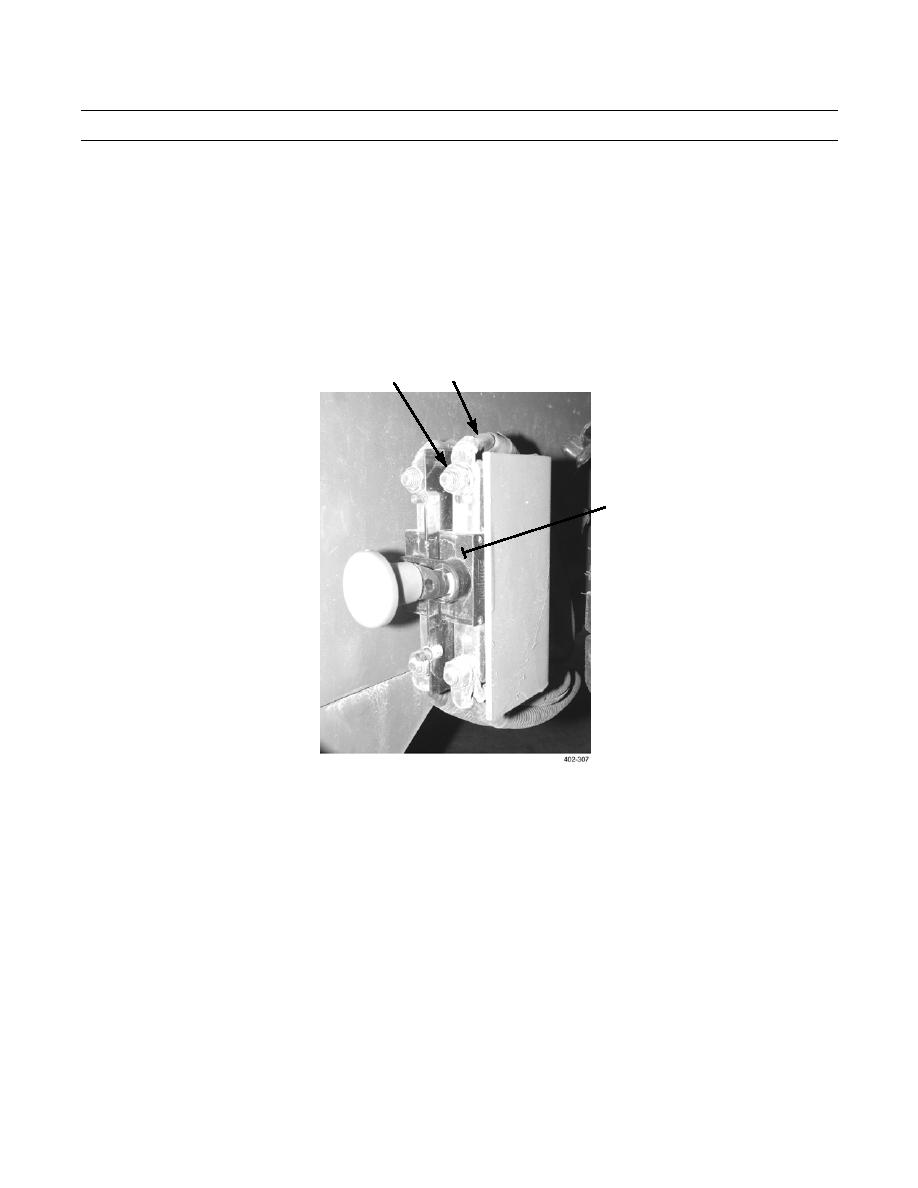
Each terminal at bottom of master battery switch has TWO cables attached.
2.
Remove four nuts (5), lockwashers (6), and six cables (8) from four screws (7) at terminals of master battery switch (4).
Discard lockwashers.
8
5,6,7
4
NOTE
Note position of master battery switch for installation.
3.
Remove four locknuts (13), eight washers (14), four screws (15), master battery switch (4), and four screws (7) from
bracket (16). Discard locknuts.
NOTE
Perform steps 4 through 6 to remove bracket.
4.
Remove two insulators (17) from bracket (16).
5.
Remove cover from battery box (TM 9-2320-303-10).
6.
Remove two locknuts (9), four washers (10), two screws (11), and bracket (16) from side of battery box (12). Discard
locknuts.
0106 00-2
|
|
Privacy Statement - Press Release - Copyright Information. - Contact Us |
