 |
|||
|
|
|||
|
|
|||
| ||||||||||
|
|
 TM 9-2320-302-20-2
ALTERNATOR REPLACEMENT (M915A3 OLD MODEL) - CONTINUED
0065 00
REMOVAL - CONTINUED
3.
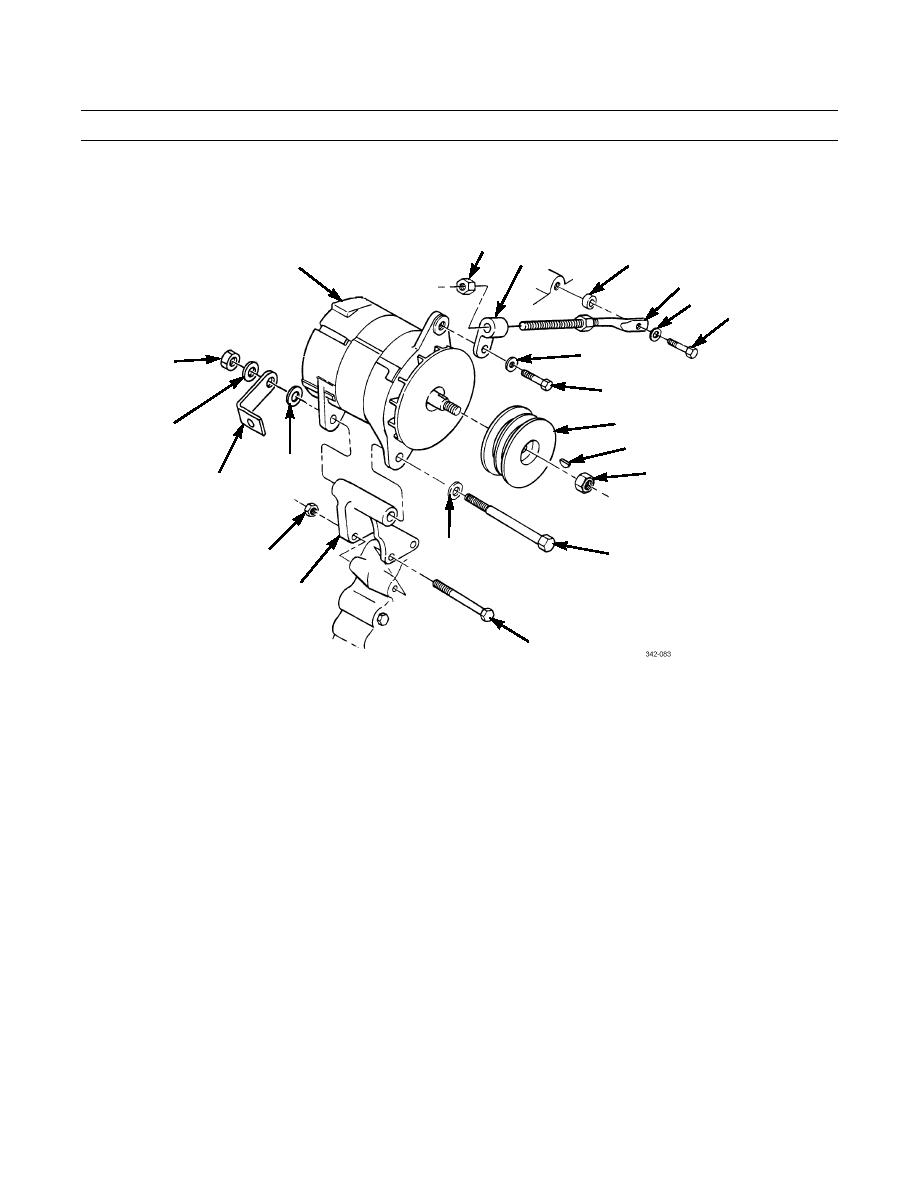
Remove cap screw (14), bearing washer (13), and adjusting rod link (8) from alternator (3).
7
8
9
3
10
11
12
2
13
24
14
15
20
16
20
17
23
20
18
22
21
19
4.
Support alternator (3) and remove locknut (24), cap screw (18), three bearing washers (20), alternator, and angle bracket
(23) from lower mount (21). Discard locknut.
5.
Hold alternator pulley (15) in vise and remove hex nut (17), key (16), and pulley from alternator (3). Retain pulley for
use on new alternator.
6.
Inspect lower mounting bracket (21) for damage. If damaged, remove two bolts (19), nuts (22) and lower mounting
bracket.
7.
Inspect adjusting rod (10) for damage. If damaged, remove cap screw (12), lockwasher (11), spacer (9), and adjusting
rod. Discard lockwasher.
8.
Remove two hex nuts (7) and adjusting rod link (8) from adjusting rod (10).
INSTALLATION
1.
Install pulley (15) and key (16) on alternator (3) with hex nut (17).
2.
If removed, install lower mounting bracket (21) with two bolts (19) and nuts (22).
3.
If removed, install adjusting rod (10), with two hex nuts (7) and adjusting rod link (8), with new lockwasher (11), spacer
(9), and cap screw (12).
4.
Support alternator (3) and secure to lower mounting bracket (21) with cap screw (18), three bearing washers (20), angle
bracket (23), and new locknut (24). Do not tighten at this time.
5.
Install alternator (3) on adjusting rod link (8) with bearing washer (13) and cap screw (14).
0065 00-2
|
|
Privacy Statement - Press Release - Copyright Information. - Contact Us |