|
| |
TM 5-2420-222-34
16-5.
HYDRAULIC IMPACTOR REPAIR.
This Task Covers:
a.
Disassembly
c.
Assembly
b.
Cleaning and Inspection
Initial Setup:
Equipment Conditions:
Materials/Parts:
•
Hydraulic impactor working tool removed (see
•
Impactor lubricant (Item 24, Appendix B)
TM 5-2420-222-20).
•
Rags (Item 28, Appendix B)
•
Hydraulic impactor motor assembly removed (see
•
Dry cleaning solvent (Item 31, Appendix B)
paragraph 16-4).
•
One repair kit
Tools/Test Equipment:
Personnel Required:
Two
•
General mechanic's tool kit
•
Field automotive shop set
General Safety Instructions:
•
Ball retainer tool
•
Dry cleaning solvent is flammable and must not •
Spring compression tool (see Appendix C)
be used near open flame. Use only in a well-
ventilated area.
a.
DISASSEMBLY
WARNING
Internal spring Is under very high tension. Use a suitable holding device to hold
both housings together when removing screws. Failure to follow this warning may
result in injury or death to personnel.
1.
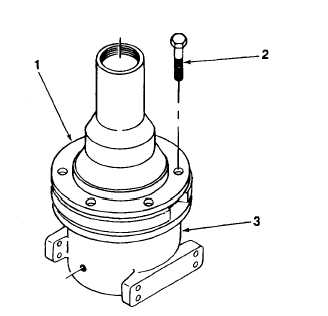
Place hydraulic impactor in arbor press. Loosen six
screws (2) about B in. (9.5 mm).
2.
Relieve pressure on arbor press approximately 3/8 in. (9.5
mm). Shake lower housing (1) until lower housing
becomes free of upper housing (3). Remove six screws
(2) and go to step 4. If lower housing does not shake
free, there may be an internal binding problem. Perform
step 3.
3.
Slowly release pressure on arbor press while loosening
six screws (2) until screws are removed and tension is off
lower housing (1).
4.
Remove lower housing (1) from upper housing (3).
TA701671
16-19
|

