 |
|||
|
|
|||
|
|
|||
| ||||||||||
|
|
 TM5-241O-237-34
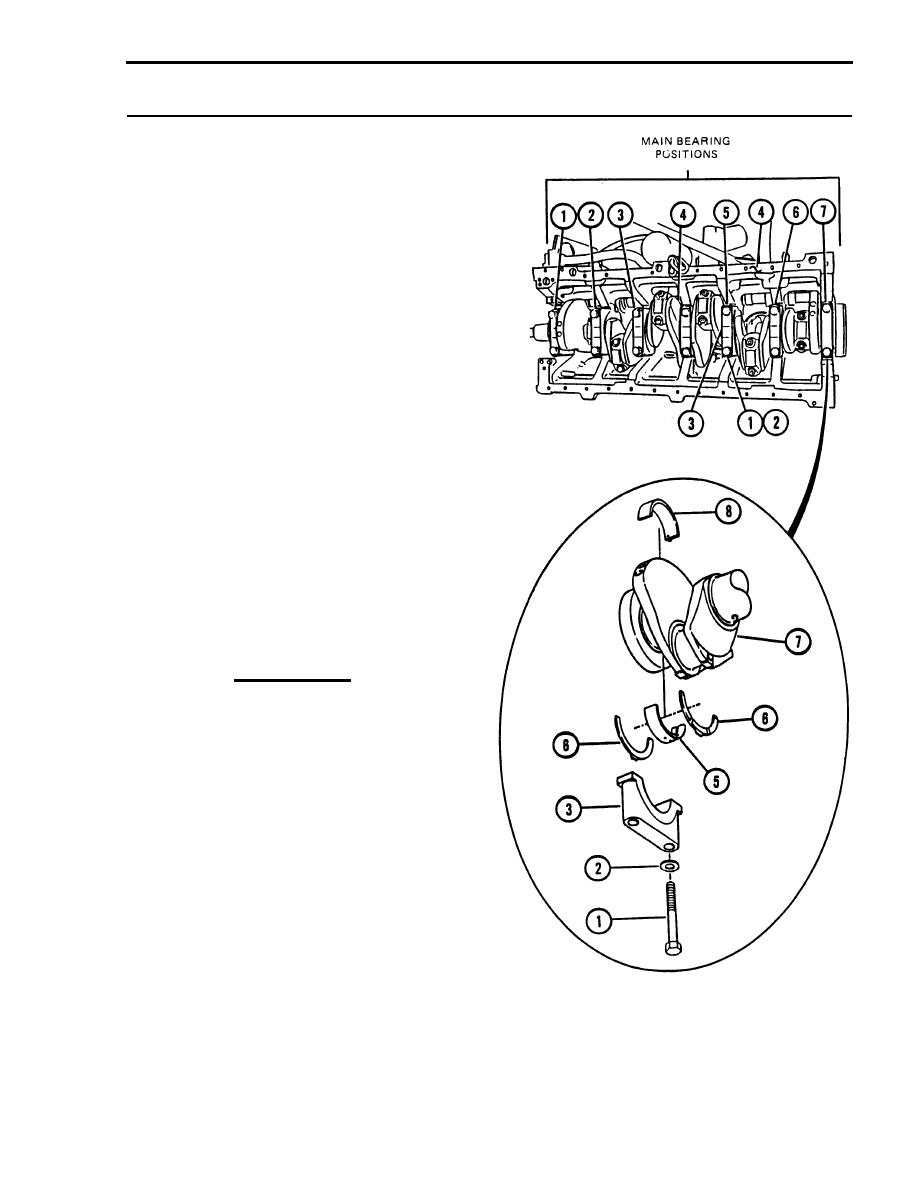
CRANKSHAFT BEARINGS - REPLACE (Cont'd)
3-11.
NOTE
Do not turn the crankshaft
when the plastigage is
installed for clearance
checks.
(9) Place a piece of plastigage on
the surface of the lower half of
main bearing (5).
NOTE
Install bearing caps with the
part number towards the front
of the engine. Be sure that
the mark (number) on the
bearing cap corresponds with
the mark in the cylinder
block.
(10) Place main bearing cap (3) in
position in the cylinder block
(4). Put clean lUbricating oil on
the threads of capscrews (1) and
on the face of washers (2), and
install capscrews and washers.
Use a wrench to tighten capscrews
to 27 to 33 lb. ft.
CAUTION
Do not use an impact wrench to
tighten main bearing cap
capscrews the additional 90
degrees.
(11) Put a mark on each bearing cap
and capscrew. Use a wrench to
tighten capscrews (1) 90 degrees
more.
(12) Remove all of the capscrews (1)
and washers (2); then remove
bearing caps (3).
3-57
|
|
Privacy Statement - Press Release - Copyright Information. - Contact Us |
