 |
|||
|
|
|||
|
|
|||
| ||||||||||
|
|
 TM 5-2410-237-23
WINCH ASSEMBLY REPAIR - CONTINUED
0245 19
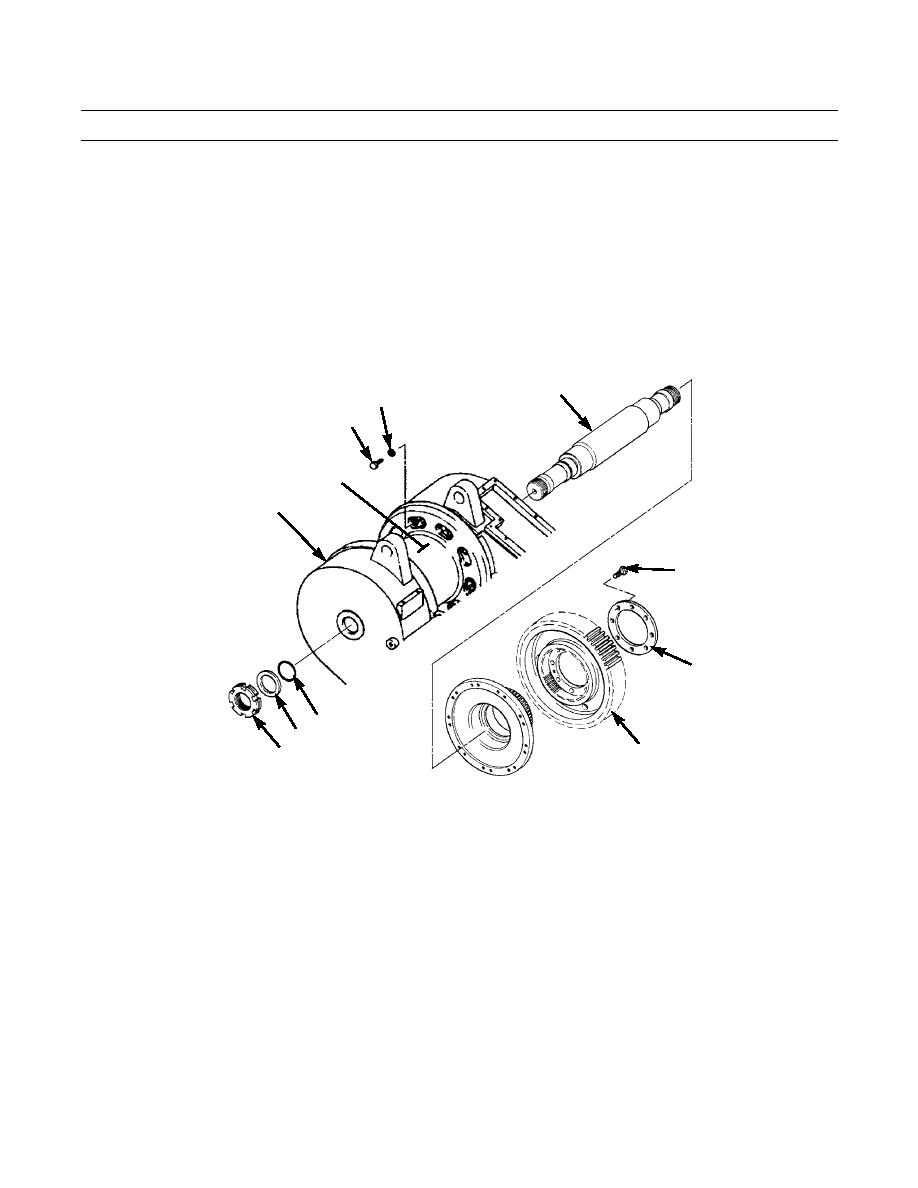
ASSEMBLY - CONTINUED
ab. Put bearing retaining ring (39) in position on drive gear (29) and install eight capscrews (38) hand tight.
ac.
Wedge a wood block between teeth of drive gear (29) and case (5) to keep drive gear from turning.
ad. Tighten eight capscrews (38) to 175 lb-ft (237 Nm).
ae.
Install remainder of washers (32) and capscrews (31) on drum (30). Tighten all capscrews to 200 lb-ft (271 Nm).
af.
Remove wood block from between drive gear (29) and case (5).
ag. Install new O-ring (37) on right side of drum shaft (34).
ah. Install washer (36) and nut (35) on drum shaft (34). Use spanner wrench and torque multiplier to tighten nut to 500
lb-ft (678 Nm).
34
32
31
30
5
38
39
37
36
29
35
421-0190
NOTE
Guide pins are used to guide drum support flange (26) into position.
ai.
Fasten lifting equipment to left side of drum (30). Install two guide pins in case (5) where capscrews (24) will be
installed.
NOTE
Perform the following steps to determine shim thickness required for final assembly. Do NOT install new
O-ring (23), new seal (28) or new shims (27) at this time.
aj.
Position drum support flange (26) on guide pins.
ak. Lift drum (30) with hoist to align drum shaft (34) with drum support flange (26). Install flange and lower lifting
equipment to release tension on drum.
al.
Install washer (22) and nut (21) on drum shaft (34).
Change 1
0245 19-40
|
|
Privacy Statement - Press Release - Copyright Information. - Contact Us |
