 |
|||
|
|
|||
|
|
|||
| ||||||||||
|
|
 TM 5-2410-237-23
WINCH ASSEMBLY REPAIR - CONTINUED
0245 19
DISASSEMBLY - CONTINUED
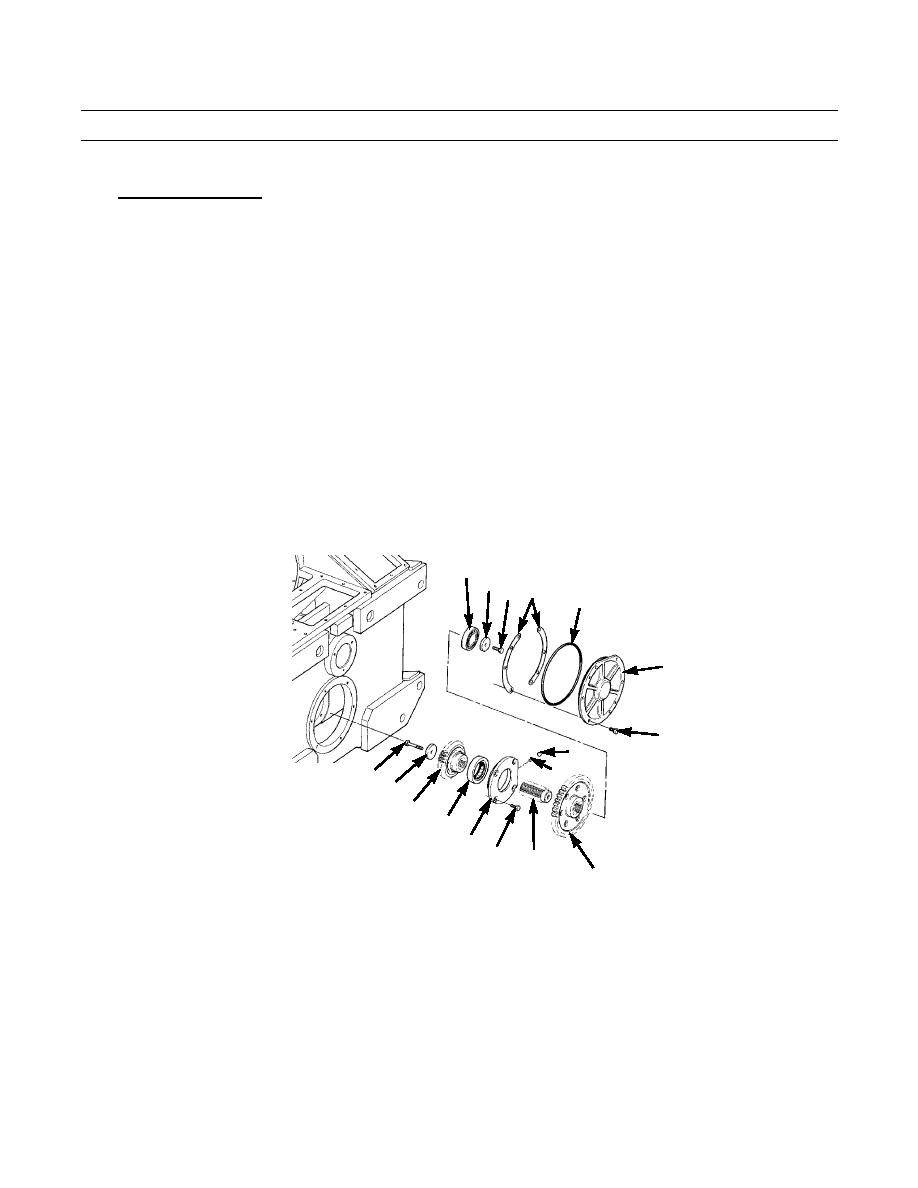
4.
Remove Winch Pinion.
a.
Remove six bolts (115) from bearing cage (116).
b.
Use two forcing screws to remove bearing cage (116).
c.
Remove and discard shims (117).
d.
Remove seal (118) from bearing cage (116). Discard seal.
e.
Remove capscrew (119) and washer (120).
NOTE
Mark direction of drive gear orientation to ensure correct assembly.
f.
Remove bearing (121) and drive gear (122).
g.
Remove four bolts (123) from bearing cage (124). Install two forcing screws and loosen bearing cage.
h.
Remove bearing cage (124), shaft (125), bearing (126) and pinion gear (127) as a unit.
i.
Remove capscrew (128), washer (129) and pinion gear (127) from shaft (125).
j.
Remove plug (130) and dowel (131) from bearing cage (124).
k.
Remove bearing (126) from bearing cage (124).
121
120 119
117
118
116
115
130
131
128
129
127
126
421-0217
124
123
125
122
0245 19-13
Change 1
|
|
Privacy Statement - Press Release - Copyright Information. - Contact Us |
