 |
|||
|
|
|||
|
|
|||
| ||||||||||
|
|
 TM 5-2410-237-23
WINDSHIELD WIPER ASSEMBLY MAINTENANCE - CONTINUED
0194 00
DISASSEMBLY - CONTINUED
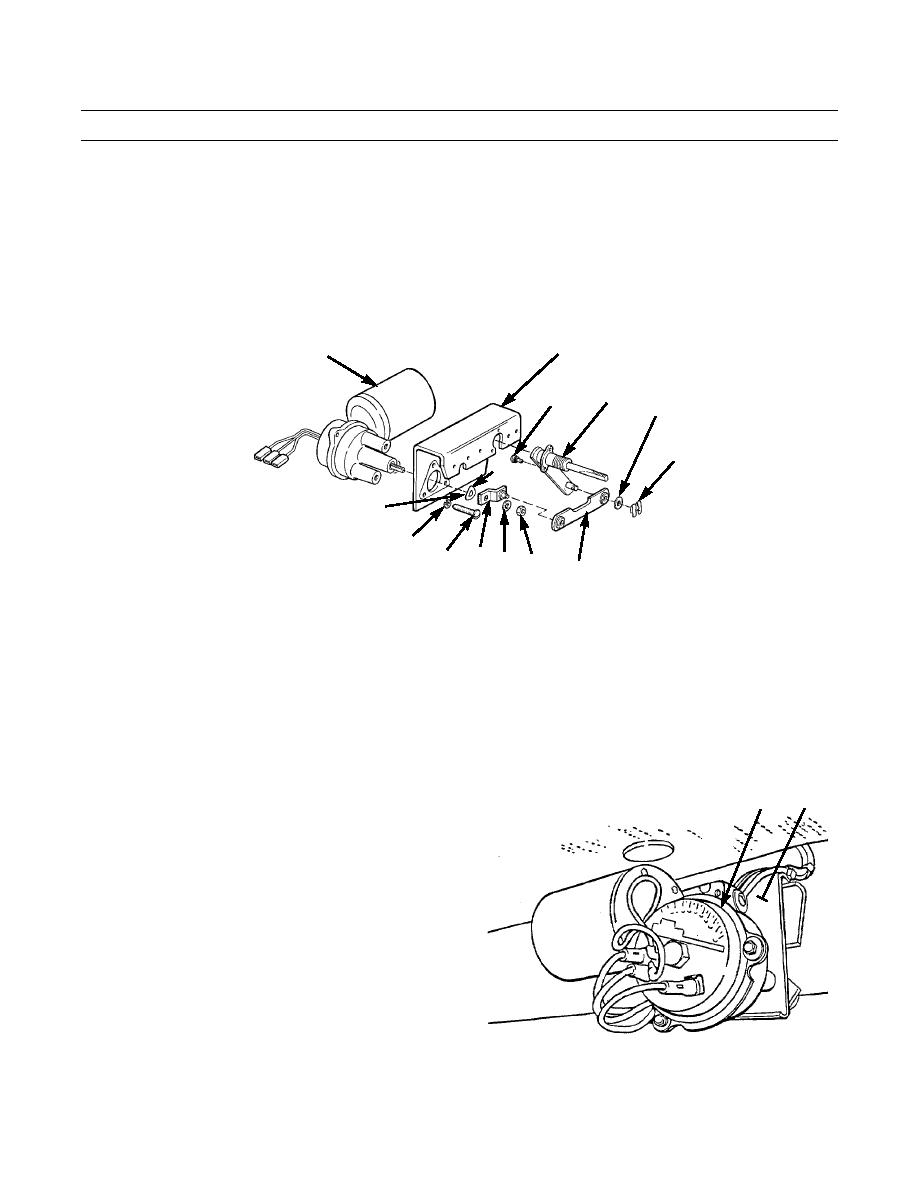
2.
Remove two clips (21), washers (22) and link arm (23).
3.
Remove nut (24), washer (25), arm (26) and spring tension washer (27).
4.
Remove three screws (28), washers (29) and wiper motor (6) to bracket (15).
NOTE
Save shims on stud of pivot shaft for assembly.
5.
Remove two screws (30) and remove pivot shaft (31).
15
6
31
30
22
21
25
27
387-443
29
26 25 24
28
23
ASSEMBLY
1.
Install pivot shaft (31) to bracket (15) with two screws (30). Place shims on pivot shaft.
2.
Position wiper motor (6) onto back of bracket (15) and install three screws (28) and washers (29).
3.
Install spring tension washer (27), arm (26), and washer (25) and nut (24) onto wiper motor shaft.
4.
Assemble link arm (23) onto pins on pivot shaft (31) and arm (26) and install two washers (22) and clips (21).
5.
Install wiper blade (20) on wiper arm (4) with screw (19) and nut (18).
INSTALLATION
1.
From inside cab, have assistant hold wiper motor (6)
15
6
and bracket (15) assembly in position.
2.
From outside of cab, install new gasket (17), spacer
(16) and adapter (14) on pivot shaft (31) protruding
through cab.
3.
Install two screws (12) and starwashers (13) to secure
adapter (14), wiper motor (6) and bracket (15) to cab.
4.
Install washer (11), washer (10) and nut (9).
5.
Slide boot (8) and bushing (7) on pivot shaft (31).
387-440
0194 00-3
|
|
Privacy Statement - Press Release - Copyright Information. - Contact Us |
