 |
|||
|
|
|||
|
|
|||
| ||||||||||
|
|
 TM 5-2410-237-23
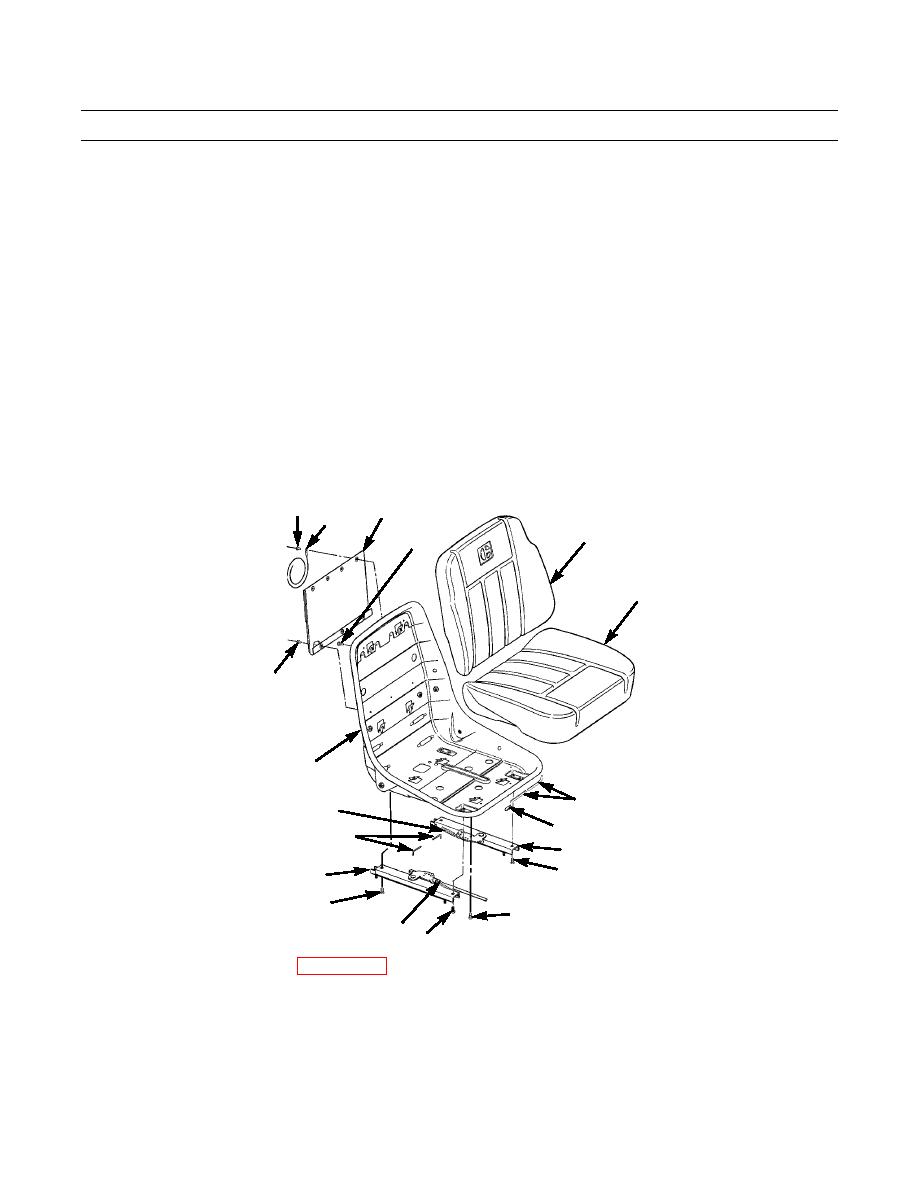
SEAT REPAIR - CONTINUED
0175 00
DISASSEMBLY - CONTINUED
8.
Open holder (11) and remove four top rivets (12) and lanyard (13). Discard rivets.
9.
Allow holder (11) to fold down and remove three bottom rivets (14) and holder. Discard rivets.
10.
Remove clip (15) and seal (16) from seat frame (4). Discard seal and clip.
ASSEMBLY
1.
Install new seal (16) on seat frame (4). Start seal at bottom center of seat frame. Secure ends of seal with new clip (15).
2.
Position bottom edge of holder (11) on back of seat frame (4), so that top of holder is hanging down. Secure bottom edge
with three new rivets (14).
3.
Position holder (11) up with flap open and install three new rivets (12) on R.H. side.
4.
Position lanyard (13) over L.H. hole and install new rivet (12).
5.
Install seat cushion (9) and back cushion (10) in seat frame (4) with four capscrews (8).
6.
Install connecting (7) between slide adjusters (1 and 2).
7.
Position slide adjusters (1 and 2) on bottom of seat frame (4) and install two bolts (5), bolts (6) and springs (3).
12
11
13
10
8
9
14
4
16
3
15
7
2
6
1
5
8
387-377
3 6
8.
Install vertical adjuster to seat (WP 0174 00).
END OF WORK PACKAGE
0175 00-2
|
|
Privacy Statement - Press Release - Copyright Information. - Contact Us |
