 |
|||
|
|
|||
|
|
|||
| ||||||||||
|
|
 TM 5-2410-237-23
FINAL DRIVE BEARINGS ADJUSTMENT - CONTINUED
0128 00
ADJUSTMENT - CONTINUED
9.
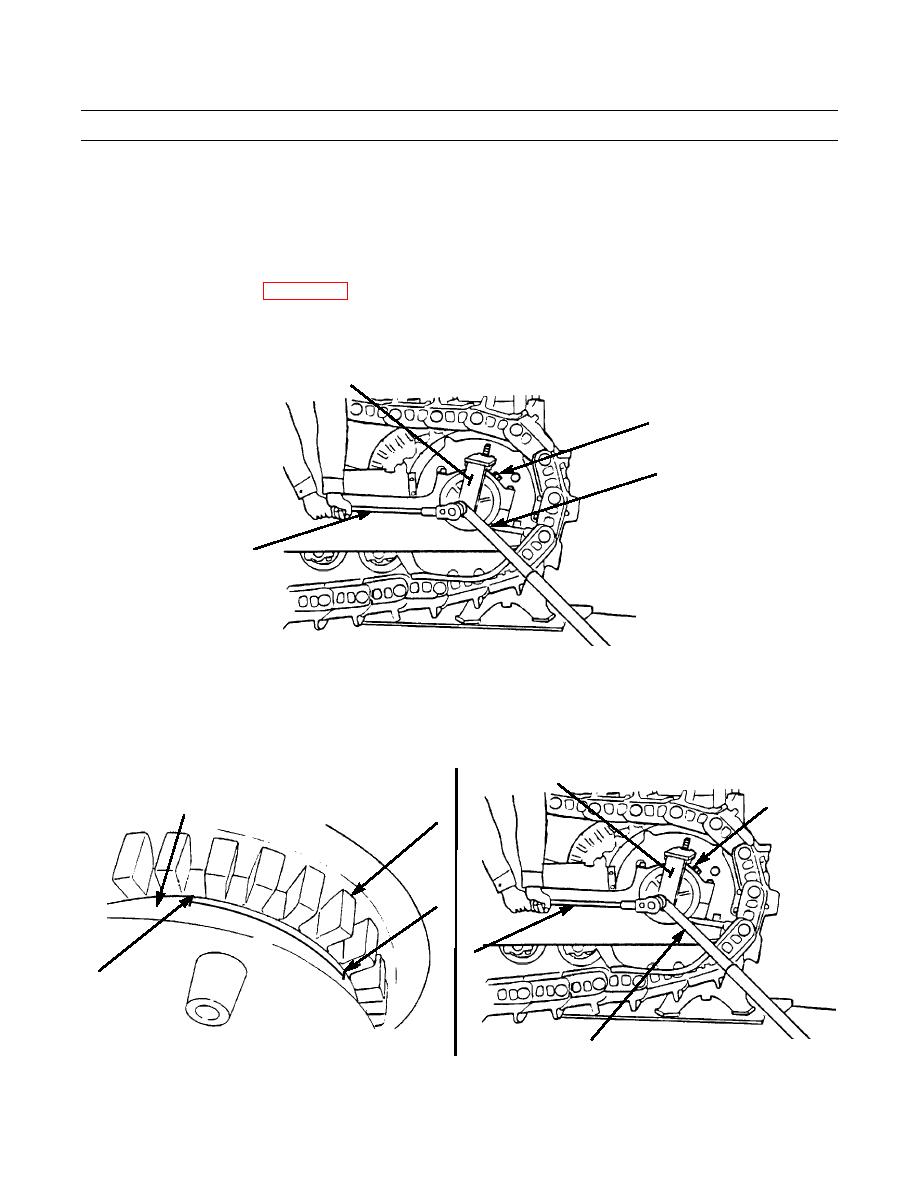
Remove torque wrench (19) and install ratchet wrench (20). Turn adjusting nut (11) to the right (six to ten lugs) to lower
torque to less than 350 lb-ft (475 Nm).
NOTE
If it is not possible to get a torque below 350 lb-ft (475 Nm) after adjusting nut is loosened, a separation of
tracks must be made (WP 0132 00) to make adjustment of bearings.
10.
Remove torque multiplier (18) and install torque wrench (19) and adapter. Tighten adjusting nut (11) to 350 lb-ft (475
Nm).
16
11 (HIDDEN)
18
20
387-465
11.
Move driver group (16) out of the way and put a mark (21) on adjusting nut (11) and holder assembly (22) in alignment
with each other. Mark (23) on holder assembly (22) should be placed to the left from mark (21) and 5.84 in. +/- 0.06 in.
(148.3 mm +/- 1.5 mm) (distance "Z") from mark (21).
12.
Install driver group (16) on shaft of trunnion group.
16
11 (HIDDEN)
22
11
21
20
23
387-466
18
387-465
13.
Install torque multiplier (18) and tighten adjusting nut (11) until marks (21 and 23) are in alignment.
0128 00-4
|
|
Privacy Statement - Press Release - Copyright Information. - Contact Us |
