 |
|||
|
|
|||
|
|
|||
| ||||||||||
|
|
 TM 5-2410-237-23
ENGINE OIL PAN REPLACEMENT - CONTINUED
0033 00
REMOVAL - CONTINUED
3.
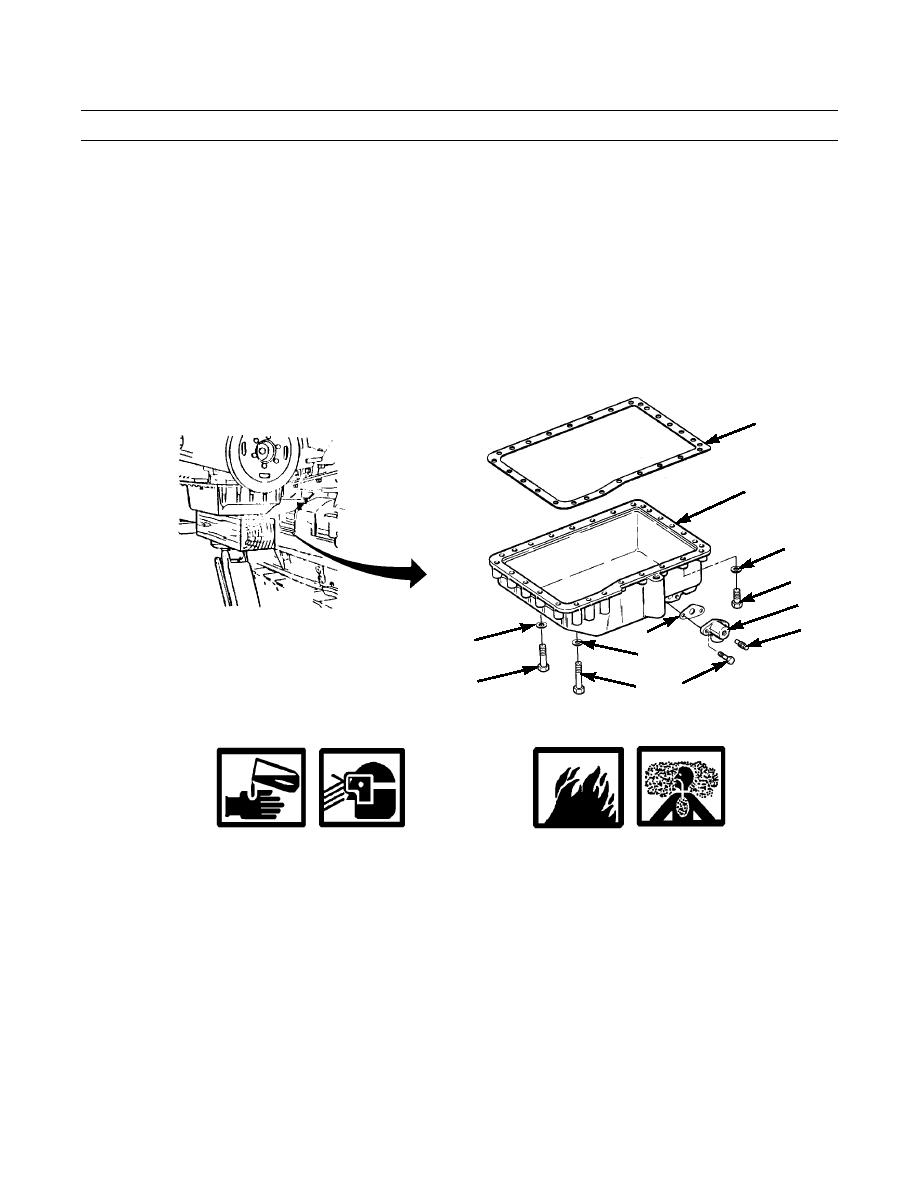
Remove plug (8) from adapter (9) on oil pan (10).
4.
Remove two capscrews (11), adapter (9) and gasket (12) from oil pan (10). Discard gasket.
5.
Position floor jack under oil pan (10).
6.
Remove three 3-1/4 in. capscrews (13) and washers (14) from oil pan (10).
7.
Remove five 2-3/4 in. capscrews (19) and washers (16) from oil pan (10).
8.
Remove twenty 1-1/2 in. capscrews (17) and washers (18) from oil pan (10).
9.
Lower floor jack and remove oil pan (10) and gasket (19) from engine. Discard gasket.
19
10
18
17
9
8
12
16
14
15
13 11
387-144
INSTALLATION
WARNING
Exposure to silicone RTV compound may be hazardous to your health. Contact with eyes can cause severe
irritation and burns. Compound can be absorbed into the skin and can cause irritation or skin sensitiza-
tion. Inhalation of vapors can cause respiratory tract irritation; prolonged inhalation can result in an aller-
gic reaction. Vapors are combustible. Do not use near open flame. Wear eye and skin protection and avoid
inhalation of vapors. Use only in a well-ventilated area. Failure to follow this warning can cause injury or
death.
NOTE
Ensure mating surface on oil pan and engine is clean.
Apply a thin layer of silicone compound on oil pan to provide a seal and to keep gasket in place.
1.
Position new gasket (19) on oil pan (10), then apply silicone compound to top side of gasket.
2.
Use a floor jack to position oil pan (10) onto engine.
0033 00-2
|
|
Privacy Statement - Press Release - Copyright Information. - Contact Us |