 |
|||
|
|
|||
|
|
|||
| ||||||||||
|
|
 TM 5-2410-233-23
ALTERNATOR REPLACEMENT - CONTINUED
0070 00
REMOVAL - CONTINUED
NOTE
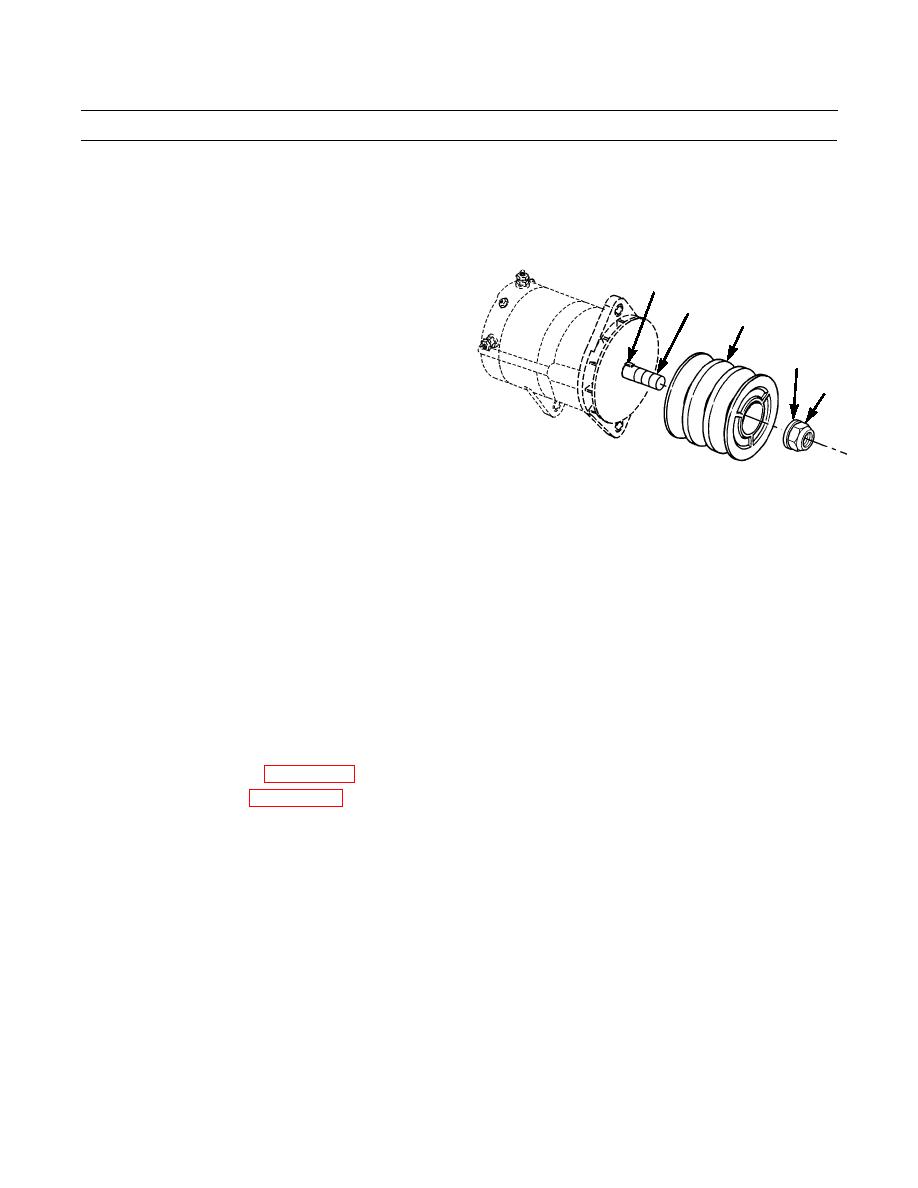
If alternator requires replacement, continue with steps 7 and 8
7.
Remove nut (16), washer (17) and pulley (18) from
alternator shaft (19).
20
19
8.
If required, remove key (20) from alternator shaft
18
(19).
17
16
386-430
INSTALLATION
1.
If removed, install key (20) on alternator shaft (19).
2.
Install pulley (18) onto alternator shaft (19) and secure with washer (17) and nut (16). Tighten nut to 76 lb-ft (103 Nm).
NOTE
Do NOT tighten alternator mounting capscrews until V-belt adjustment is complete.
3.
Position alternator (4) on engine accessory bracket (12) and install bolt (9), new star washer (10) and nut (11).
4.
Install washer (17), spacer (16), washer (15), new lockwasher (14) and bolt (13) to alternator (4) and alternator clamp
block (8).
5.
Connect wire (6) and install nut (5).
6.
Connect wire (3) and install washer (2) and nut (1).
7.
Install V-belts and adjust (WP 0069 00).
8.
Connect battery cables (WP 0080 00).
9.
Start engine and check for proper operation of charging system (TM 5-2410-233-10).
END OF WORK PACKAGE
0070 00-3
|
|
Privacy Statement - Press Release - Copyright Information. - Contact Us |
