 |
|||
|
|
|||
|
|
|||
| ||||||||||
|
|
 TM 5-2410-233-23
RADIATOR MAINTENANCE - CONTINUED
0063 00
INSTALLATION - CONTINUED
7.
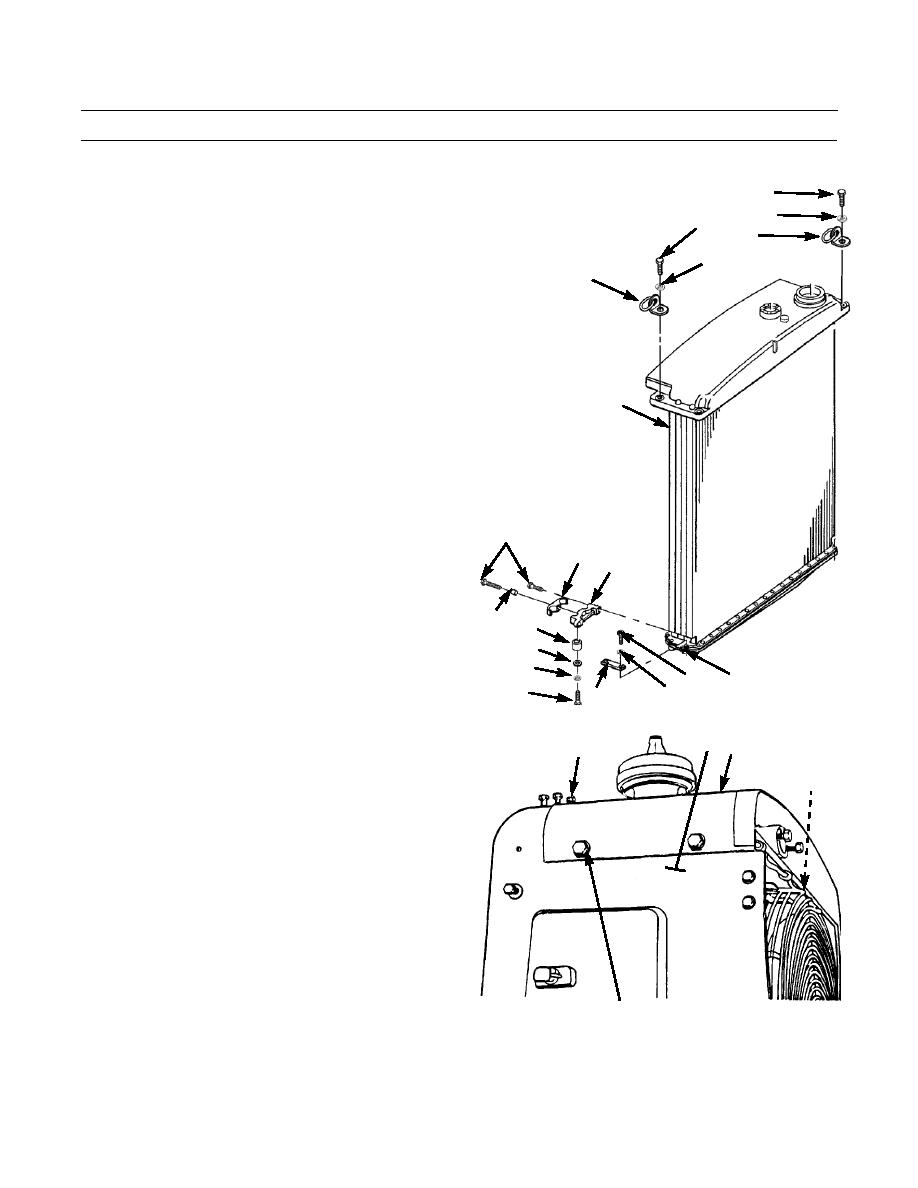
Position retainer (36) to radiator mount brace (37) and
31
install washer (35) and capscrew (34).
32
31
8.
Position lower mount bracket (42) on lower backside
33
on radiator (10) and install two bumpers (41), washers
32
(40), new lockwashers (39) and capscrews (38).
33
9.
Position strap (45) and install retainer (44), and two
capscrews (43) on lower mount bracket (42).
10.
Repeat steps 7 through 9 for other side of radiator
(10).
11.
Tighten all mounting hardware, remove lifting device
and two lifting links (33).
10
12.
Install two new lockwashers (32) and capscrews (31)
on tank.
43
45
42
386-682
44
41
40
39
37
34
38
36
35
13.
Connect water pressure relief line to top of radiator
10 23
24,25,26
(10).
27,28,29,30
14.
Install two shields (30) and two shrouds (29) with ten
(HIDDEN)
washers (28) and capscrews (27).
15.
Install radiator cover (23) with three new lockwashers
(26), washers (25) and capscrews (24).
16.
Install two washers (22), new lockwashers (21) and
capscrews (20) on one side of radiator cover (23).
17.
Repeat step 16 on other side of radiator cover (33).
18.
Install new gasket (19), elbow flange (16) and four
new lockwashers (18) and capscrews (17) to bottom of
radiator (10).
19.
Install hose (15) and two hose clamps (14) on elbow
flange (16) at bottom of radiator (10).
20.
Install new gasket (13), elbow flange (9) and two new
20,21,22
386-126
lockwashers (12) and capscrews (11) to top of radiator
(10).
21.
Install hose (8), two hose clamps (7) on elbow flange
(9) at top of radiator (10).
0063 00-8
|
|
Privacy Statement - Press Release - Copyright Information. - Contact Us |