 |
|||
|
|
|||
|
|
|||
| ||||||||||
|
|
 TM 9-2320-312-24-2
Truck Engine
Disassembly and Assembly Section
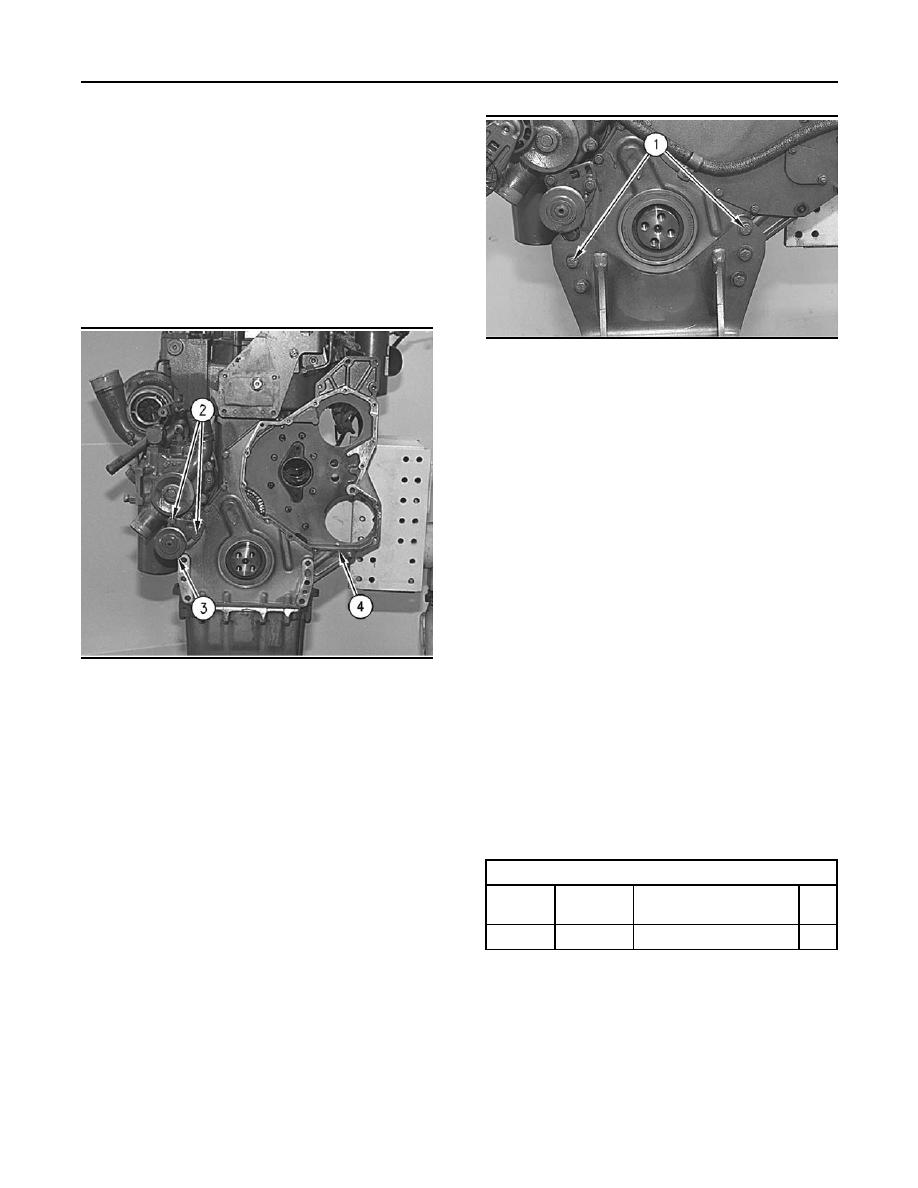
4. Remove the bolts that fasten front housing (4)
to the cylinder block and to the engine oil pan.
Remove front housing (4). Clean the sealant from
front housing (4) and the cylinder block.
i01336821
Housing (Front) - Install
SMCS Code: 1151-012
Installation Procedure
g00615717
Illustration 165
7. Position the front engine support and install five
bolts (1).
8. Install any external components, if equipped.
End By:
a. Install the camshaft. Refer to Disassembly and
Assembly, "Camshaft - Install".
b. Install the crankshaft front seal. Refer to
Disassembly and Assembly, "Crankshaft Front
Seal - Install".
c. Install the crankshaft vibration damper. Refer to
Disassembly and Assembly, "Vibration Damper
and Pulley - Remove and Install".
g00612359
Illustration 164
i01747653
1. Clean the joint face on front housing (4) with
Camshaft Idler Gear - Remove
8T-9011 Component Cleaner.
and Install
2. Apply 4C-9500 Quick Cure Primer to the joint
face. Allow the primer to dry for at least three to
SMCS Code: 1206-010
five minutes.
Removal Procedure
Note: Do not allow the 1U-8846 Sealant to seal the
main oil passage on front housing (4).
Table 35
3. Apply 1U-8846 Sealant to the joint face. Spread
Required Tools
the sealant uniformly. Front housing (4) must
Part
be installed within ten minutes of applying the
Tool
Part Description
Qty
Number
sealant.
1
1P-0520
A
Driver Group
4. Position front housing (4) on the cylinder block.
Start By:
5. Install the bolts that fasten front housing (4) to
the cylinder block and the engine oil pan.
a. Remove the front housing. Refer to Disassembly
and Assembly, "Housing (Front) - Remove".
6. Position belt tightener (3) and install two bolts (2).
|
|
Privacy Statement - Press Release - Copyright Information. - Contact Us |
