 |
|||
|
|
|||
|
|
|||
| ||||||||||
|
|
 25
TM 9-2320-312-24-2
Truck Engine
Disassembly and Assembly Section
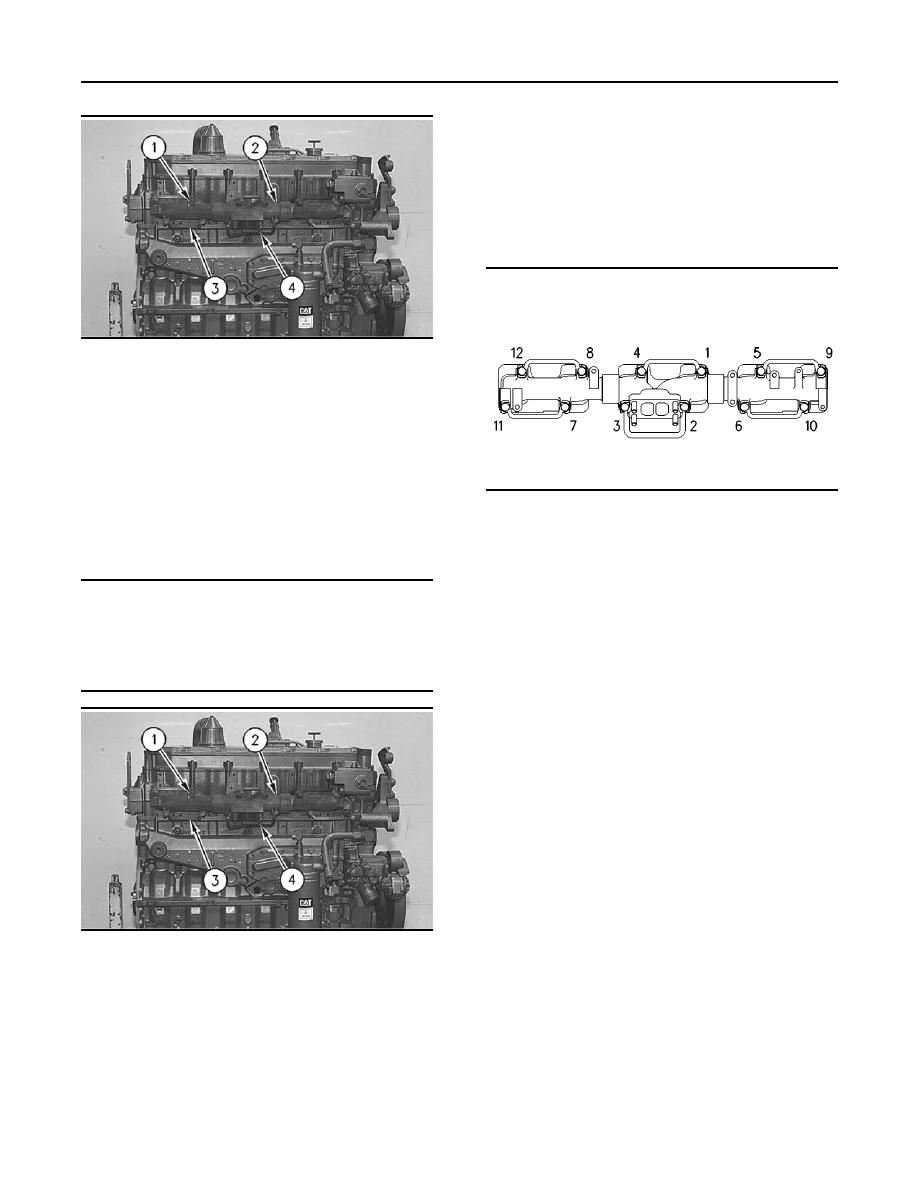
3. Apply 2P-2333 High Temperature Sealer to the
outside diameter of the male ends of the exhaust
manifold (2). Assemble exhaust manifold (2) and
remove the excess sealer from the joints.
4. Apply 5P-3931 Anti-Seize Compound to the
threads of bolts (1). Position the gaskets and
exhaust manifold (2) on the cylinder head
assembly. Install locks (3) and bolts (1).
g00617696
Illustration 56
(2), and the gaskets from the cylinder head
assembly.
pieces.
3. Remove mounting studs (4) from exhaust
g00617739
Illustration 58
manifold (2), if necessary.
5. Tighten bolt (1) through bolt (12) in a numerical
Installation Procedure
sequence.
Tighten bolts to the following torque. .. 4 1 Nm
NOTICE
(35 9 lb in)
Excessive use of sealant can cause damage to com-
ponents.
6. Tighten bolt (1) through bolt (12) in a numerical
sequence.
To avoid component damage use only the amount of
sealant necessary for the application.
Tighten bolts to the following torque. .. 45 5 Nm
(33 4 lb ft)
7. Bend the locking tab over the flat of each bolt
head.
8. Apply 5P-3931 Anti-Seize Compound to the
threads of mounting studs (4).
9. Install mounting studs (4). Tighten mounting
studs (4) to a torque of 35 5 Nm (26 4 lb ft).
Note: Prior to starting or running the engine, allow
the sealant in the exhaust manifold joints to air dry
for 24 hours.
g00617696
Illustration 57
End By:
1. Inspect the condition of the gasket. Replace the
a. Install the turbocharger. Refer to Disassembly
gasket, if necessary.
and Assembly, "Turbocharger - Install".
2. Mounting surfaces should be clean, and dry. In
addition, mounting surfaces should be free of
any other foreign matter.
|
|
Privacy Statement - Press Release - Copyright Information. - Contact Us |
