 |
|||
|
|
|||
|
Page Title:
FAN CLUTCH LINING REMOVAL |
|
||
| ||||||||||
|
|
 TM 9-2320-312-24-1
COOLING FAN AND FAN CLUTCH MAINTENANCE - CONTINUED
0141 00
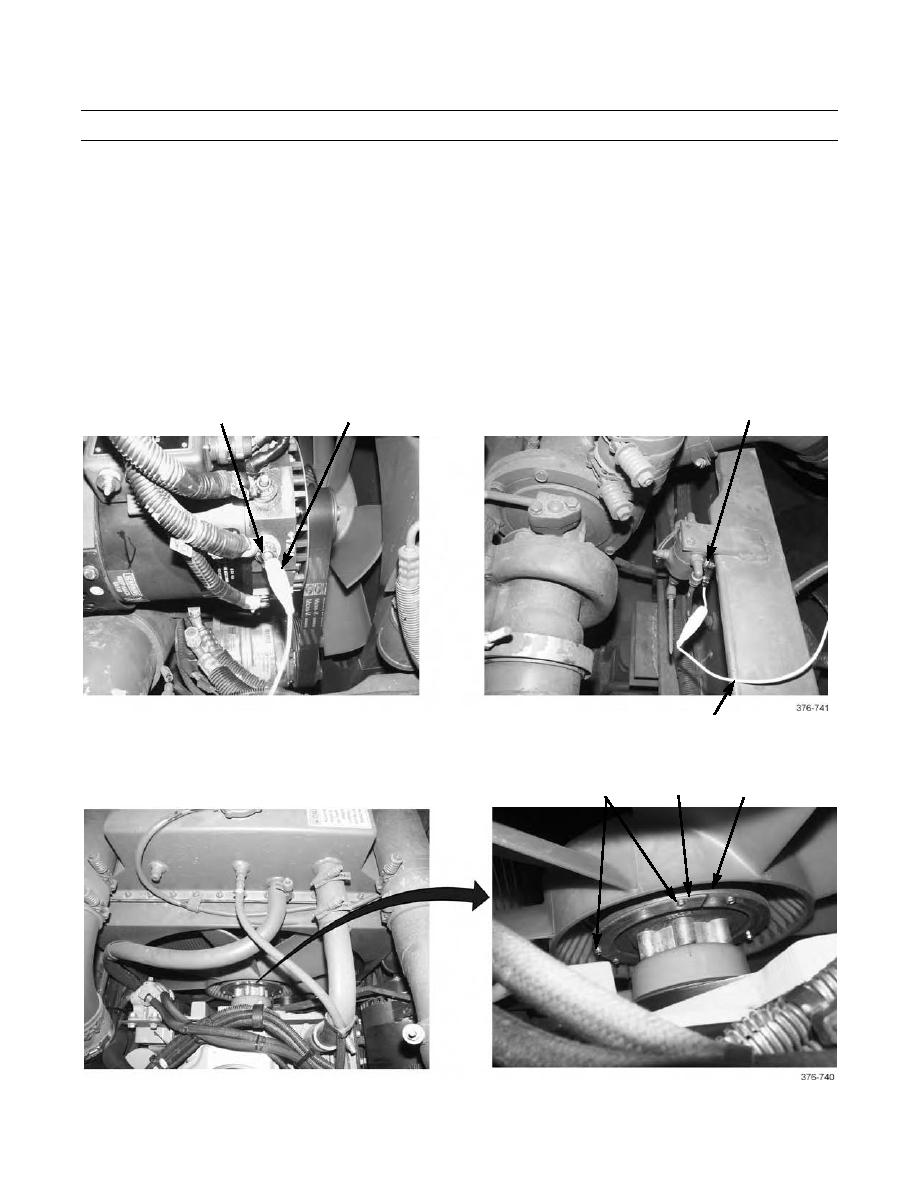
FAN CLUTCH LINING REMOVAL
NOTE
Fan clutch lining replacement is performed on vehicle.
1.
As required, depress service brake pedal until reading on dual air pressure gauge on instrument panel is 90 psi (621
kPa).
2.
Start engine (TM 9-2320-312-10) and charge air system until gauge reads120 psi (827 kPa). Shut down engine.
3.
Tilt cab (TM 9-2320-312-10).
4.
Connect a jumper wire (2) between 12V terminal (1) of alternator and fan clutch solenoid terminal (3), closest to
right frame rail. When jumper connection is made, fan clutch will disengage and fan will spin freely. Leave jumper
wire in place.
3
1
2
2
5.
Remove six screws (4) and three mounting plates (5) from housing of fan clutch (6). Discard screws.
5
4
6
0141 00-2
|
|
Privacy Statement - Press Release - Copyright Information. - Contact Us |
