 |
|||
|
|
|||
|
Page Title:
CIRCUIT BREAKER REMOVAL - CONTINUED |
|
||
| ||||||||||
|
|
 TM 9-2320-312-24-1
CIRCUIT BREAKERS AND RELAYS REPLACEMENT - CONTINUED
0095 00
CIRCUIT BREAKER REMOVAL - CONTINUED
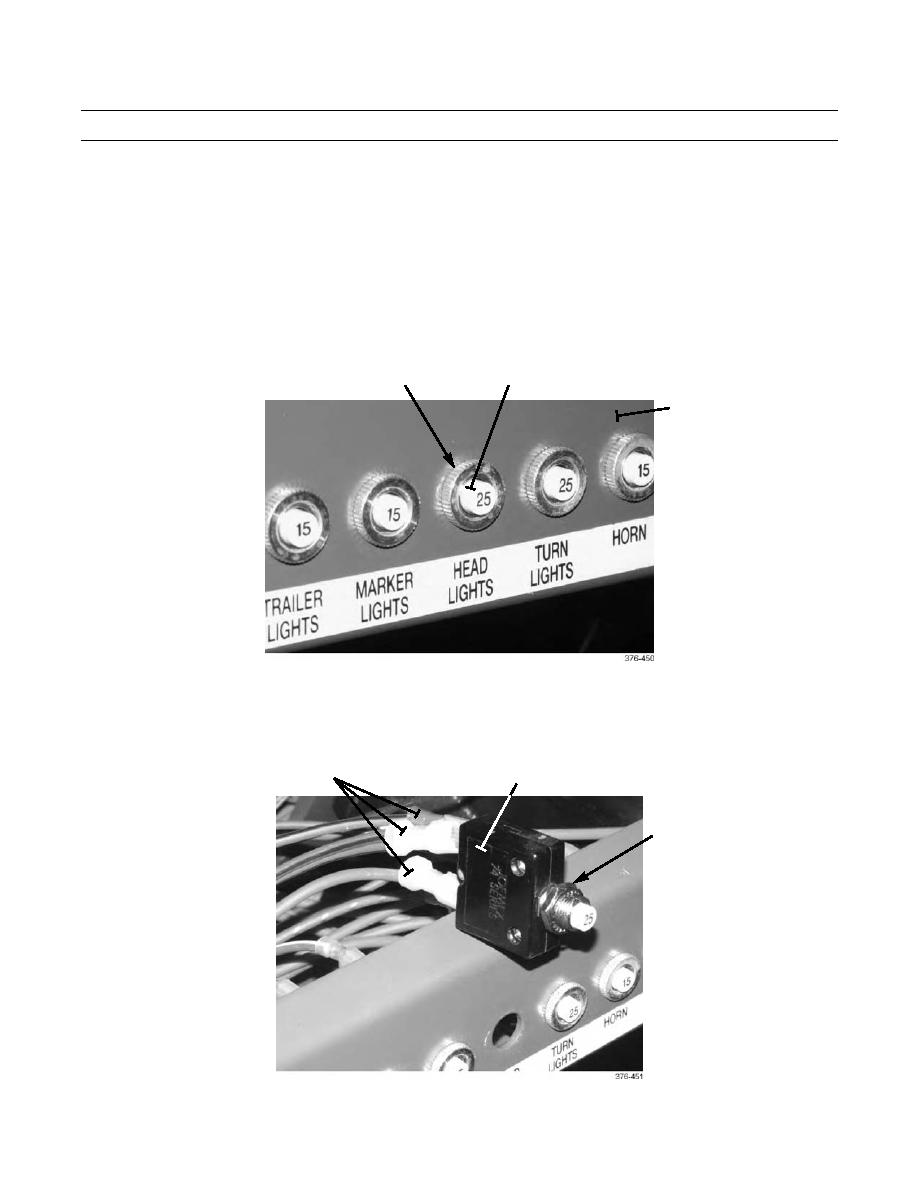
NOTE
Circuit breakers at edge of instrument panel frame are replaced the same way, but may have either two
or three wires attached. Perform the following steps to replace each of 22 circuit breakers. "HEAD
LIGHTS" circuit breaker is shown.
Ensure that circuit breaker is replaced with circuit breaker of the SAME capacity.
2.
Remove ring (5) from front of circuit breaker (6) and pull circuit breaker out from rear of instrument panel frame (7).
6
5
7
3.
Remove lockwasher (9) and nut (10) from circuit breaker (6).
4.
Disconnect three wires (8) of cab wiring harness from rear of circuit breaker (6).
8
6
9,10
0095 00-2
|
|
Privacy Statement - Press Release - Copyright Information. - Contact Us |
