 |
|||
|
|
|||
|
|
|||
| ||||||||||
|
|
 TM 9-2320-303-24-2
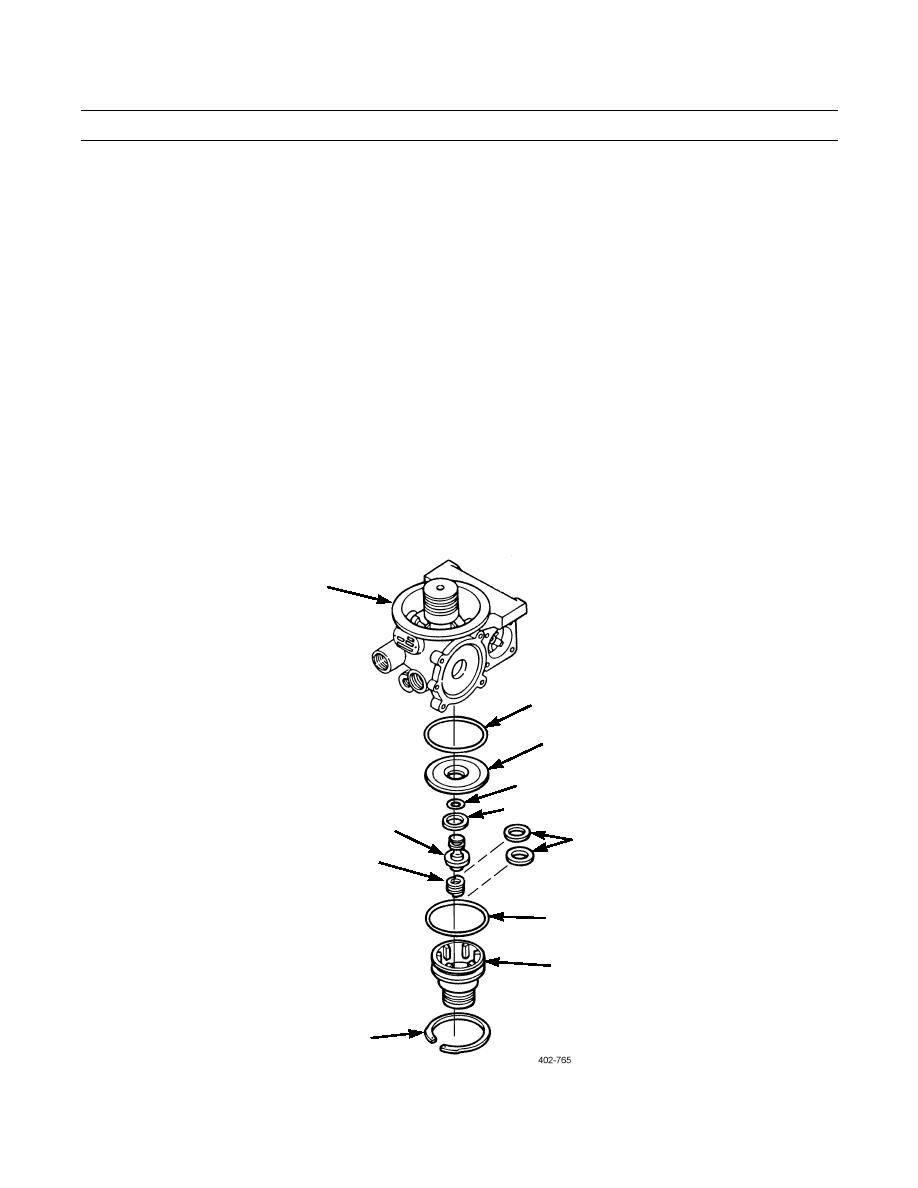
AIR DRYER REPAIR - CONTINUED
0262 00
DISASSEMBLY - CONTINUED
NOTE
Perform steps 10 through 14 to remove PURGE VALVE ASSEMBLY.
10.
Remove retaining ring (25) and valve head (24) from air dryer (3).
NOTE
Two shims, one at each end of spring, will be removed if equipped.
11.
Remove spring (26), two shims (22), and O-ring (23) from valve head (24). Discard O-ring.
12.
Remove piston (27) and piston seat (21) from air dryer (3).
13.
Remove O-ring (20) from piston (27). Discard O-ring.
NOTE
Note position of washer for installation.
14.
Remove washer (19) and O-ring (18) from air dryer (3). Discard O-ring.
3
18
19
20
21
27
22
26
23
24
25
0262 00-4
|
|
Privacy Statement - Press Release - Copyright Information. - Contact Us |
