 |
|||
|
|
|||
|
|
|||
| ||||||||||
|
|
 TM 9-2320-303-24-2
FRONT AXLE REPLACEMENT - CONTINUED
0249 00
INSTALLATION - CONTINUED
3.
Install pin (13) in spacer (14).
4.
Coat top of spacer (14) with sealing compound and install spacer on top of shim (9).
5.
Install axle (12).
6.
Coat bottom and U-bolt saddles of two axle stops (7) with antiseize compound.
7.
Install two axle stops (7), four U-bolts (8), eight washers (11), and eight nuts (10) on axle (12). Tighten nuts to 380-460
lb-ft (515-624 Nm).
8.
Remove floor jack from under vehicle.
9.
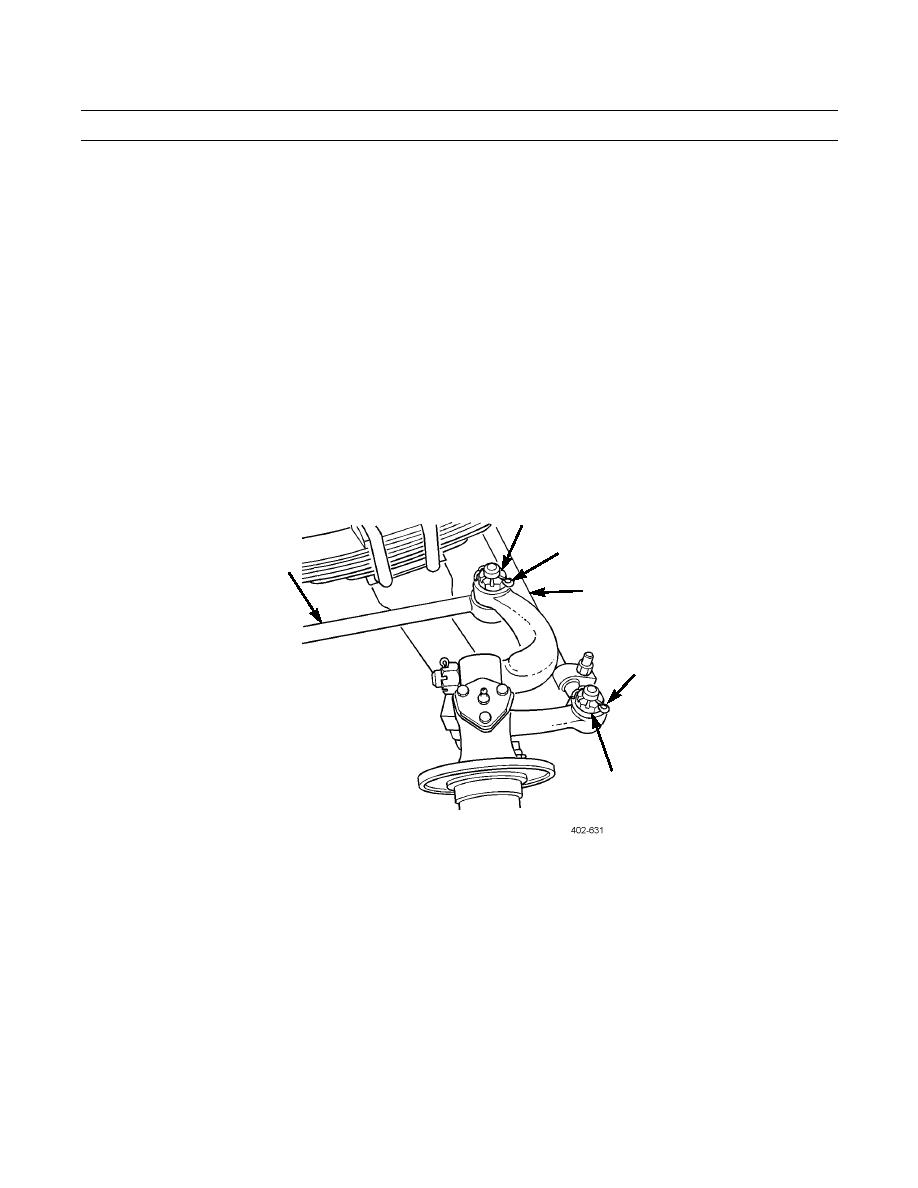
Install tie rod (4) and two castellated nuts (5). Tighten nuts to 165-180 lb-ft (224-244 Nm).
10.
Install two new cotter pins (6) through two castellated nuts (5).
11.
On left side, install steering arm (1) and castellated nut (3). Tighten nut to 165-180 lb-ft (224-244 Nm).
12.
Install new cotter pin (2) through castellated nut (3).
13.
Install ABS sensor (WP 0091 00).
14.
Install front brake spider and brake chamber bracket (WP 0123 00).
2
3
1
4
5
6
END OF WORK PACKAGE
0249 00-3/4 blank
|
|
Privacy Statement - Press Release - Copyright Information. - Contact Us |
