 |
|||
|
|
|||
|
|
|||
| ||||||||||
|
|
 TM 9-2320-303-24-2
STARTER REPAIR - CONTINUED
0235 00
DISASSEMBLY - CONTINUED
CAUTION
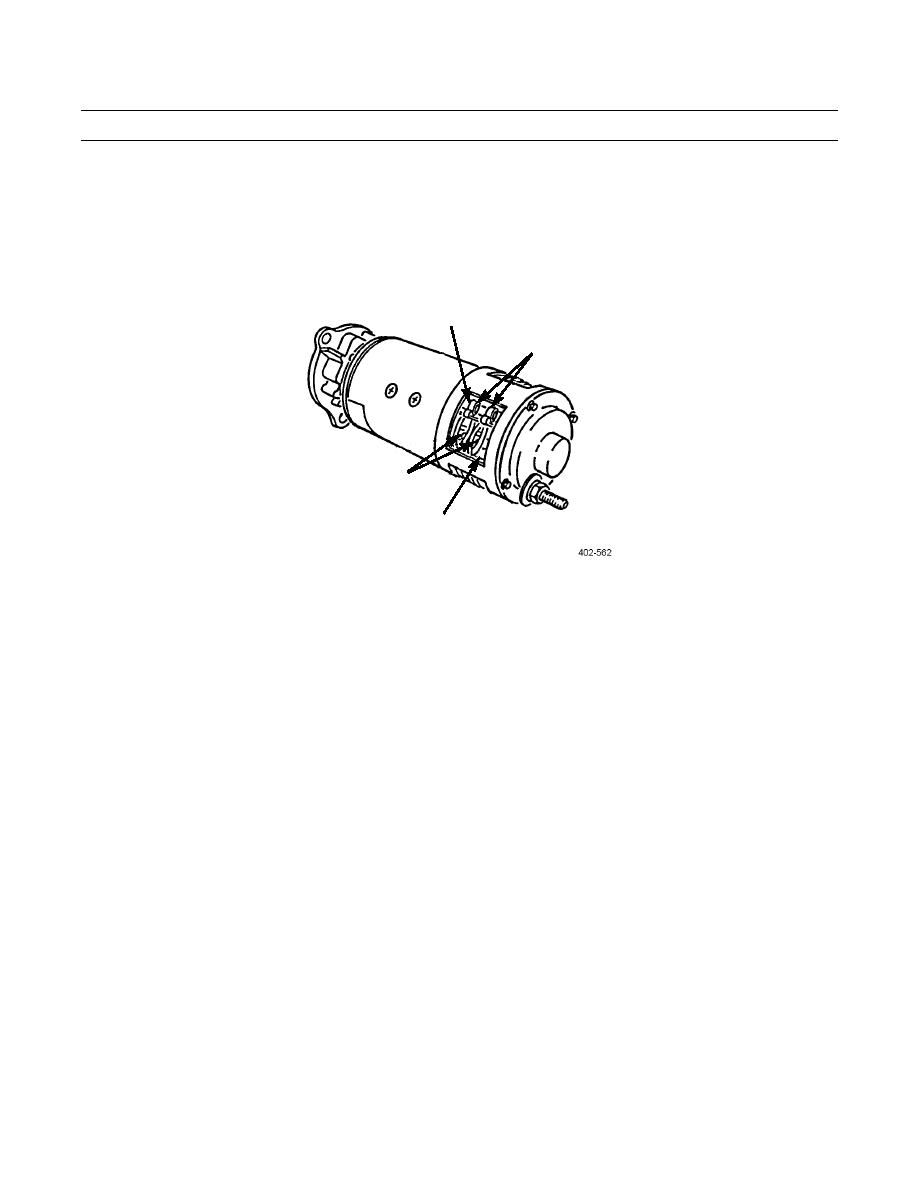
Do not pull brush leads until spring tension is relieved to prevent damage to equipment.
2.
Remove eight screws (7) and four lock plates (6).
3.
Pull two springs (5) upward and remove eight brushes (4).
4
5
7
6
NOTE
Mark commutator housing and field ring prior to removing commutator housing to aid in installation.
4.
Remove four screws (34), lockwashers (33), commutator housing (12), insulation washer (29), and washer (28) from
field ring (26). Discard lockwashers.
5.
Remove four screws (25), lockwashers (24), washers (23), eight insulation washers (21), and four insulation bushings
(22). Discard lockwashers.
6.
Remove four brush holders (31), insulation washers (19), and ground jumper (30) from commutator housing (12).
7.
Remove nut (8), four washers (9), insulator (10), and packing (11) from ground stud (20). Discard packing.
8.
Remove ground stud (20) from commutator housing (12).
9.
Remove packing (16), insulation washer (17), and washer (18) from ground stud (20). Discard packing.
10.
If damaged, remove bushing (15) from commutator housing (12).
11.
Remove packing (27), pipe plug (14), and felt wick (13) from commutator housing (12). Discard packing.
12.
If damaged, remove bushing (32) from commutator housing (12).
0235 00-2
|
|
Privacy Statement - Press Release - Copyright Information. - Contact Us |
