 |
|||
|
|
|||
|
|
|||
| ||||||||||
|
|
 TM 9-2320-303-24-2
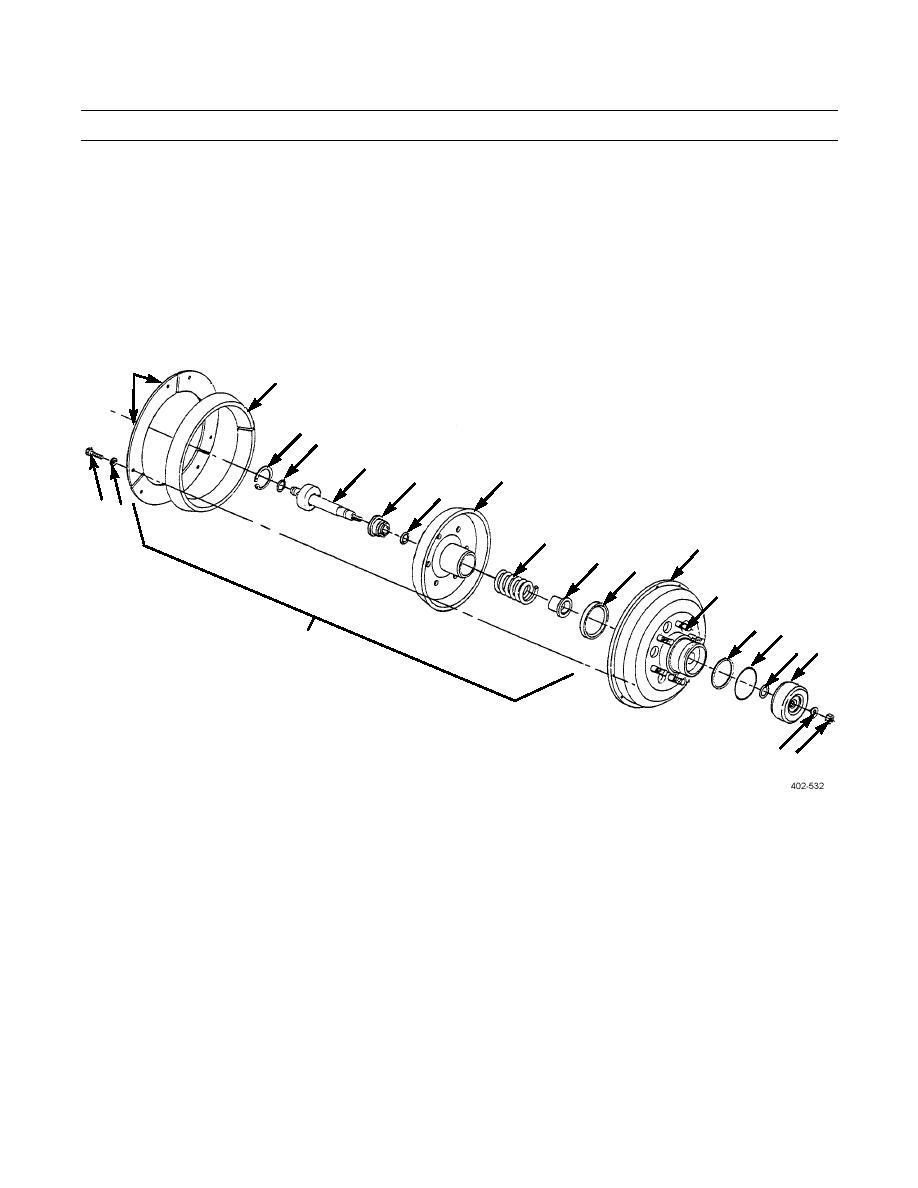
FAN CLUTCH REPAIR - CONTINUED
0232 00
DISASSEMBLY - CONTINUED
3.
Remove six screws (22), lockwashers (21), three retaining plates (8), and lining (9) from shaft assembly (15). Discard
screws, lockwashers, and lining.
4.
Release "C" clamps slowly to relieve spring tension and remove housing (19), seal (18), end cap (17), and spring (16)
from shaft assembly (15). Discard seal and spring.
5.
Remove retaining ring (10) and piston assembly (12).
6.
Remove two packings (11 and 14) and spring carrier (13) from piston. Discard packings.
7.
If damaged, remove and discard studs (20) from housing (19).
8
9
10
11
12
15
13
14
65
16
19
17
18
20
1
2
7
34
65
ASSEMBLY
1.
If removed, install new studs (20) in housing (19).
2.
Install two new packings (11 and 14) and spring carrier (13) to piston (12).
3.
Install piston assembly (12) and retaining ring (10).
4.
Install new spring (16), end cap (17), new seal (18), and housing (19) on shaft assembly (15).
5.
Compress housing (19) and shaft assembly (15) using two "C" clamps and install new lining (9), three retaining plates
(8), six new lockwashers (21), and new screws (22) in shaft assembly.
6.
Remove two "C" clamps from opposite sides of clutch assembly (7).
7.
Install new dust seal (1), new packing (2), new seal (3), cylinder (4), new tab washer (6), and new nut (5) on clutch
assembly (7).
8.
Install fan clutch (WP 0049 00).
END OF WORK PACKAGE
0232 00-2
|
|
Privacy Statement - Press Release - Copyright Information. - Contact Us |
