 |
|||
|
|
|||
|
|
|||
| ||||||||||
|
|
 TM 9-2320-303-24-1
HOOD ADJUSTMENT - CONTINUED
0180 00
ADJUSTMENT- CONTINUED
14.
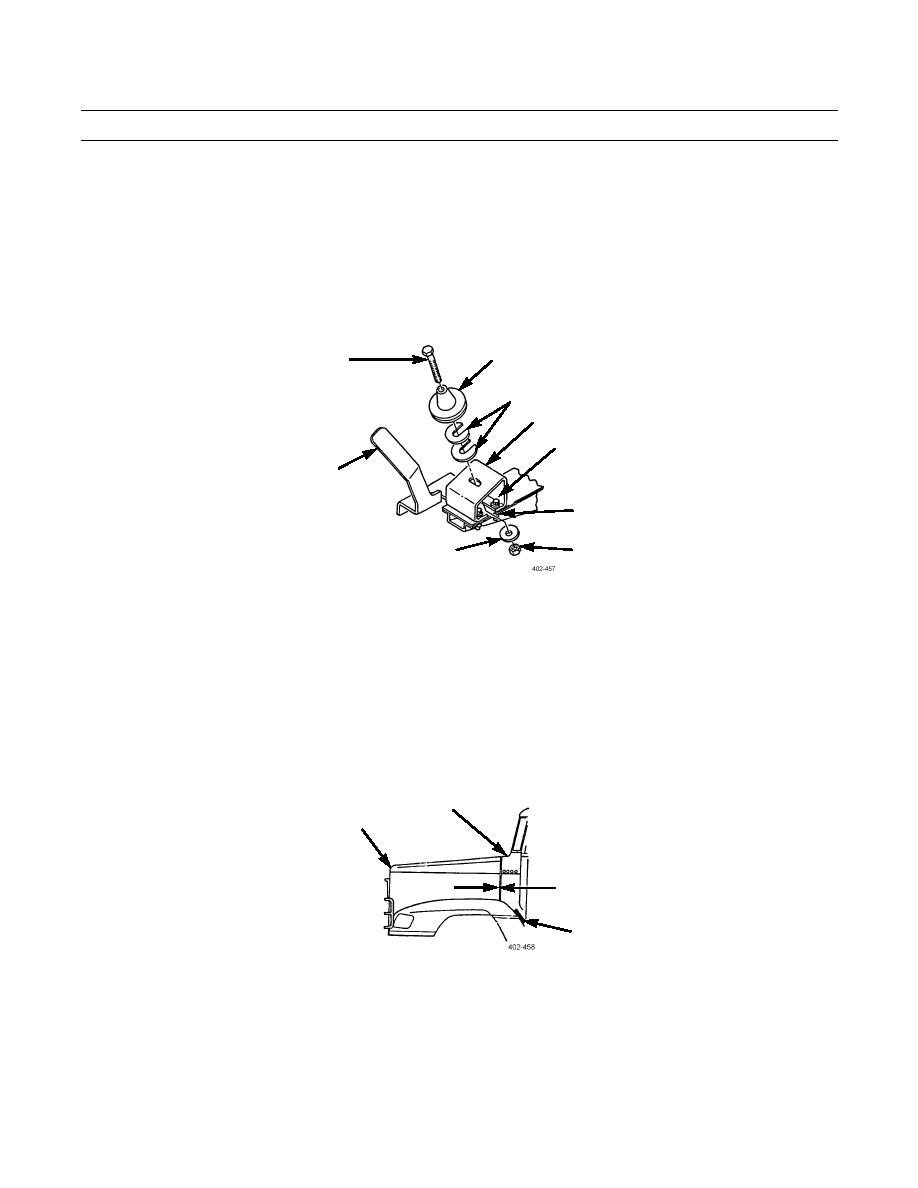
Remove hood guide (15) from under locator bracket (14). Install hood guide on top of locator bracket.
15.
Install four screws (11), washers (12), and new locknuts (5) just tight enough to allow forward or backward adjustment.
16.
Install locator (10), bolt (9), washer (13), and new locknut (4) just tight enough to allow for installation of spacers (8).
17.
Repeat steps 8 through 11 until seam alignment is attained.
18.
Tighten locknut (4) just enough to allow side-to-side movement for adjustment.
10
9
8
14
11
15
5,12
4
13
19.
Repeat steps 9 through 18 for opposite side, if necessary.
20.
Repeat steps 5 and 6.
NOTE
Perform step 21 only if required.
21.
Close hood (1) and fasten two hood latches (7).
22.
Measure and note gap between rear edge of hood (1) and cowl (2) at 1 in (25.4 mm) below seam and at 12 in (305 mm)
below seam. Gap should be 1/2-3/4 in (13-19 mm).
2
1
1/2-3/4 in (13-19 mm)
7
NOTE
Perform steps 23 through 25 if gap is not correct.
Repeat step 23 for both nuts.
23.
Loosen locknut (6) just enough to allow for installation or removal of spacers (16).
0180 00-4
|
|
Privacy Statement - Press Release - Copyright Information. - Contact Us |
