 |
|||
|
|
|||
|
|
|||
| ||||||||||
|
|
 TM 9-2320-303-24-1
HOOD ADJUSTMENT - CONTINUED
0180 00
ADJUSTMENT- CONTINUED
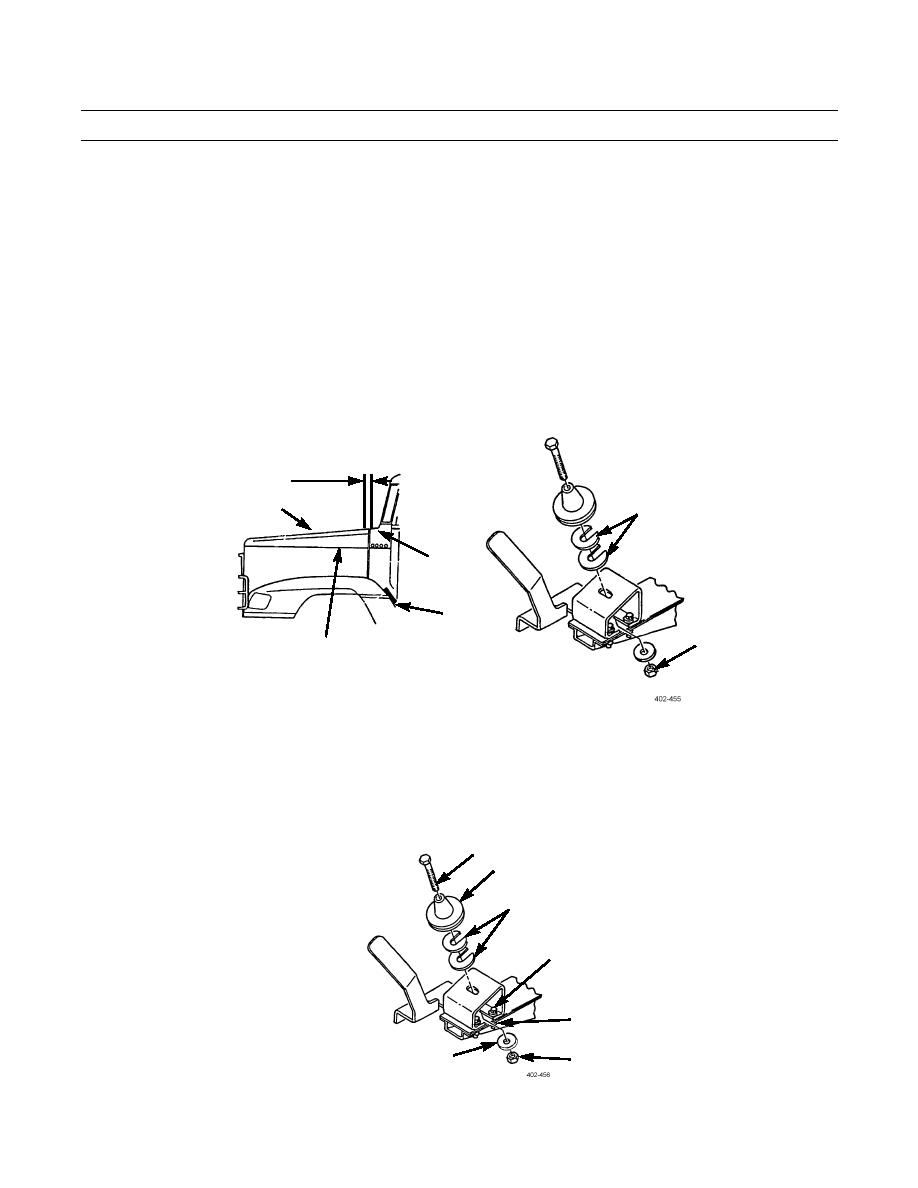
6.
Measure gap between hood (1) and cowl (2) 8 in (203 mm) below seam on both sides. Gap should be 1/2-3/4 in (13-19
mm). If gap is incorrect, move hood (1) forward or backward until gap is correct on both sides.
7.
Check seams on both sides of hood (1) and cowl (2) for alignment. If seams are not aligned, note distance between
seams.
NOTE
When performing step 8, use care not to disturb adjustment performed in step 6.
8.
Tilt hood (1) to fully open position.
9.
Loosen locknut (4) just enough to allow installation or removal of spacers (8), as necessary.
10.
Install or remove spacers (8) to raise or lower hood (1) to align seams.
11.
Close hood (1) and repeat steps 7 through 10 until seam is aligned.
1/2-3/4 IN (13-19 MM)
CLEARANCE
1
8
2
7
4
SEAM
NOTE
Perform steps 12 through 20 only if all spacers have been removed and seam is still not in alignment.
12.
Remove locknut (4), washer (13), bolt (9), and locator (10). Discard locknut.
13.
Remove four locknuts (5), washers (12), and screws (11). Discard locknuts.
9
10
8
11
5,12
13
4
0180 00-3
|
|
Privacy Statement - Press Release - Copyright Information. - Contact Us |
