 |
|||
|
|
|||
|
|
|||
| ||||||||||
|
|
 TM 9-2320-302-20-2
UTILITY LIGHT MAINTENANCE (M915A3 OLD MODEL) - CONTINUED
0108 00
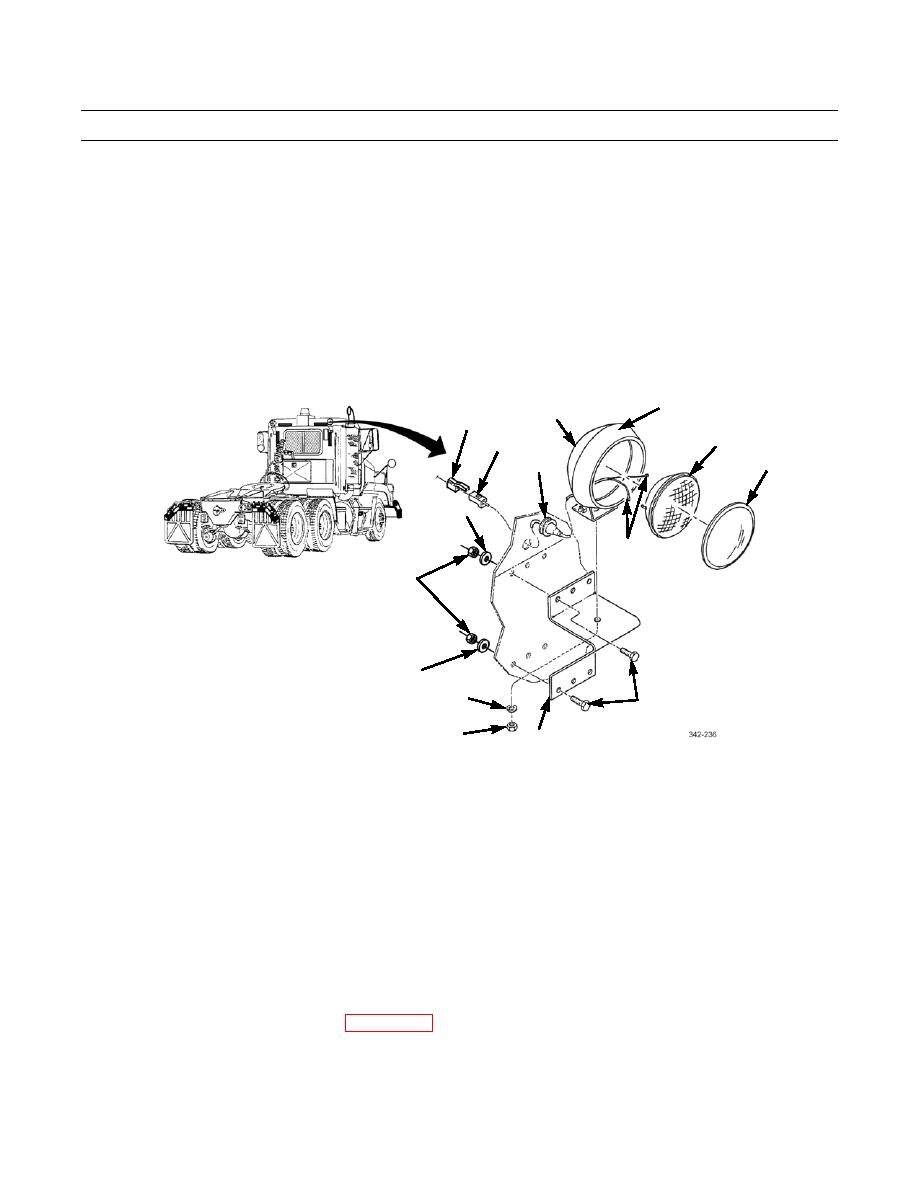
LIGHT REMOVAL
1.
Disconnect utility light wiring connector (7) from cab wiring connector (6).
2.
Remove rubber grommet (8) and pull utility light wiring out from inside cab.
3.
Remove locknut (11), lockwasher (12), and utility light (1) from mounting bracket (10). Discard locknut and lock-
washer.
NOTE
Perform step 4 only if bracket is damaged.
4.
Remove six screws (9), washers (13), locknuts (14), and mounting bracket (10) from cab. Discard locknuts.
2
1
6
3
7
4
8
13
5
14
13
12
9
11
10
LIGHT INSTALLATION
NOTE
Perform step 1 only if mounting bracket was removed.
1.
Install mounting bracket (10) on cab with six screws (9), washers (13), and new locknuts (14).
2.
Install light (1) on mounting bracket (10) with new locknut (11) and lockwasher (12).
3.
Feed utility light connector (7) through cab access and connect to cab wiring harness (6). Install grommet (8).
LAMP INSTALLATION
1.
Connect two wires (5) to lamp (3). Position lamp in utility light assembly (1) and roll rubber seal (2) over lamp.
2.
Install lens retainer (4) on utility light assembly (1) by rolling back rubber seal (2) edge around edge of lens retainer.
3.
If removed, install cab and head liners (WP 0264 00).
END OF WORK PACKAGE
0108 00-2
|
|
Privacy Statement - Press Release - Copyright Information. - Contact Us |
