 |
|||
|
|
|||
|
|
|||
| ||||||||||
|
|
 TM5-2410-237-34
3-21. VALVE MECHANISM - REPLACE (Cont'd)
(11) Put anti-seize compound on the
threads of capscrews (7).
Install six capscrews and six
washers (8) to brackets (9, 10
and 11) which secure the rocker
shaft (5) to the cylinder head
assembly.
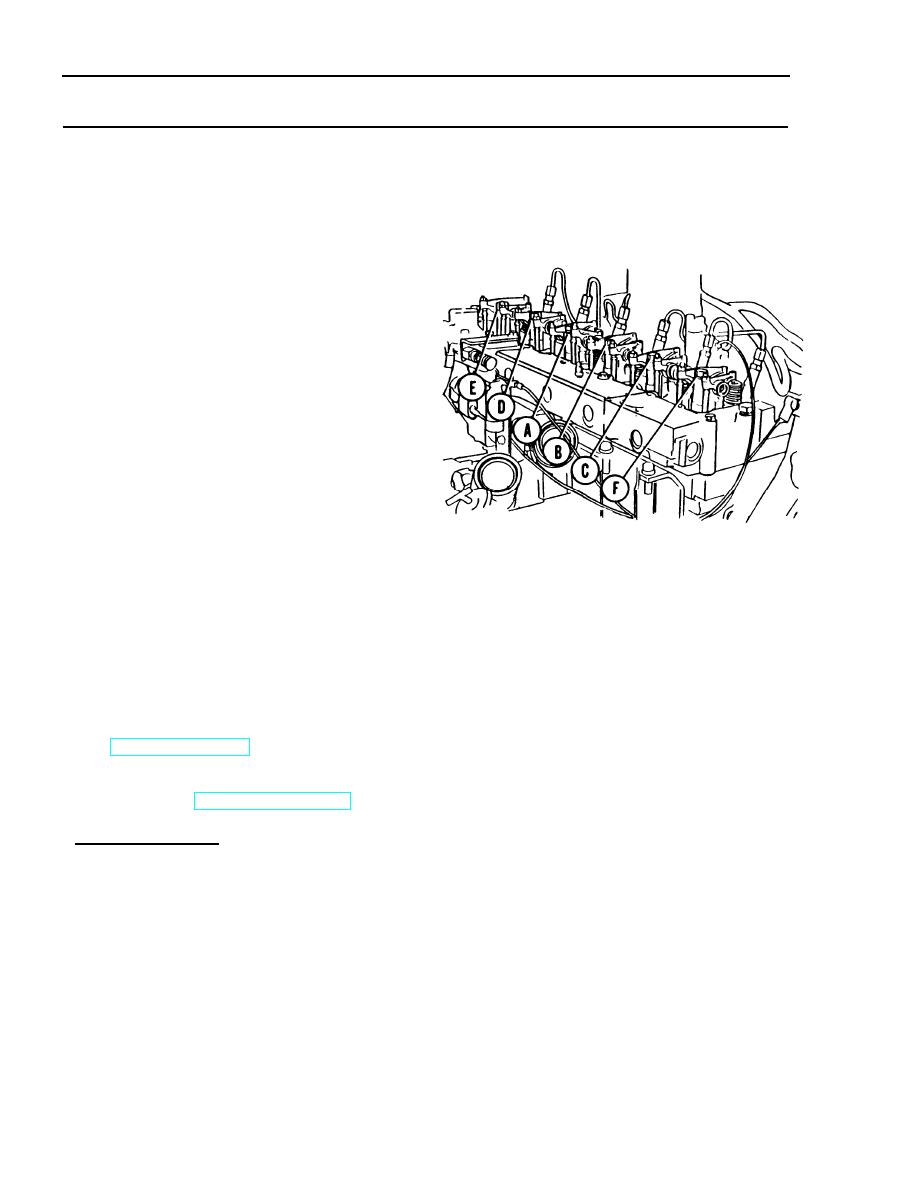
(12) Refer to the illustration and
tighten the capscrews (7) as
follows:
(a) Use a wrench to tighten the
capscrews, in letter sequence,
to torque of 115 lb. ft.
(b) Use a wrench to tighten the
capscrews, in letter sequence,
to torque of 18513 lb. ft.
(c) Again, tighten the capscrews
in letter-sequence, to torque
of 18513 lb. ft.
(13) If new rocker arms (3 or 4) were
installed, install new adjustment
screws (2) and nuts (l). Use a
flat blade screwdriver to install
twelve screws and use a wrench to
install twelve nuts which secure
rocker arms on the rocker shaft
assembly (5) to push rods (6).
(14) Adjust the valve mechanism, see
TM5-2410-237-20.
(15) Install the valve mechanism
cover, see TM5-2410-237-20.
e. Place In Service
Run engine and check for proper
operation.
3-100
|
|
Privacy Statement - Press Release - Copyright Information. - Contact Us |
