 |
|||
|
|
|||
|
|
|||
| ||||||||||
|
|
 TM5-241O-237-34
3-18. PISTONS, CONNECTING RODS, PISTON PINS AND RINGS -
REPLACE/REPAIR (Cont'd)
CAUTION
Never install the ring compressor
without the use of the cylinder
liner as a guide. Damage to the
piston rings could result.
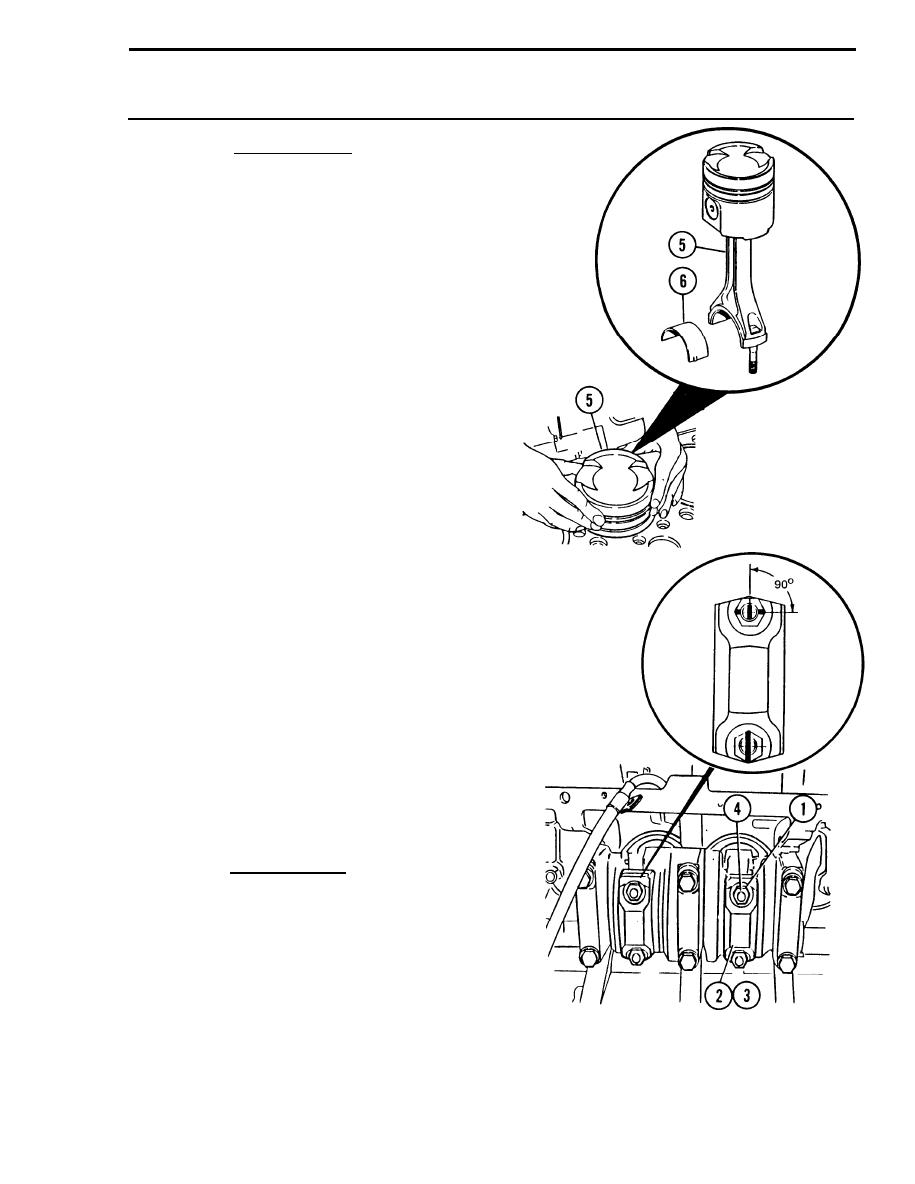
(4) Place ring compressor into
position on the cylinder liner.
(5) Put bearing half (6) and
connecting rod and piston assembly
(5) into the same cylinder it was
removed from by carefully sliding
it through the ring compressor and
at the same time guiding the
connecting rod onto the assembly.
NOTE
Make sure the "V" mark on the
piston is in alignment with the
"V" mark on the cylinder block.
(6) Put clean engine oil on bearings,
bolt threads and surfaces of the
nuts (1) that make contact with
the connecting rod caps (2). Put
connecting rod bearing halves (3)
and caps in position on the
connecting rods. Make sure that
the tabs on the back of bearings
are in the tab grooves of the
connecting rod and cap. Use a
13/16" wrench to install the nuts
onto capscrews (4) and tighten to
a torque of 303 lb. ft. Put a
mark on each nut and the end of
each capscrew. Tighten the nuts
90 more.
CAUTION
When the connecting rod caps are
installed, make sure the number
on the side of the cap is next to
the same number on the side of
the corresponding connecting rod.
3-83
|
|
Privacy Statement - Press Release - Copyright Information. - Contact Us |
