 |
|||
|
|
|||
|
|
|||
| ||||||||||
|
|
 TM5-241O-237-34
3-18. PISTONS, CONNECTING RODS, PISTON PINS AND RINGS -
REPLACE/REPAIR (Cont'd)
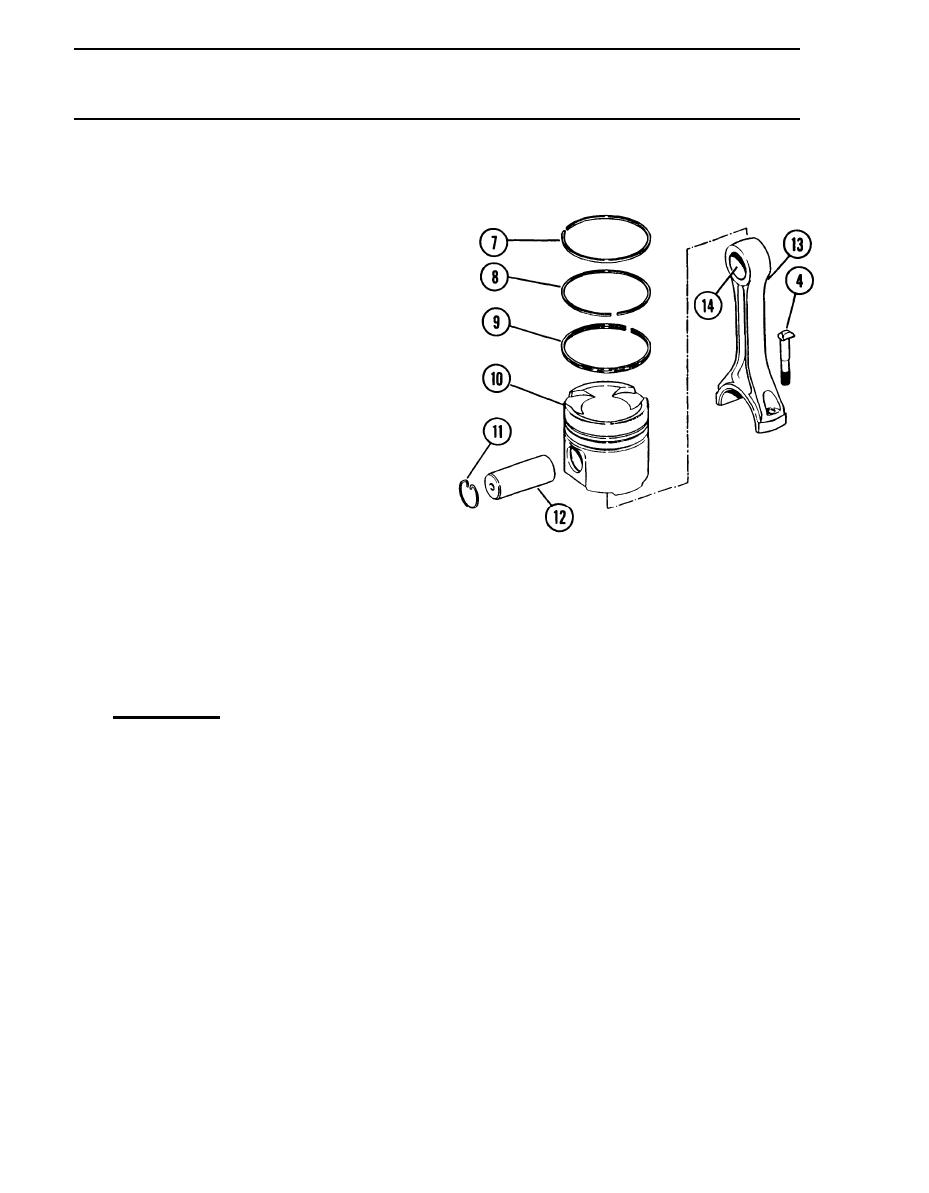
(5) Put connecting rod (13) in
position in the piston (10) with
bearing tab groove and number
identification on the same side
as the "V" mark on the top of the
piston.
(6) Install piston pin (12) and
retaining ring (11) in piston
(10).
NOTE
The oil ring (9) must be
installed on the piston (10)
with the ring end gap 180 from
the oil ring joint.
(7) Install the oil ring (9) on the
piston (1) with tool.
(8) Install the intermediate piston
ring (8) with the side that has
the mark "UP-2" toward the top of
the piston (10) with tool.
(9) Install the top piston ring (7)
with the side that has the mark
"UP-l" toward the top of the
piston (10). Make sure piston
ring end gaps are 90 apart
before the pistons are installed.
Installation
d.
(1) Turn the crankshaft until the
bearing journals for the piston
and connecting rod assembly being
installed are at bottom center.
(2) Put clean engine oil on the
crankshaft journals, inside of
cylinder liners, piston rings and
connecting rod bearings.
(3) Rotate the piston rings so that
the ring openings are
approximately 90 apart from each
other.
3-82
|
|
Privacy Statement - Press Release - Copyright Information. - Contact Us |
