 |
|||
|
|
|||
|
|
|||
| ||||||||||
|
|
 TM5-241O-237-34
3-10. CRANKSHAFT ASSEMBLY - REPAIR/REPLACE (Cont'd)
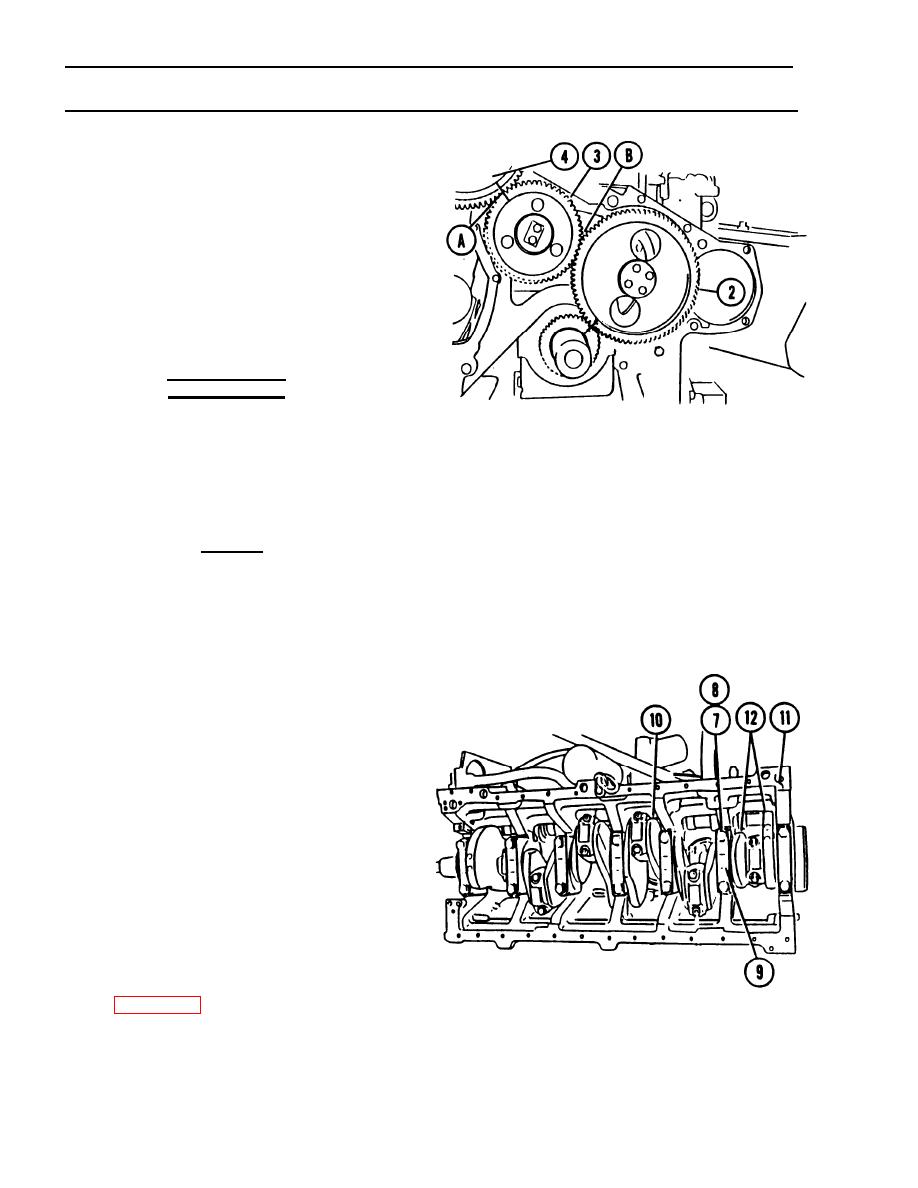
(2) Make a mark on the the teeth of
the fuel pump idler gear (3) and
the fuel pump drive gear (4), in
their engaged location, at
location "A". Make a mark on the
engaged teeth of the fuel pump
idler gear and the camshaft gear
(2) at location "B". This will
help in the correct timing of the
camshaft, for the fuel injection
pump, during crankshaft
installation.
WARNING
Be certain that the crankshaft is
secured properly to a floor jack
before removal of the last two
bearing caps. Failure to follow
these instructions could cause
personal injury.
CAUTION
It is recommended that nylon
straps, or equivalent, be used to
secure the crankshaft on floor
jack to prevent damage to the
machined surfaces of the
crankshaft. Be sure that nothing
metallic comes in contact with
the machined surfaces.
(3) Use a wrench to remove fourteen
capscrews (7) and fourteen
washers (8), then remove seven
bearing caps (9) from crankshaft
(10) in cylinder block (11).
(4) Remove two thrust plates (12)
from the No. 7 main bearing.
(5) Use a floor jack to lower
crankshaft (10) from the cylinder
block (11) and place it in a
clean work area.
(6) Remove the main bearings. See
3-44
|
|
Privacy Statement - Press Release - Copyright Information. - Contact Us |
