 |
|||
|
|
|||
|
|
|||
| ||||||||||
|
|
 TM 5-2410-237-23
WINCH ASSEMBLY REPAIR - CONTINUED
0245 19
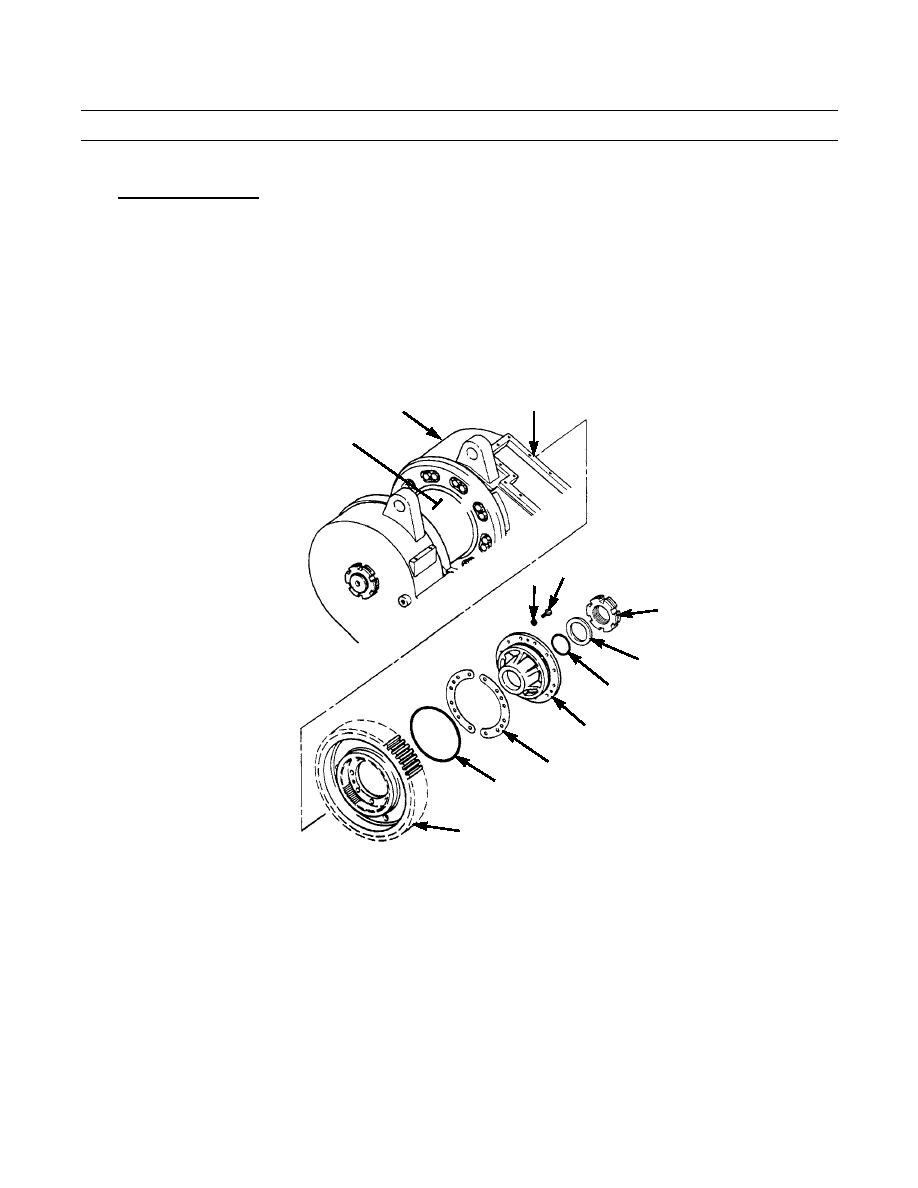
DISASSEMBLY - CONTINUED
2.
Remove Winch Drum.
a.
Use spanner wrench and torque multiplier to remove nut (21) from drum shaft.
b.
Remove washer (22) and O-ring (23) from drum shaft. Discard O-ring.
c.
Remove 12 capscrews (24) and lockwashers (25) from drum support flange (26). Discard lockwashers.
d.
Install three forcing screws of correct size in drum support flange (26). Tighten forcing screws evenly and remove
drum support flange and shims (27). Remove forcing screws from drum support flange. Discard shims.
e.
Remove seal (28) from drum support flange (26). Discard seal.
f.
Place a 1 x 4 in. wood block, 12 in. long, between drive gear (29) and case (5), to hold drum (30) in position.
34 (HIDDEN)
5
30
24
25
21
22
23
26
27
28
29
421-0189
0245 19-5
Change 1
|
|
Privacy Statement - Press Release - Copyright Information. - Contact Us |
