 |
|||
|
|
|||
|
|
|||
| ||||||||||
|
|
 TM 5-2410-237-23
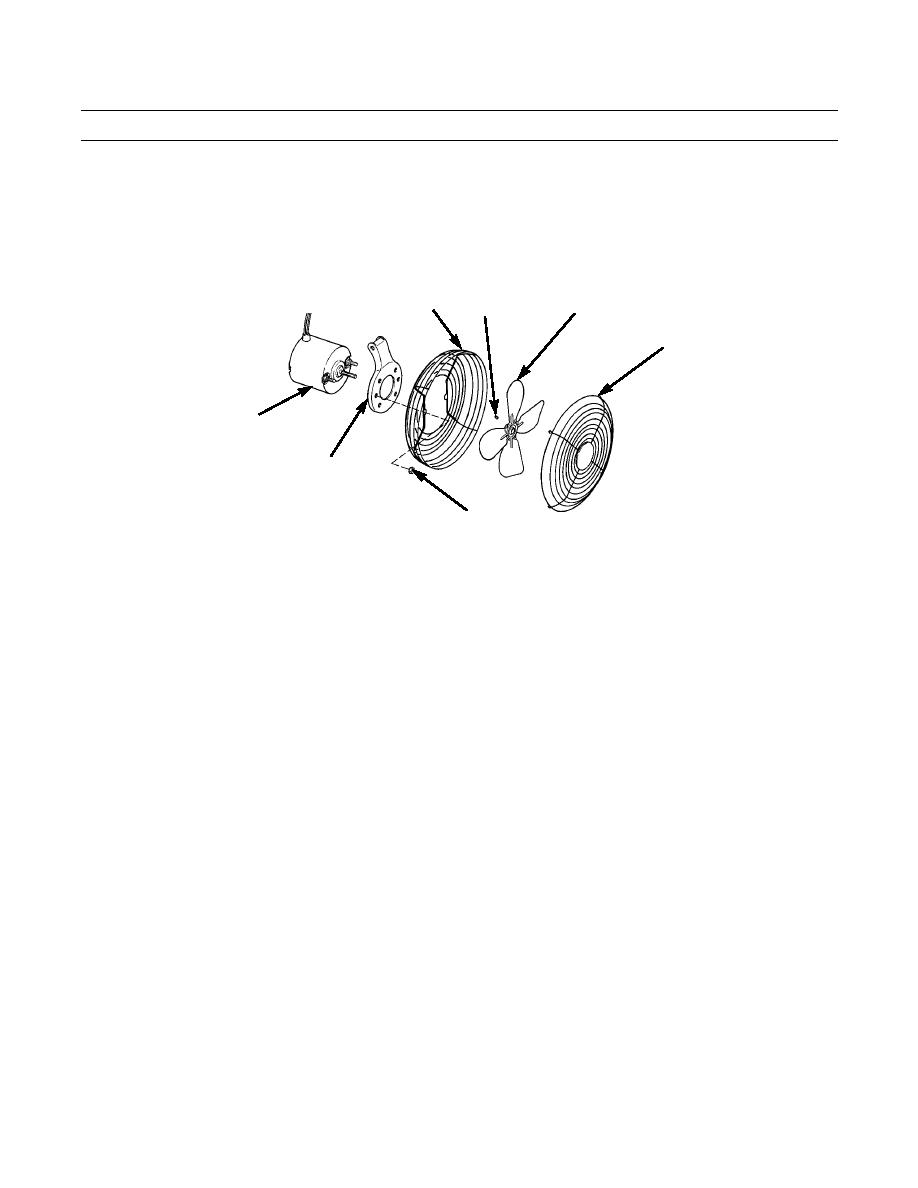
DEFROSTER FAN MAINTENANCE - CONTINUED
0195 00
DISASSEMBLY - CONTINUED
5.
Remove front fan guard (21) from rear fan guard (22).
6.
Remove setscrew (23) and fan blade (24) from shaft of motor (25).
7.
Remove two self-locking nuts (26), rear fan guard (22) and mounting bracket (16) from motor (25). Discard self-locking
nuts.
22
24
23
21
25
16
26
387-470
ASSEMBLY
1.
Install mounting bracket (16) and rear fan guard (22) on motor (25) with two new self-locking nuts (26).
2.
Install setscrew (23) part way into hub of fan blade (24).
3.
Install fan blade (24) on shaft of motor (25) and tighten setscrew (23).
4.
Install front fan guard (21) on rear fan guard (22).
5.
Install bolt (18) through mounting bracket (9) and install spacer (20), angle bracket (15), washer (19) and new self-lock-
ing nut (17) on bolt.
6.
Position mounting bracket (16) with two washers (14) into angle bracket (15) and install capscrew (13), two washers
(14) and new self-locking nut (12).
7.
Connect wire (1) and two wires (11) to switch (8) with three screws (10).
NOTE
Replacement switch comes with new mounting locknut.
8.
Place switch (8) in mounting base (9) and install locknut (7) on switch.
0195 00-3
|
|
Privacy Statement - Press Release - Copyright Information. - Contact Us |
