 |
|||
|
|
|||
|
|
|||
| ||||||||||
|
|
 TM 5-2410-237-23
AMMETER REPLACEMENT - CONTINUED
0082 00
REMOVAL - CONTINUED
NOTE
Tag wires to ensure correct operation.
2.
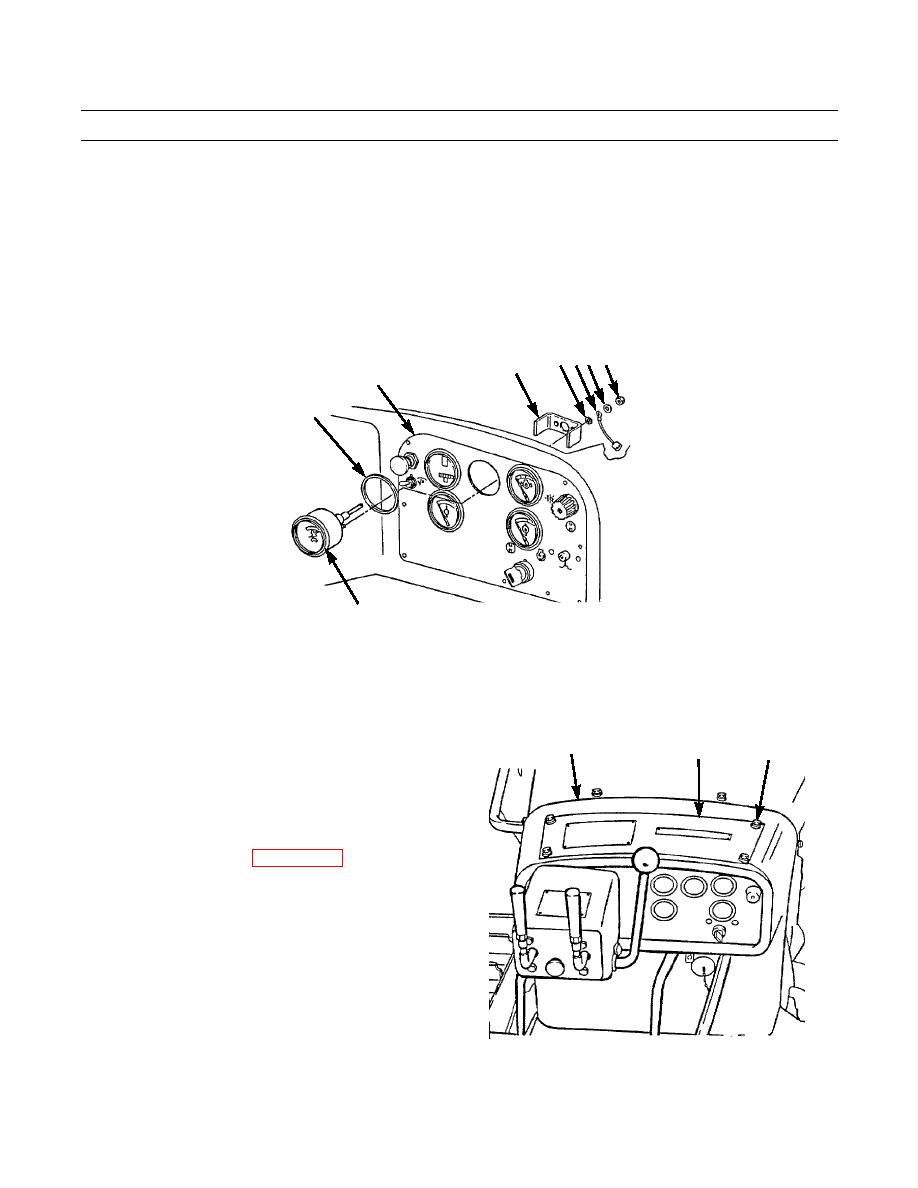
Remove two nuts (6), washers (7), eight wires (8), two lockwashers (9) and bracket (10) from back of ammeter (11).
3.
Slide ammeter with preformed packing (12) out through front of dash assembly (5).
4.
Remove preformed packing (12) from ammeter. Discard preformed packing.
9 87 6
10
5
12
11
387-046
INSTALLATION
1.
Install new preformed packing (12) on ammeter (11).
2.
Insert ammeter (11) into position on dash assembly (5).
3.
Install bracket (10), two new lockwashers (9), eight
5
4
1,2,3
wires (8), two flatwashers (7) and nuts (6) on back on
ammeter (11).
4.
Install cover (4) on top of dash assembly (5) with four
capscrews (1), washers (2) and new lockwashers (3).
5.
Connect battery cables (WP 0101 00).
6.
Turn battery disconnect switch to ON position
(TM 5-2410-237-10).
7.
Start machine and check for proper operation of
ammeter (TM 5-2410-237-10).
387-045
END OF WORK PACKAGE
0082 00-2
|
|
Privacy Statement - Press Release - Copyright Information. - Contact Us |
