 |
|||
|
|
|||
|
|
|||
| ||||||||||
|
|
 TM 5-2410-237-23
GOVERNOR CONTROLS AND LINKAGE MAINTENANCE - CONTINUED
0058 00
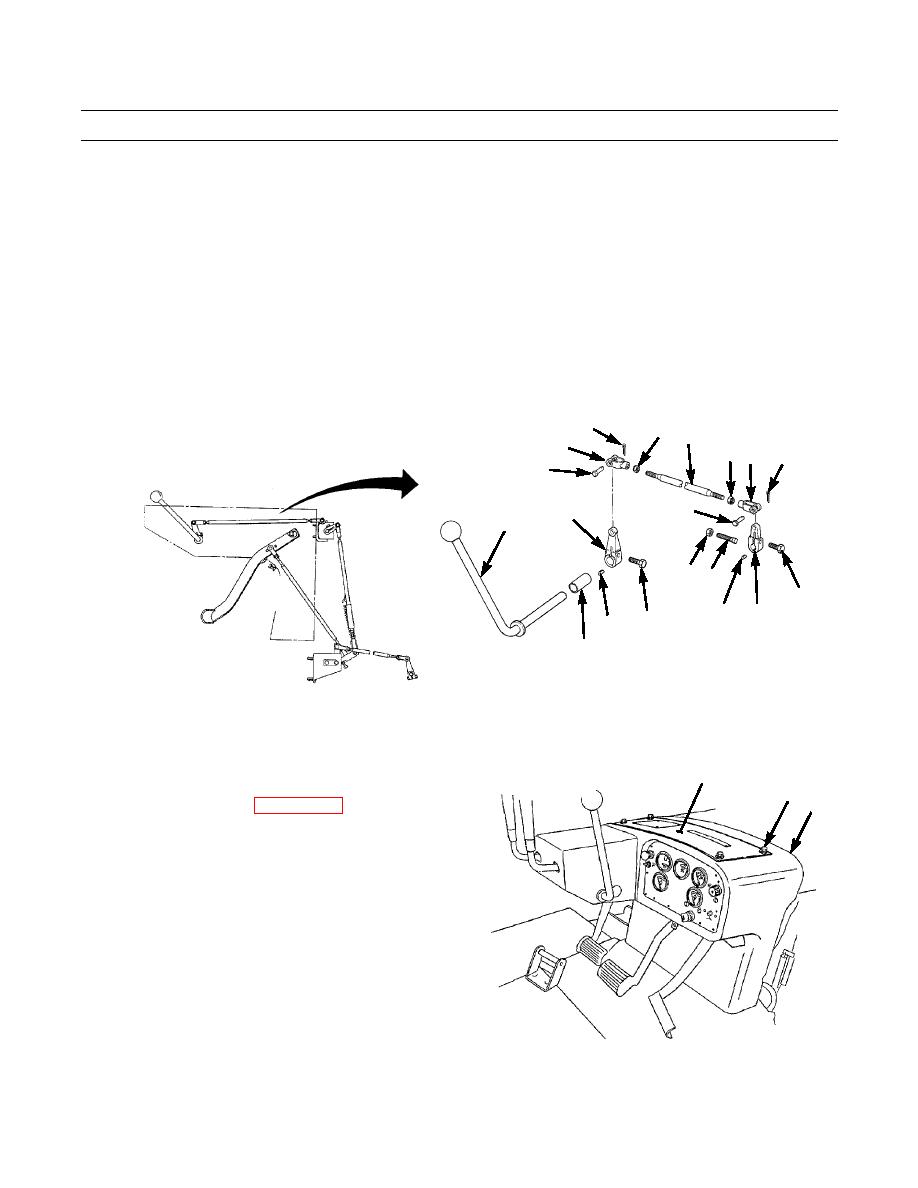
INSTALLATION - CONTINUED
32.
Install key (18) and lever (17) on shaft assembly at upper rear of dash assembly (5).
33.
Install capscrew (19) and nut (20) finger tight at upper rear of dash assembly (5).
34.
Install capscrew (16) in lever (17) on shaft assembly on back of dash.
35.
Insert hand lever (10) through side of dash housing and install spacer (15), key (14) and lever (9) on hand lever shaft.
36.
Install capscrew (13) in lever (9) on hand lever (10).
37.
Install two jam nuts (11) and two rod ends (12) on rod (8). Adjust rod length to 21.54 in. (547 mm). See Adjustment, step
3. Tighten jam nuts against rod ends to secure.
38.
Install rod end (12) on lever (9) at hand lever (10) end with pin (7) and new cotter pin (6).
39.
Repeat step 38 at other end of rod (8) assembly at back of dash assembly (5).
6
11 8
12
11 12
6
7
7
9
10
DASH
AREA
20 19
DASH
16
ASSY
17
18
13
14
15
MOUNTED ON
FLYWHEEL
387-425
MOUNTED ON
HOUSING
GOVERNOR
40.
Make adjustments to linkages. See Adjustment.
41.
Install cover (4) on top of dash assembly (5) with four
4
capscrews (1), new lockwashers (2) and washers (3).
1,2,3
5
42.
Connect battery cables (WP 0101 00).
387-424
0058 00-10
|
|
Privacy Statement - Press Release - Copyright Information. - Contact Us |
