 |
|||
|
|
|||
|
|
|||
| ||||||||||
|
|
 TM 5-2410-237-23
GOVERNOR CONTROLS AND LINKAGE MAINTENANCE - CONTINUED
0058 00
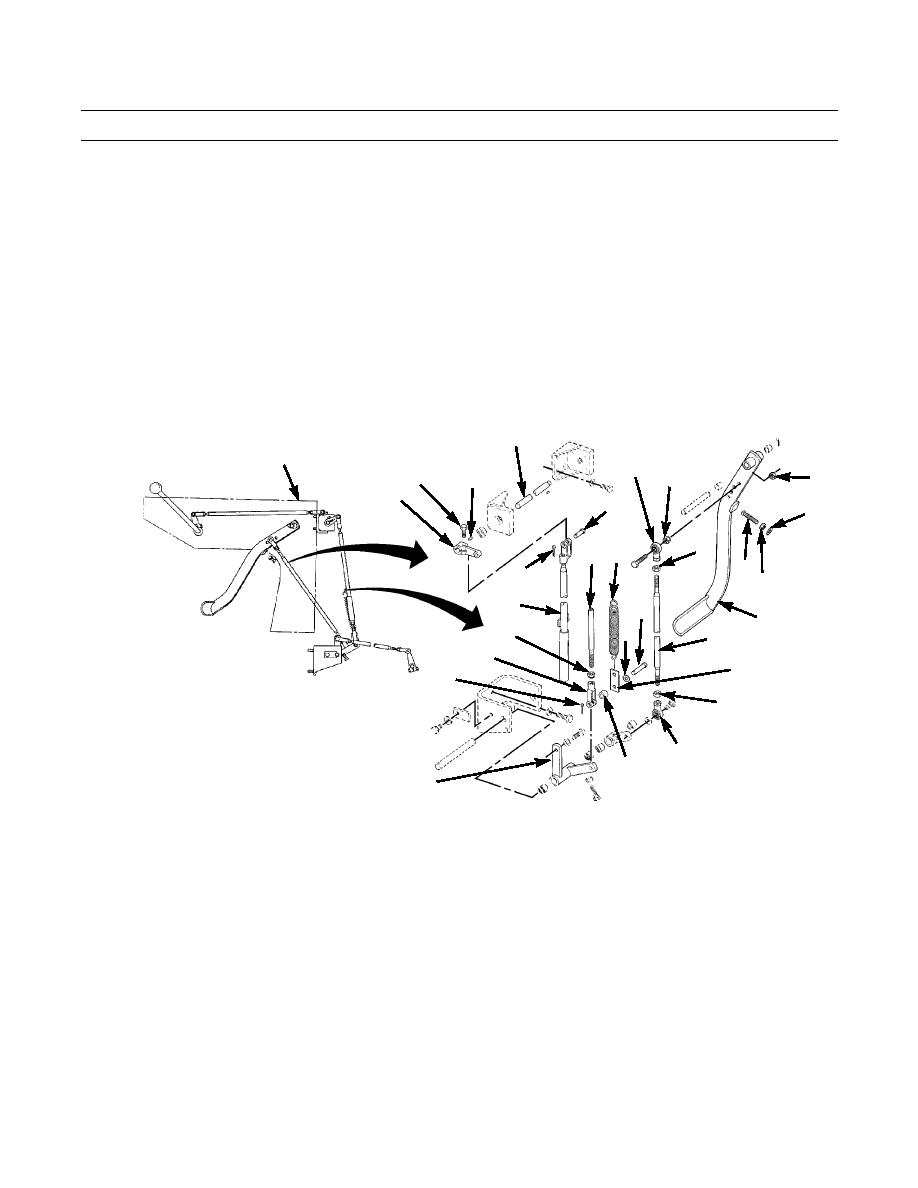
INSTALLATION - CONTINUED
22.
Install jam nut (42) and rod end (41) on rod (40) and insert rod (40) in rod (30). Adjust rod length until distance between
center line of holes in rod ends is 23.50 in. (597 mm). See Adjustment, step 6. Tighten jam nut against rod end.
23.
Install pin (29), washer (37), strip (36), spacer (38) and rod end (41) on bellcrank (39) and install new cotter pin (28) in
pin.
24.
Install key (33) and lever (31) on shaft (34) and secure lever (31) with capscrew (32).
25.
Install upper end of rod (30) on lever (31) and secure with pin (29) and new cotter pin (28).
26.
Install spring (35) on strip (36) and rod (30).
27.
Install washer (26), nut (27) and capscrew (25) onto lower part of dash assembly (5) finger tight.
28.
Install two jam nuts (55) and rod ends (56) on rod (24). Adjust rod assembly to length of 24.01 in. (610 mm). See
Adjustment, step 9. Tighten jam nuts against rod ends to secure.
34
5
56
21
32
33
21
31
29
26
DASH
55
AREA
40 35
25
28
DASH
27
ASSY
30
29
23
42
37
24
MOUNTED ON
41
FLYWHEEL
36
28
HOUSING
MOUNTED ON
GOVERNOR
55
56
38
39
387-426
0058 00-8
|
|
Privacy Statement - Press Release - Copyright Information. - Contact Us |
