 |
|||
|
|
|||
|
|
|||
| ||||||||||
|
|
 TM 5-2410-237-23
CRANKSHAFT FRONT SEAL AND WEAR SLEEVE REPLACEMENT - CONTINUED
0026 00
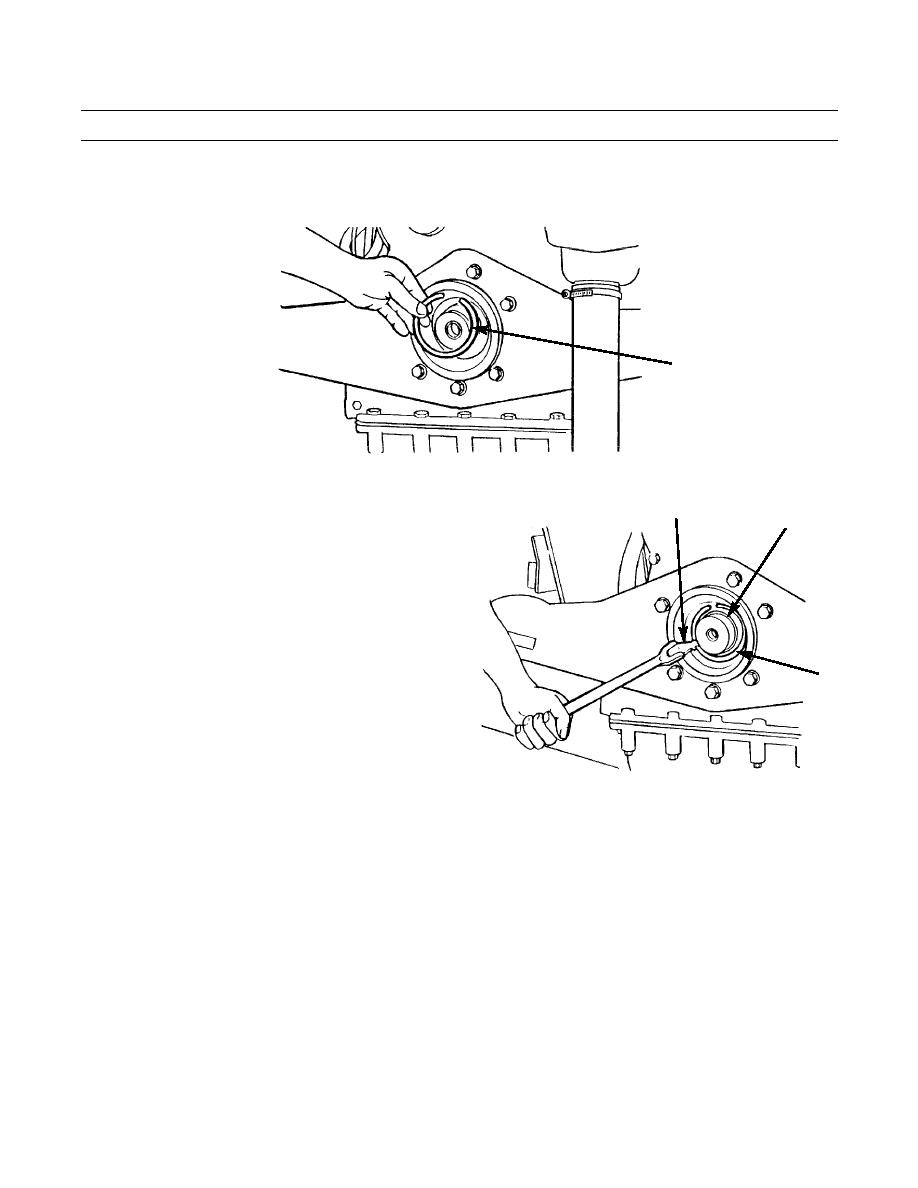
REMOVAL - CONTINUED
3.
Insert distorter ring (2) into seal bore.
2
387-222
4.
Place wear sleeve distorter (3) between distorter ring
3
(2) and wear sleeve (4). Turn until edge of distorter
4
makes a crease in wear sleeve. Make additional
creases in wear sleeve every 90 degrees, then every 45
degrees, until wear sleeve is loose. Remove distorter
ring tool and wear sleeve. Discard wear sleeve.
2
387-223
INSTALLATION
NOTE
Wear sleeve and crankshaft front seal comes as a set.
Wear sleeve and crankshaft front seal must be installed together.
1.
Apply clean lubricating oil on seal lip of new seal (1) and on outside diameter of new wear sleeve (4).
2.
Install seal (1) on wear sleeve (4) as shown, with lip of seal towards side of wear sleeve that has chamfer on inside diam-
eter.
3.
Clean inside diameter of wear sleeve (4) and tapered surface of crankshaft (5) with quick cure primer coating.
4.
Apply sealing compound to surfaces on inside diameter of wear sleeve (4) and on crankshaft (5).
5.
Position wear sleeve (4) and seal (1) on crankshaft, with lip of seal towards engine.
0026 00-2
|
|
Privacy Statement - Press Release - Copyright Information. - Contact Us |
