 |
|||
|
|
|||
|
Page Title:
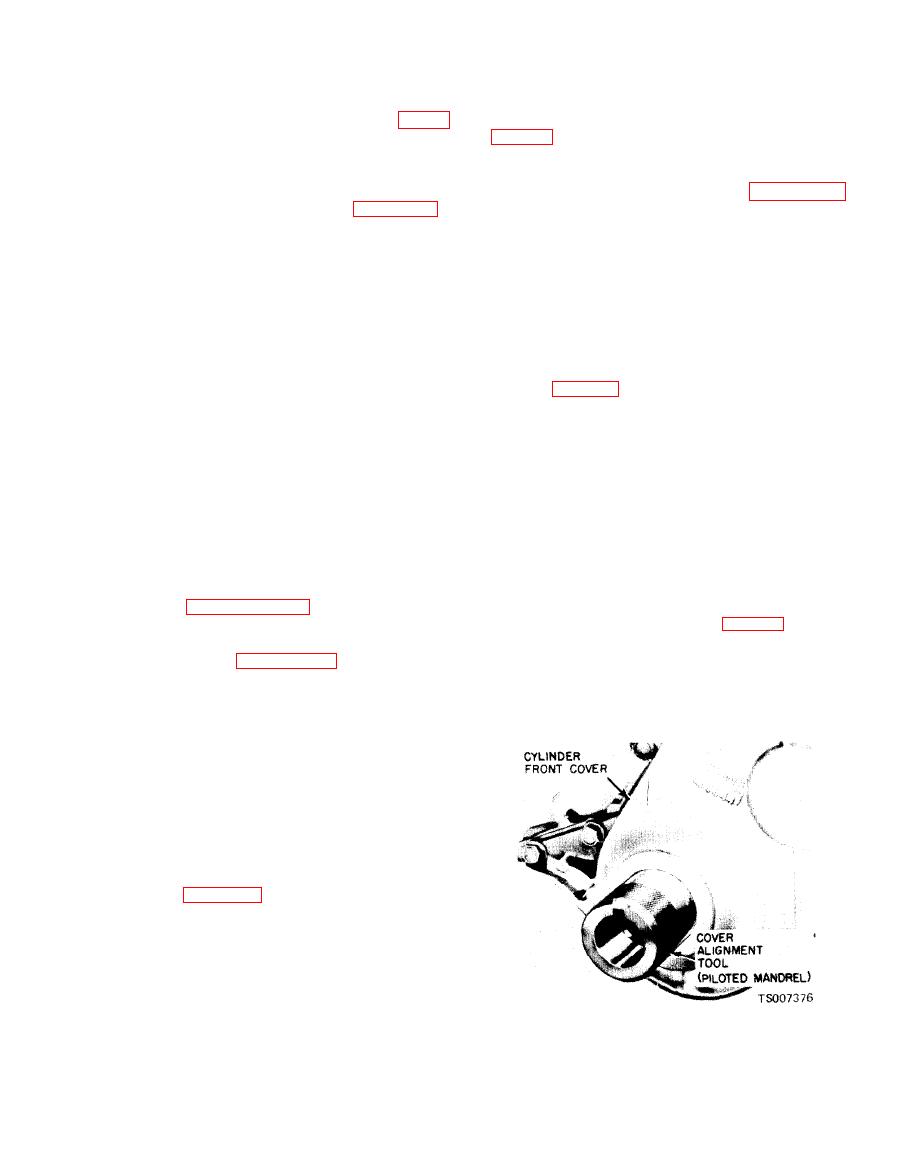
Figure 6-47. Aligning Cylinder Front Cover. |
|
||
| ||||||||||
|
|
 TM
10-3930-633-34
replacement, the engine must be removed from
(4) Remove the cam screw and washer from
the vehicle and installed on a work stand (fig. 6-
the end of the crankshaft and remove the damper
3).
a. Removal.
(5) Remove the oil level dipstick. Remove
the oil pan and related parts by following the
(1) Remove the starter.
procedure under Oil Pan Removal, paragraph 6-
( 2 ) Remove the transmission from the
43, Remove the oil pump screen and inlet tube
vehicle, following the procedures in Chapter 2,
assembly.
Section IV.
(6) Remove the cylinder front cover and
(3) Remove the flywheel attaching bolts and
discard the gasket. It is good practice to replace
remove the flywheel and engine rear cover plate.
the oil seal each time the cylinder front cover is
(4) Use an awl to punch two holes in the
removed.
crankshaft rear oil seal. Punch the holes on op-
(7) Drive out the old seal with a pin punch.
posite sides of the crankshaft and just above the
Clean out the recess in the cover.
bearing cap to cylinder block split line. Install a
b. Installation.
sheet metal screw in each hole. Use two large
screwdrivers or small pry bars and pry against
(1) Coat a new seal with grease and install
the seal (fig. 6-40). Drive the seal in until it is
both screws at the same time to remove the
fully seated in the recess. After installation, check
crankshaft rear oil seal. It may be necessary to
to be sure the seal is properly positioned in the
place small blocks of wood against the cylinder
cover and the spring is properly positioned in the
block to provide a fulcrum point for the pry bars.
seal.
Use caution throughout this procedure to avoid
scratching or otherwise damaging the crankshaft
(2) Clean the cylinder front cover and the
gasket surfaces of the cylinder block. Coat the
oil seal surface.
gasket surface of the block and cover with oil-
(5) Clean the oil seal recess in the cylinder
resistant sealer. Position a new gasket on the
block and main bearing cap.
block.
b. Installation.
(3) Insert the small diameter end of the cover
(1) Clean, inspect and polish the rear oil seal
alignment tool in the bore of the cover. Position
rubbing surface on the crankshaft, following the
the cover and pilot assembly over the end of the
procedures in paragraph 6-30. Coat a new oil seal
crankshaft and against the block (fig. 6-47), being
and the crankshaft with a light film of engine oil.
careful to align the cover flush with the cylinder
Start the seal in the recess and install it with the
block oil pan gasket surface. Install the alternator
tool as shown in figure 6-40. Keep the tool
adjusting arm and cylinder front cover bolts.
straight with the centerline of the crankshaft and
Torque all the bolts to specifications.
install the seal until the tool contacts the cylinder
block surface. Remove the tool and inspect the
seal to be sure it was not damaged during in-
stallation.
(2) Install the engine rear cover plate.
Position the flywheel on the crankshaft flange.
Coat the threads of the flywheel attaching bolts
with oil-resistant sealer and install the bolts.
Torque the bolts in sequence across from each
other to specifications.
(3) Install the transmission, following the
procedure in Chapter 2, Section IV. Do not adjust
the transmission linkage.
a. Removal.
(1) Drain the cooling system and crankcase.
(2) Remove the radiator.
(3) Remove the alternator adjusting arm
bolt, loosen the drive belt and swing the adjusting
arm out of the way. Remove the fan, drive belts
and pulley. It may be necessary to remove the air
compressor belt and/or steering pump belt.
|
|
Privacy Statement - Press Release - Copyright Information. - Contact Us |
