 |
|||
|
|
|||
|
Page Title:
Air Cleaner Service |
|
||
| ||||||||||
|
|
 TM 10-3930-633-12
(3) Install filter element making sure wing
nut is tight.
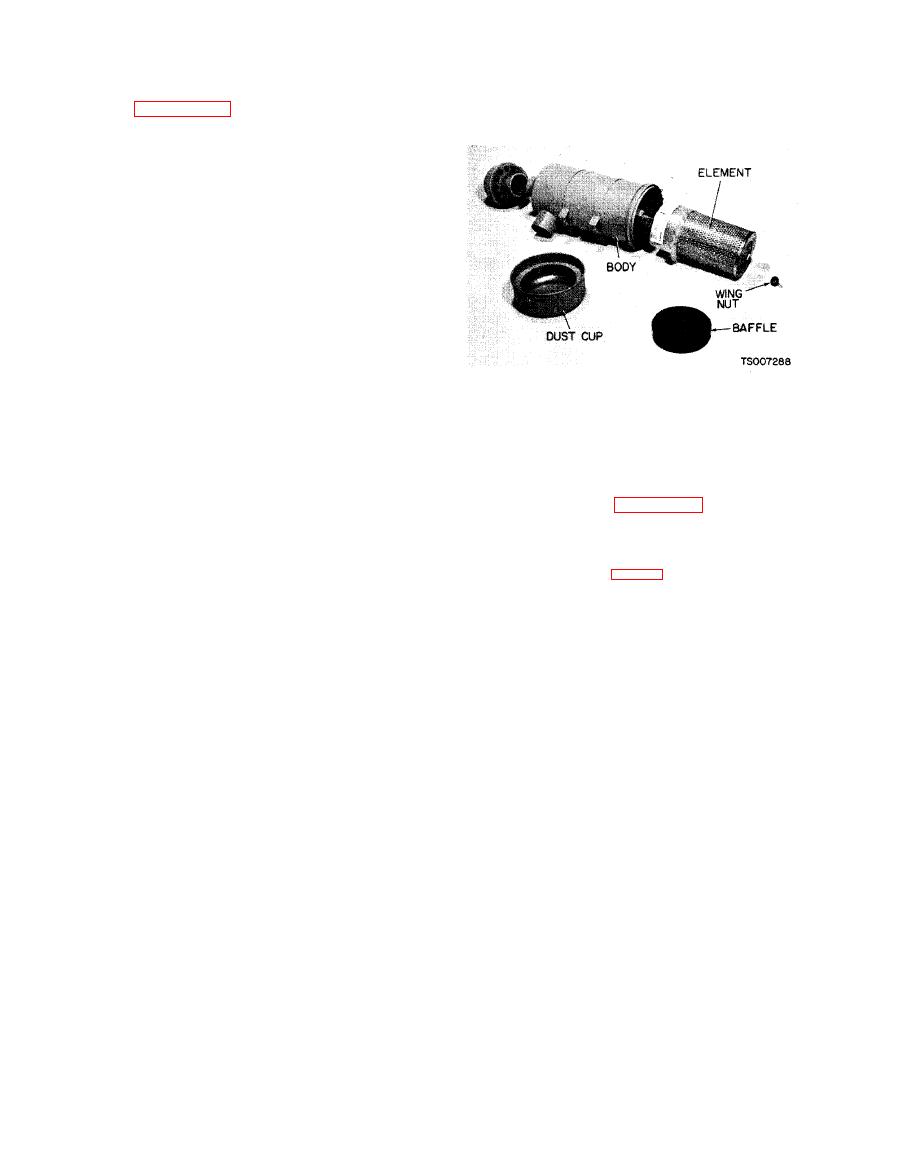
Refer to figure 4-27, showing parts of the air
(4) Replace baffle.
cleaner assembly, and service the air cleaner as
follows:
a. Dust Cup. Empty and clean dust cup every
8 operating hours or more often under extremely
dusty conditions. Dust should not be allowed to
build up in cup. Remove foreign material such as
leaves from around filter and tighten wing nut if
necessary. Replace baffle and securely replace cup
on air cleaner body.
b. Filter Element Removal. Proper servicing
means cleaning unit thoroughly and maintaining
airtight connections between the air cleaner and
intake manifold so that all air entering the engine
is filtered. Remove the filter element for cleaning
as follows:
(1) Remove cover.
(2) Lift out baffle.
If parts of the air cleaner body or system duct-
(3) Empty dust from cup.
work become damaged or deteriorated to the
(4) Remove filter element. Clean thoroughly
point that they will not form an airtight seal
by using one of the following methods.
against entry of unfiltered air, these parts must
c. Cleaning a Dusty Element. Use compressed,
be replaced. Refer to figure 4-28 and remove the
dry filtered air directing this up and down pleats
parts to be replaced as shown in the illustration.
on the clean side of the element.
When installing new parts, maintain the parts
CAUTION
relationship depicted in the illustration.
Air pressure must not exceed 100 PSI.
KEY to fig. 4-28:
Maintain a reasonable distance between
1. Air cleaner assembly
nozzle and element. Direct air through
2. Clamp
element (opposite to direction of arrows
3. cup
cast on end of element). Do not damage
4. Baffle
5. Wing nut
fins or se sling surfaces or rupture
6. Washer
element nor allow dust to deposit on
7. Element and gasket
clean air side.
8. Screw
d. Cleaning an Oily or Sooty Element. For best
9. Nut
results, use small amount of cool tap water with
10. Washer
11. Lockwasher
non-sudsing household detergent then add to
12. Clamp
w a r m (70 0 - 100 F, 21 C - 38 C) water.
13, Clamp
The warmer the solution the better the cleaning.
14. Hose
S o a k for approximately 15 minutes. Rinse
15. Nut
16. Screw
element thoroughly with clean water from hose
17. Clamp
(maximum pressure 40 PSI). Air dry completely
18. Elbow
before installing.
19. Clamp
e. Element Installation. After air cleaner has
20. Tube
21. Wing nut
dried, (a fan or air draft may be used, but do not
22. Washer
heat element to hasten drying) inspect element for
23. Adapter
damage by placing a bright light inside element.
24. Clamp
Thin spots, pin holes or the slightest rupture will
25. Adapter
render the element unfit for further use.
26. Restriction indicator
27. Elbow
(1) Clean cover, baffle and inside of filter
28. Nipple
body with a clean lint free cloth.
29. Coupling
(2) Check air cleaner hose connections for an
30. Adapter
airtight fit.
31. Hose
|
|
Privacy Statement - Press Release - Copyright Information. - Contact Us |
