 |
|||
|
|
|||
|
|
|||
| ||||||||||
|
|
 TM 10-3930-633-12
working area to prevent the build-up of
potentially explosive vapors, and use
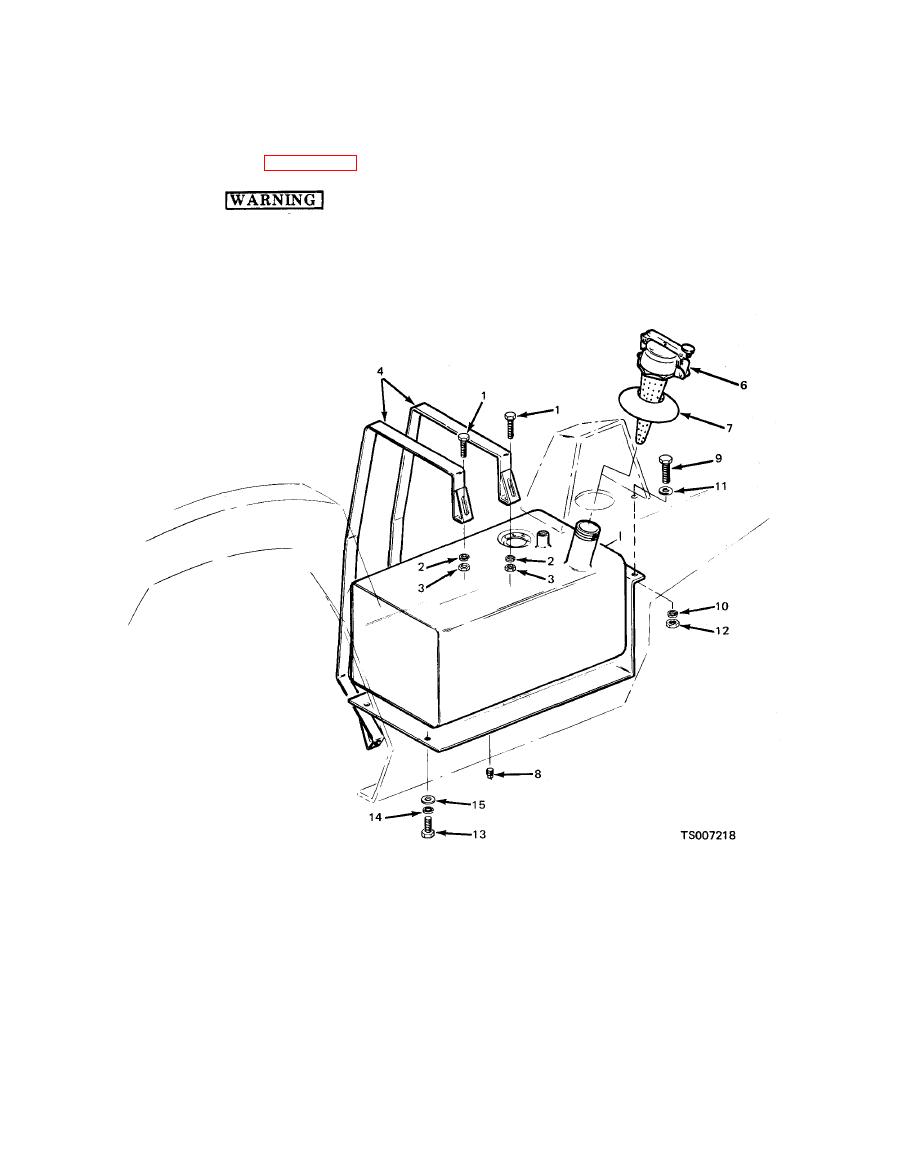
a. General. The fuel tank is mounted at the
extreme care when handling metal tools
right side of the vehicle, and is secured to the
to avoid the possibility of sparks. Use a
frame by means of two metal straps.
safety type fuel container to catch the
gasoline as it is drained from the tank.
as follows:
(1) Remove filler cap and strainer (6) by
unscrewing from fuel tank filler neck. Remove
Do not smoke or permit an open flame in
filler neck seal (7).
the vicinity of the vehicle while draining
the fuel tank. Provide ventilation to the
13. Screw
9. Screw
5. Fuel tank
1. Screw
14. Lockwasher
10. Lockwasher
6. Filler cap
2. Lockwasher
15. Washer
11. Washer
7. Seal
3. Nut
16. Strainer
12. Nut
8. Drain plug
4. Strap
(4) Remove machine screws and lift out
(2) Remove plug (8) and allow tank to drain
sending unit from top of tank.
completely. Flush tank with hot water or steam.
(5) Remove screws (1), securing straps (4),
(3) Unscrew and remove fuel shut-off valve
and remove fuel tank (5) from frame.
from the standpipe on top of the tank.
|
|
Privacy Statement - Press Release - Copyright Information. - Contact Us |
