 |
|||
|
|
|||
|
Page Title:
Figure 4-9. Engine manifolds, exploded view. |
|
||
| ||||||||||
|
|
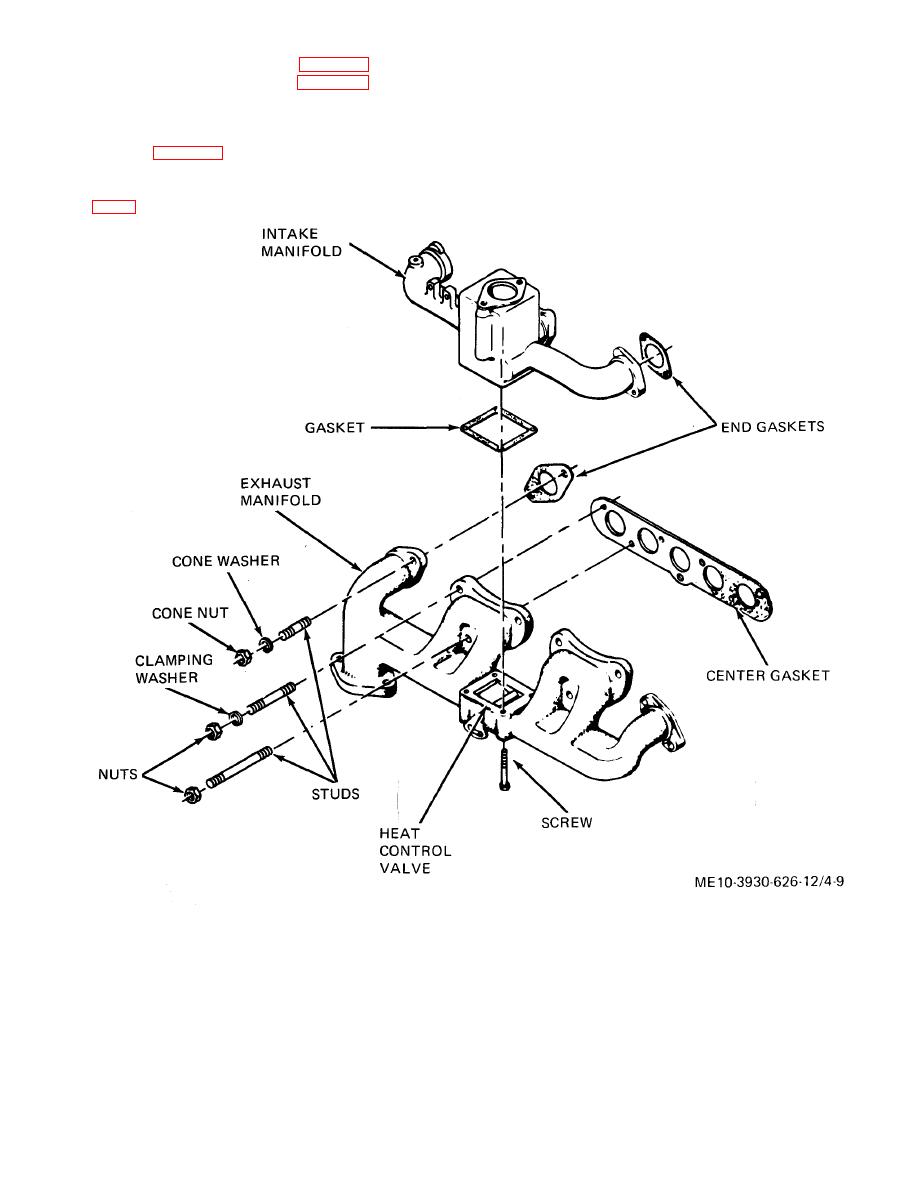 ( 8 ) Lift manifolds off studs. Remove and
(3) Remove air cleaner (para 4-35).
discard center and end gaskets.
(4) Remove carburetor (para 4-36 b).
(9) Remove screws attaching intake manifold
(5) Slide governor off carburetor mounting
to exhaust manifold. Discard gasket.
studs.
(6) D i s c o n n e c t exhaust pipe from exhaust
manifold (para 4-44 b (2).
manifold screws. Constant heating and cooling may have
frozen screws in place. Use a good grade penetrating oil and
( 7 ) Remove assembled intake and exhaust
allow to stand several minutes before attempting removal.
manifolds by removing attaching nuts and washers
flat within 0.0008 inch. Replace manifold if
b. Cleaning. Soak manifold in SD long enough
warpage is bad enough to be possible source of
to soften crusted deposits. Clean machined surface
leaks. Check for cracks or distortion. Check heat
with flat bladed scraper. Clean bores of passages
control valve for free operation.
with scraper and wire brush, Dry with clean cloths.
c. Inspection. Inspect for warpage at machined
surfaces with straight edge. The surfaces should be
|
|
Privacy Statement - Press Release - Copyright Information. - Contact Us |
